
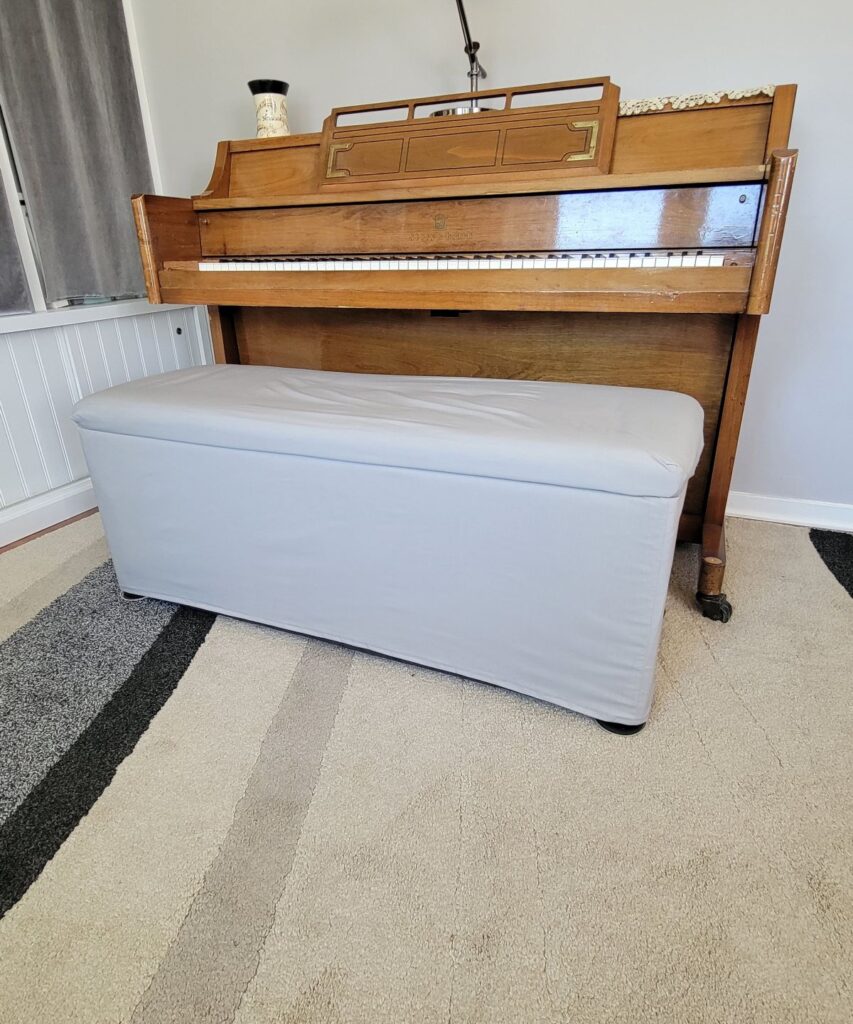
How to Sew a DIY Storage Bench Cover
Have you ever wanted to sew a DIY storage bench cover? What about a pretty washable slipcover with a ruffle? If so, you have come to the right place. I have been wanting to make this cover for a long time. When Fabric Wholesale Direct offered to send me the fabric to make it, I jumped at the chance!
This post is part of a DIY/ Craft Blog Hop hosted by Chloe at Celebrate and Decorate. If you’re visiting us in order and are coming from Design Morsels, I’m so glad you’ve stopped by!. At the end of this post you will find links to a bunch of other blogger’s crafty ideas, too.
- Ruffled Piano Bench Cover
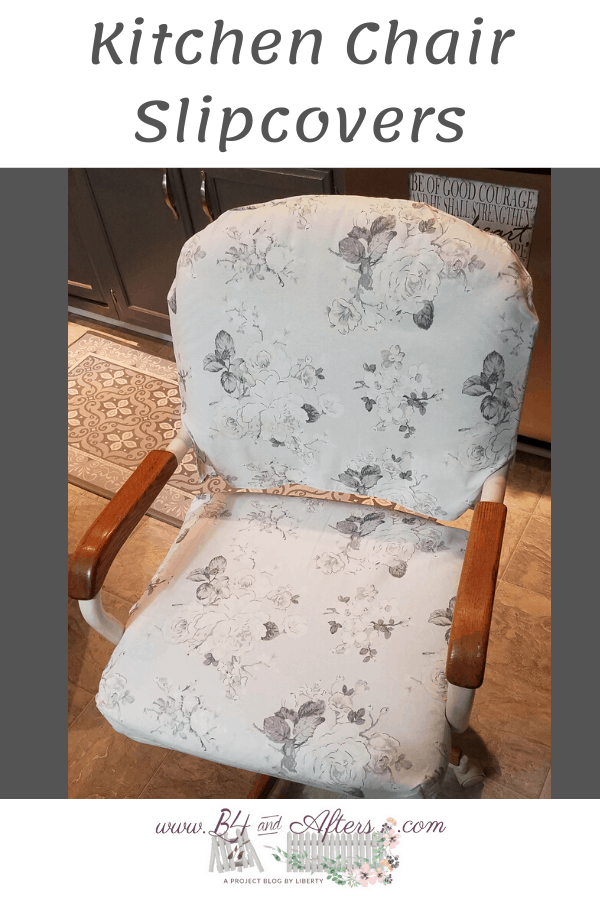
- Removable Kitchen Chair Slipcovers
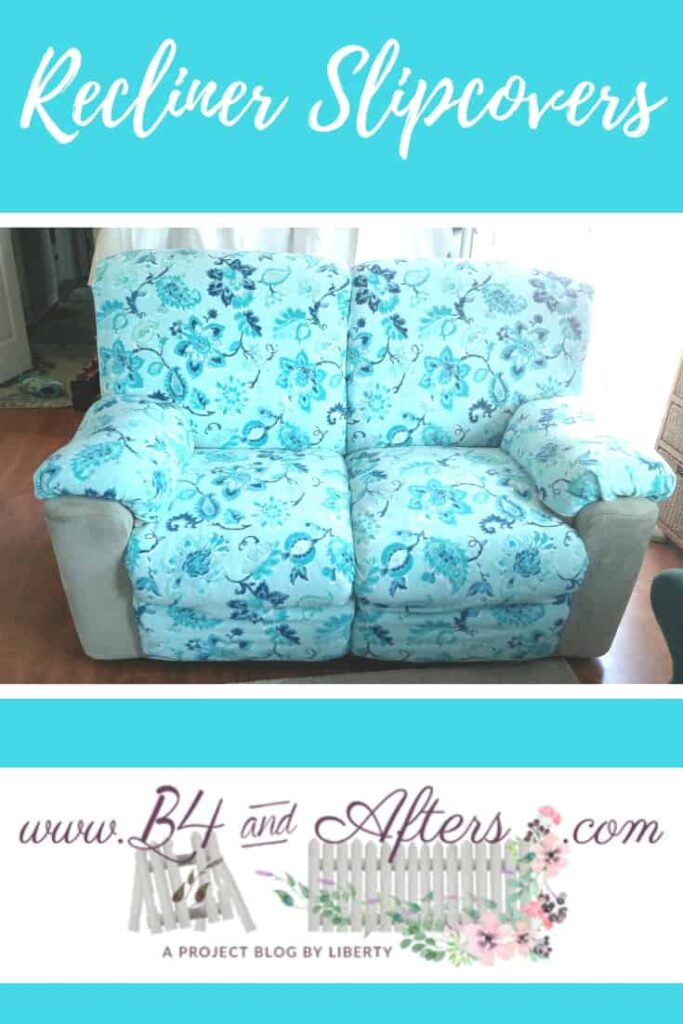
- Recliner Slipcovers
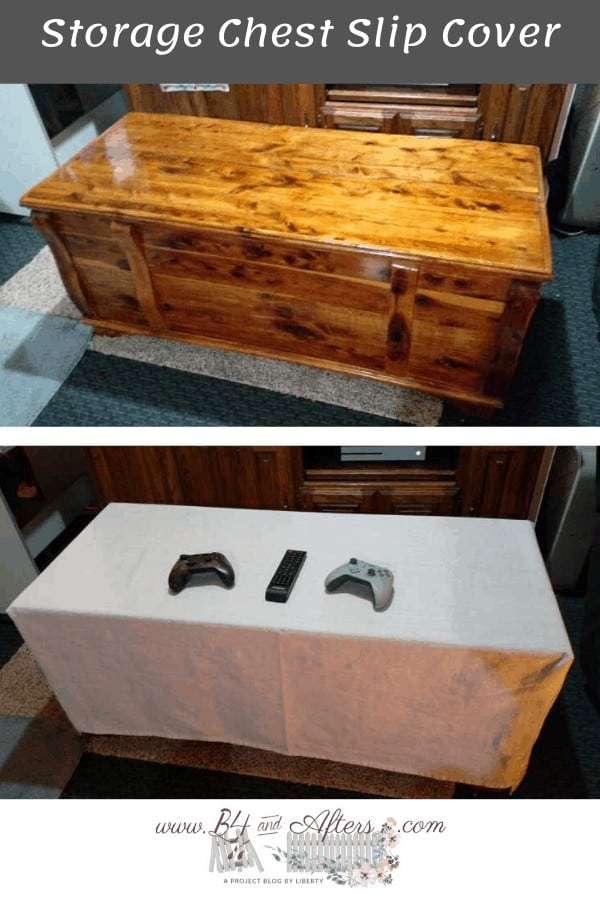
- Storage Chest Slipcover
Supplies Needed
To make this cover, you will need just a few supplies.
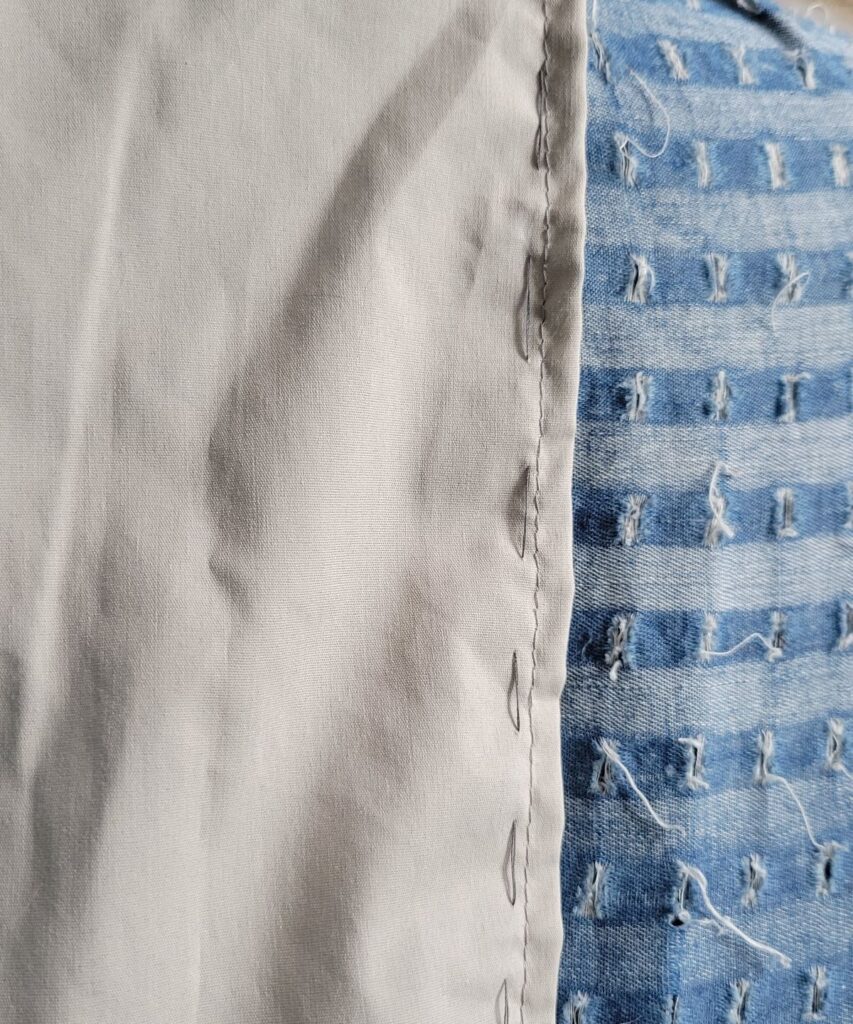
- 5 yards slightly stretchy fabric
- Coordinating thread
- Fabric Scissors
- Washable fabric pen
- Sewing machine
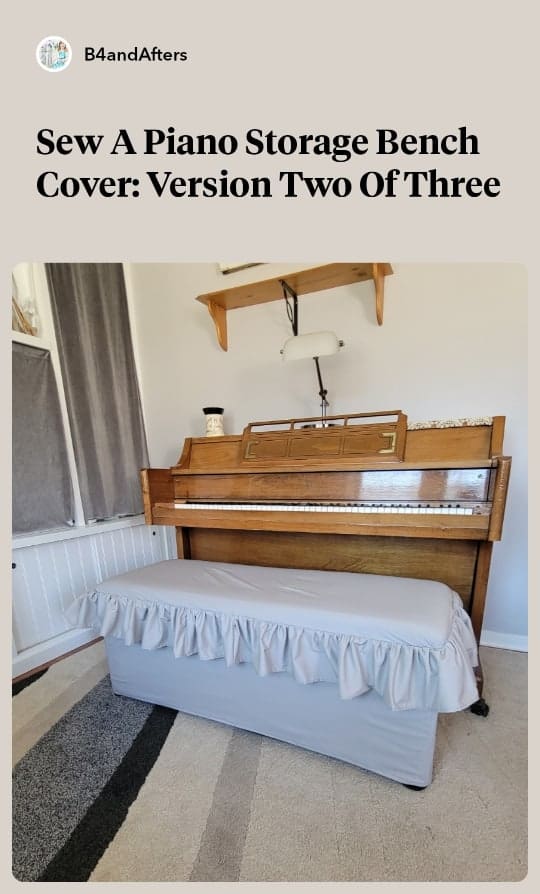
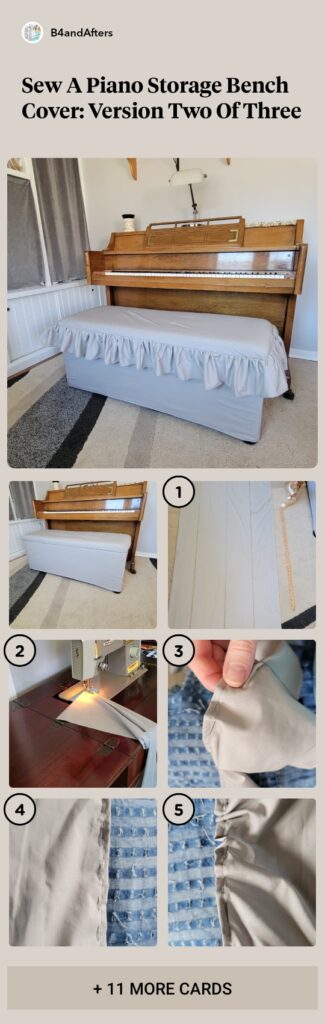
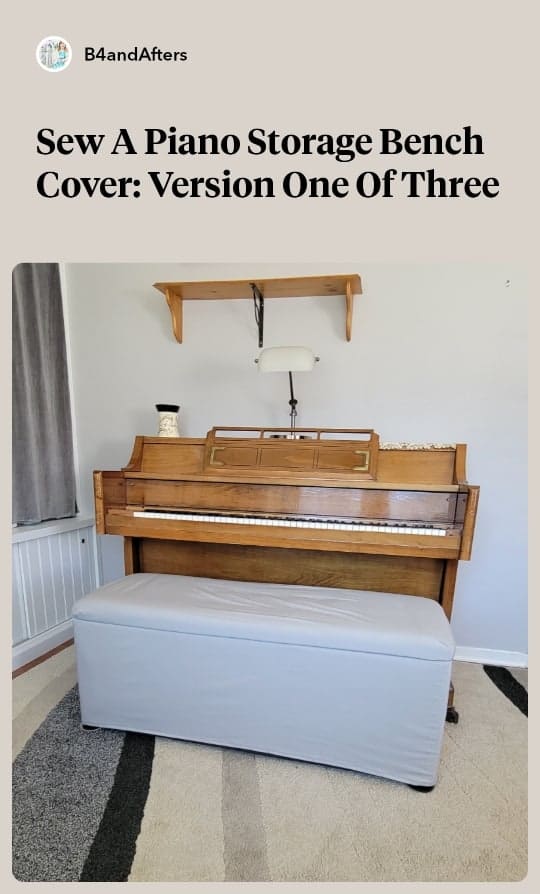
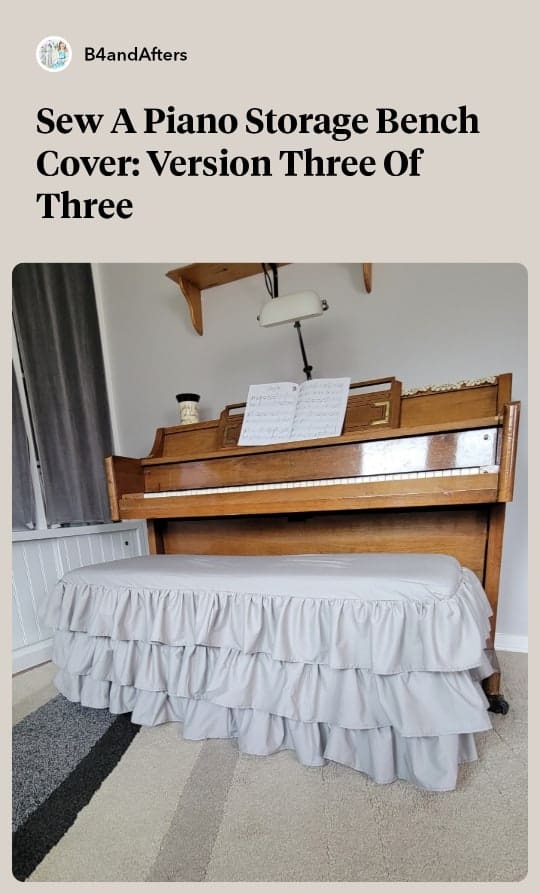
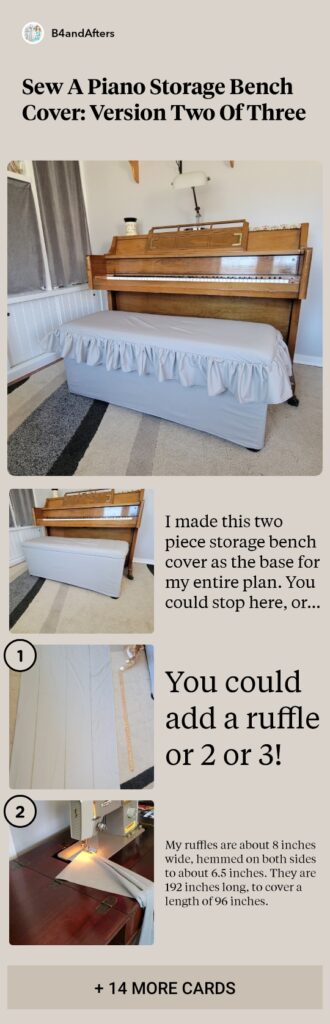
I’m about to show you Version 2 of 3 ways that you could make this diy storage bench cover. I have already shared version one. Version 3 is my favorite!
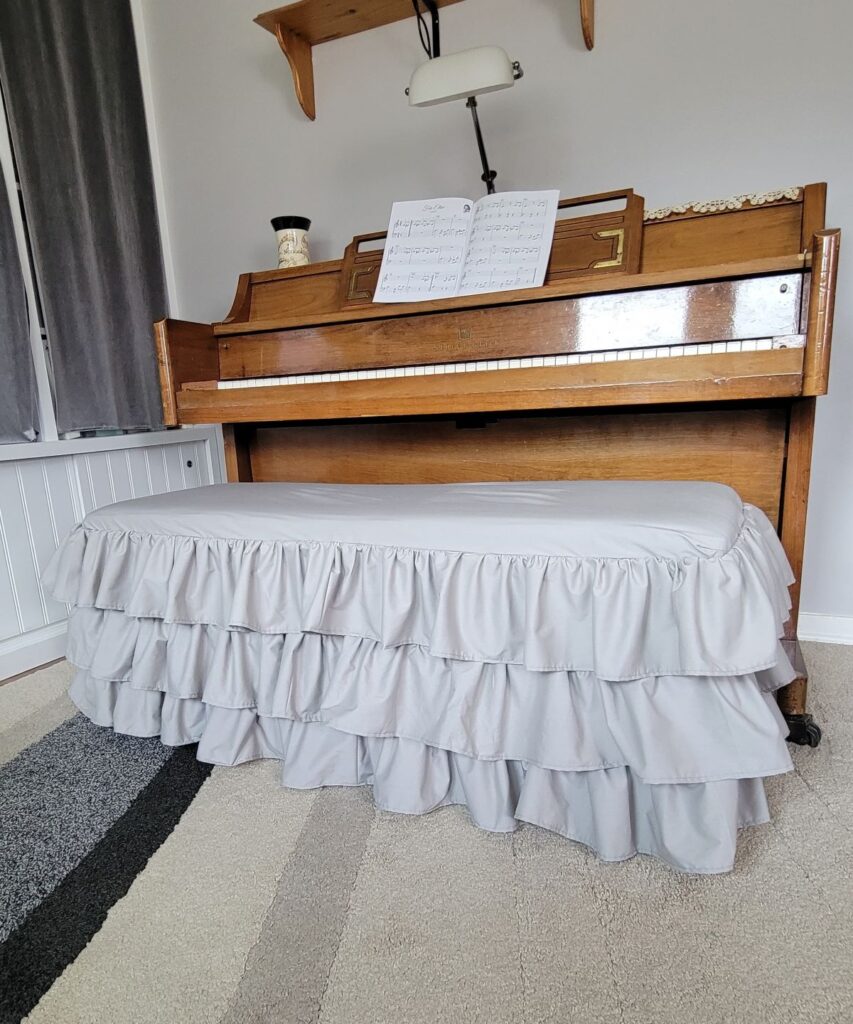
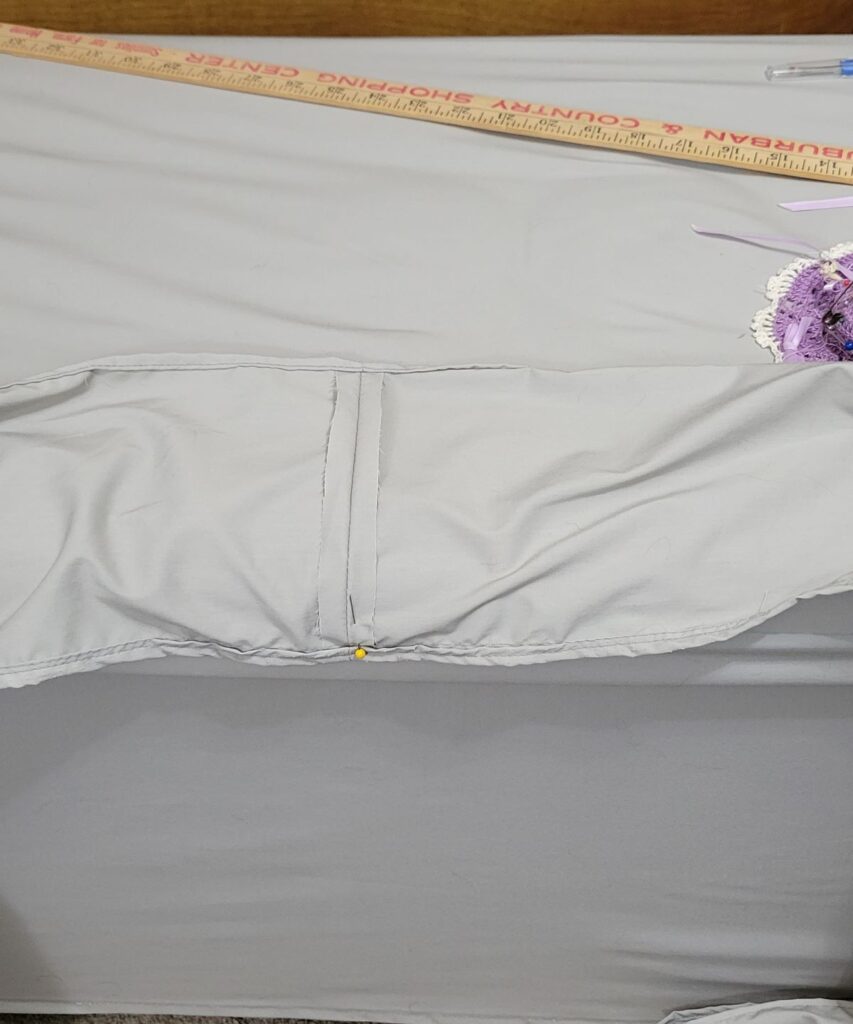
I made this two piece storage bench cover as the base for my entire plan. You could stop here, or…
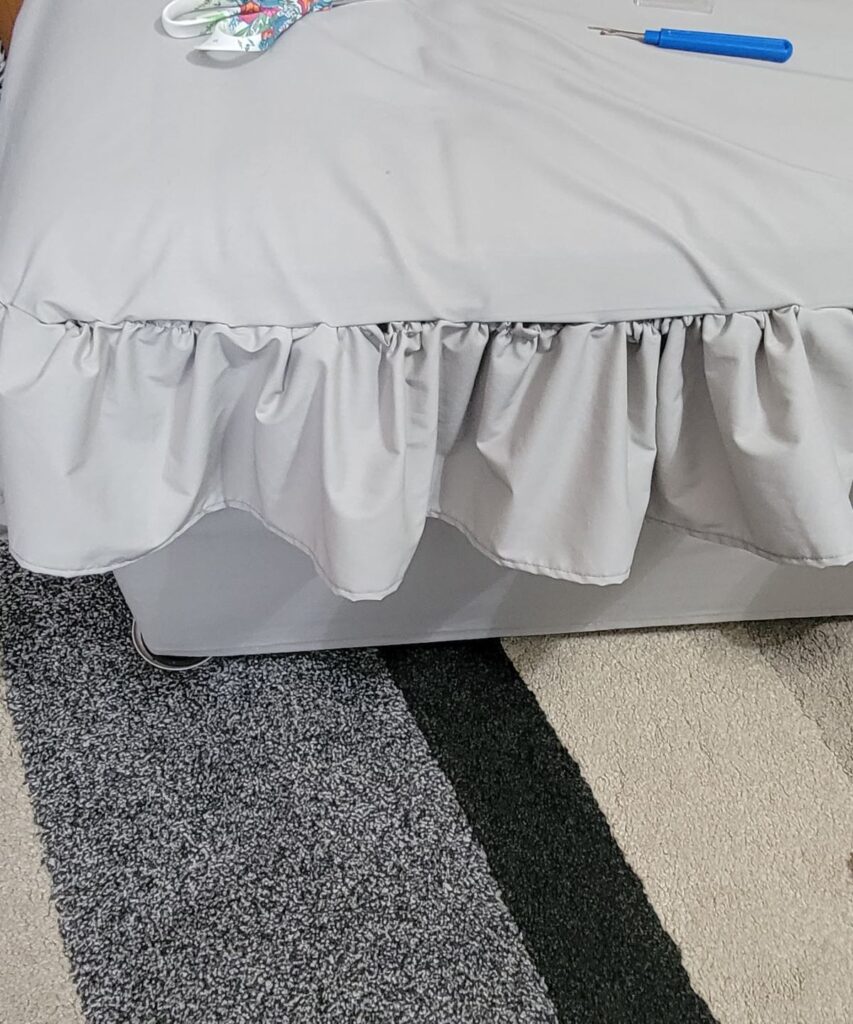
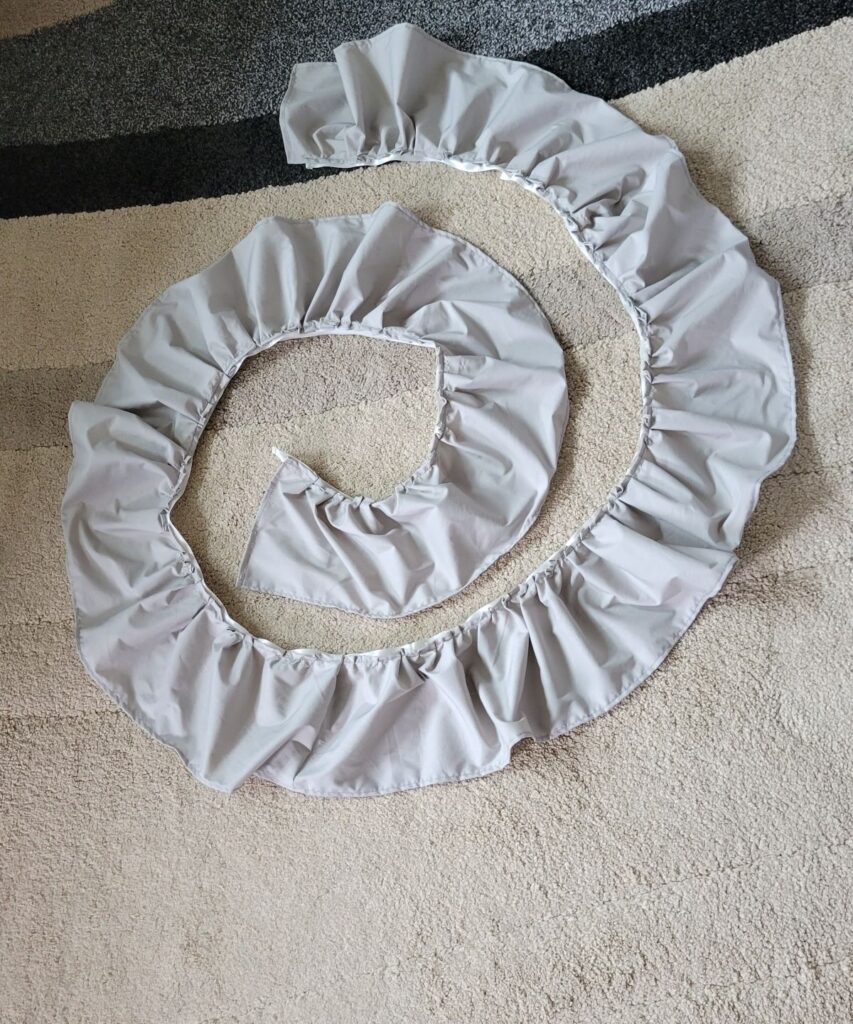
You could add a ruffle or 2 or 3! My ruffles are about 8 inches wide, hemmed on both sides to about 6.5 inches. They are 192 inches long, to cover a length of 96 inches.
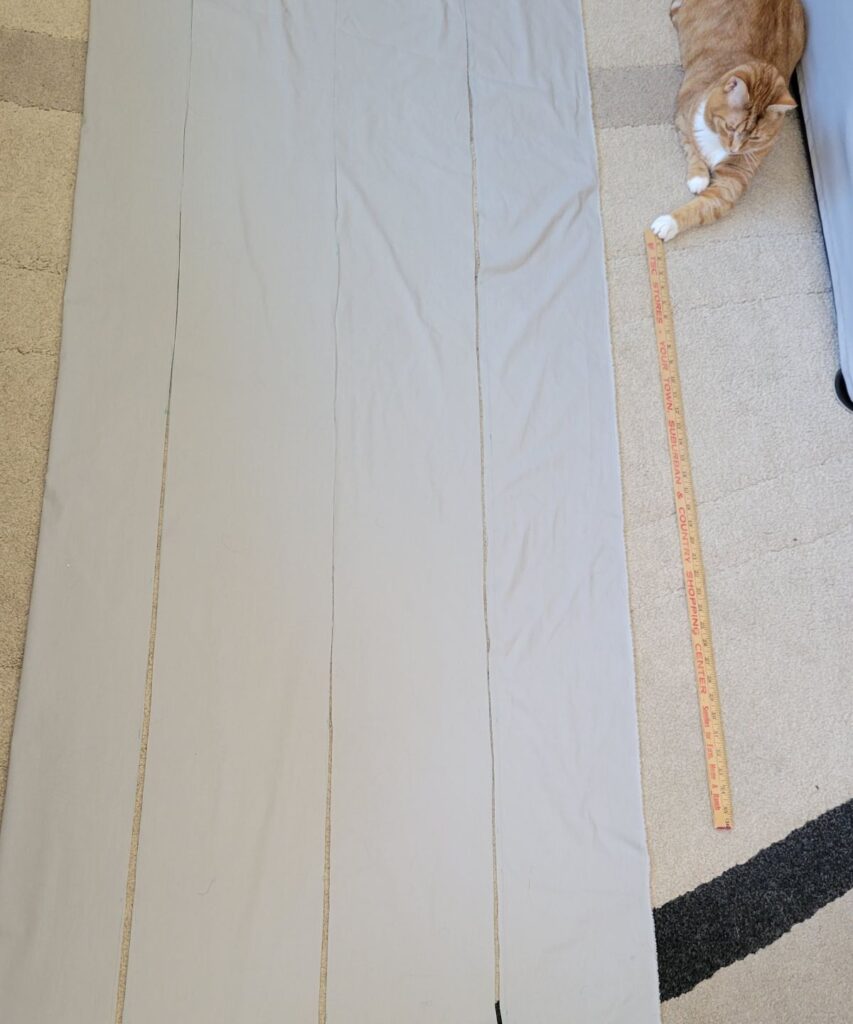
So you need about twice the length to gather for ruffles. If your machine will not sew a long stitch like mine wouldn’t, then hand baste where you want to gather it. To hand baste, sew long stitches. Then you can pull the fabric along the thread like a curtain.
I do recommend that you watch the video to see more about how to baste, if you’re not sure.
I used a washable fabric marker to mark along the fabric where I wanted to place the ruffle, using a yard stick to help make it straight. Then I pinned the center of the ruffle to the center of the bench lid.
I began pinning the ruffle to the top slipcover piece.
It was a bit difficult and I thought, “there has to be a better way.”
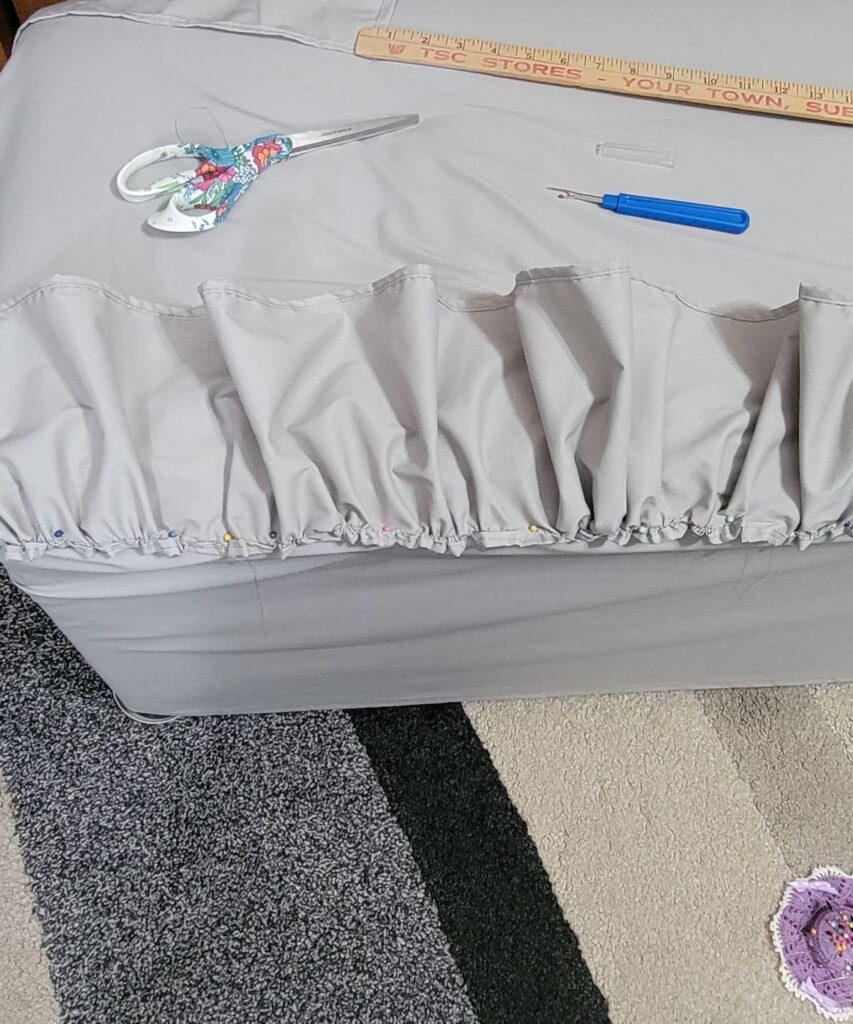
It looks nice but it took me a long time to do this because of working upside down to place the pins in the right direction!
I decided to sew the ruffle to a ribbon. Then I could do the gathering separately instead of while I was trying to attach it to the bench. That idea worked but it involved the extra step
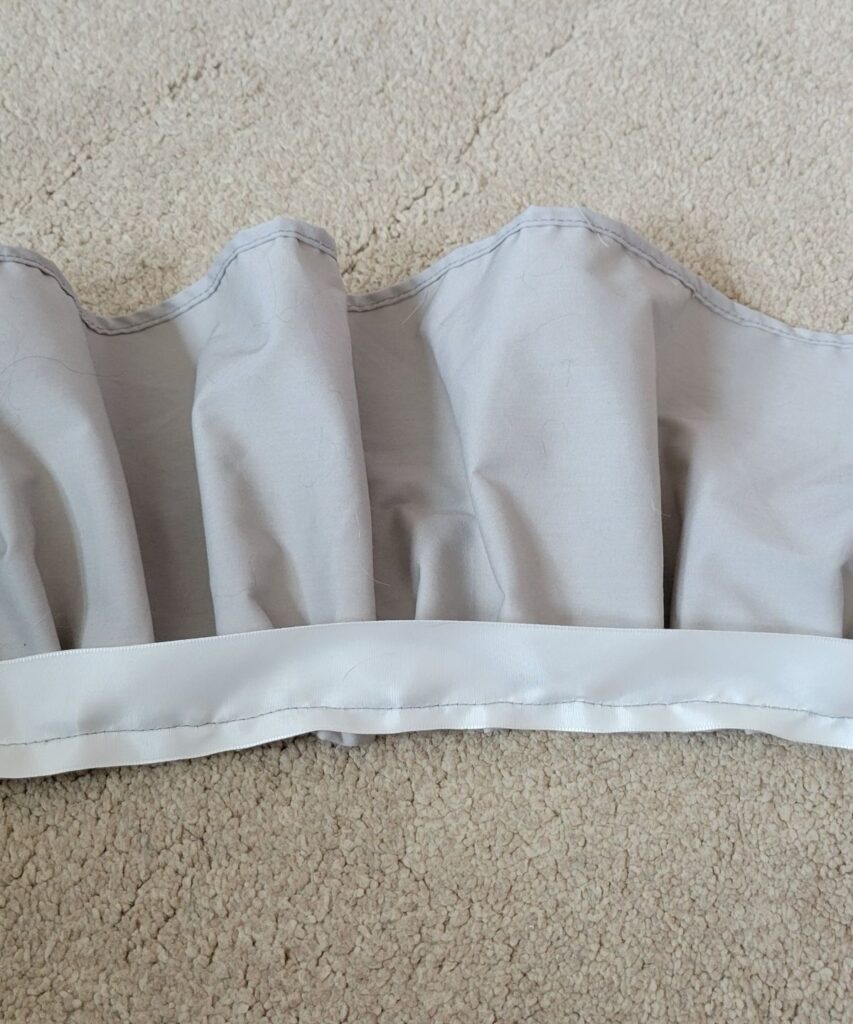
of sewing the ruffle to the ribbon.
This did make it a lot easier to work with when it was time to attach the ruffle to the bench.
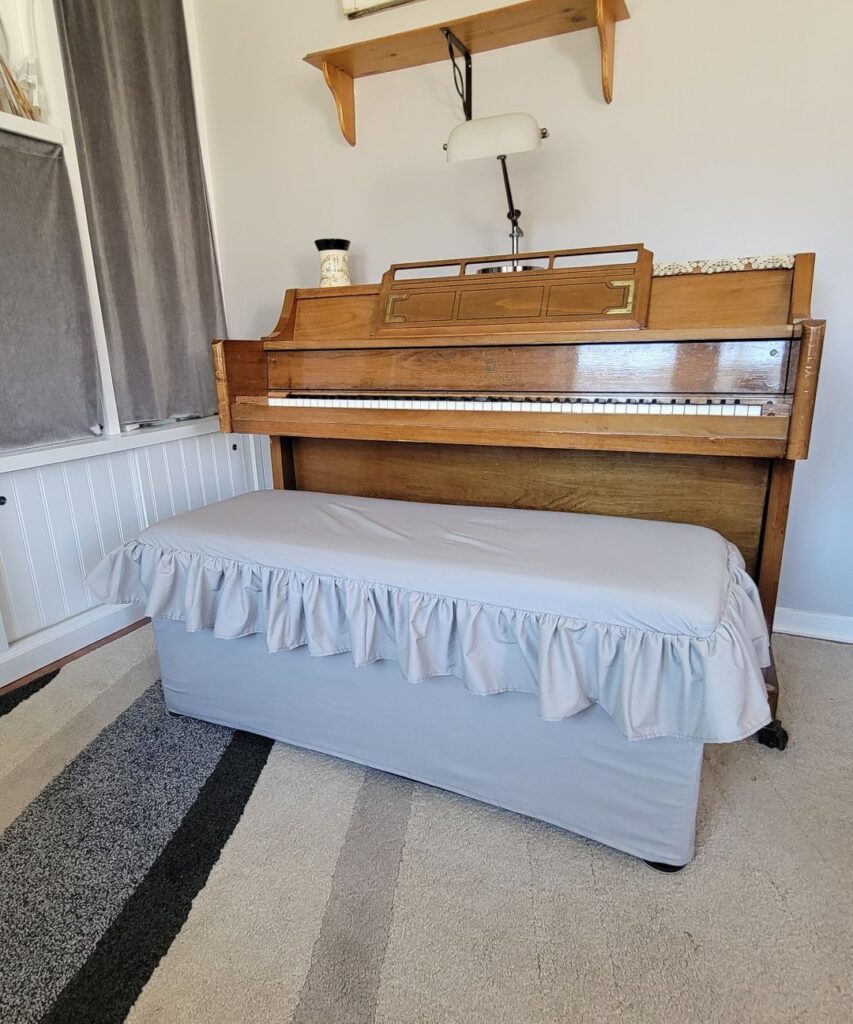
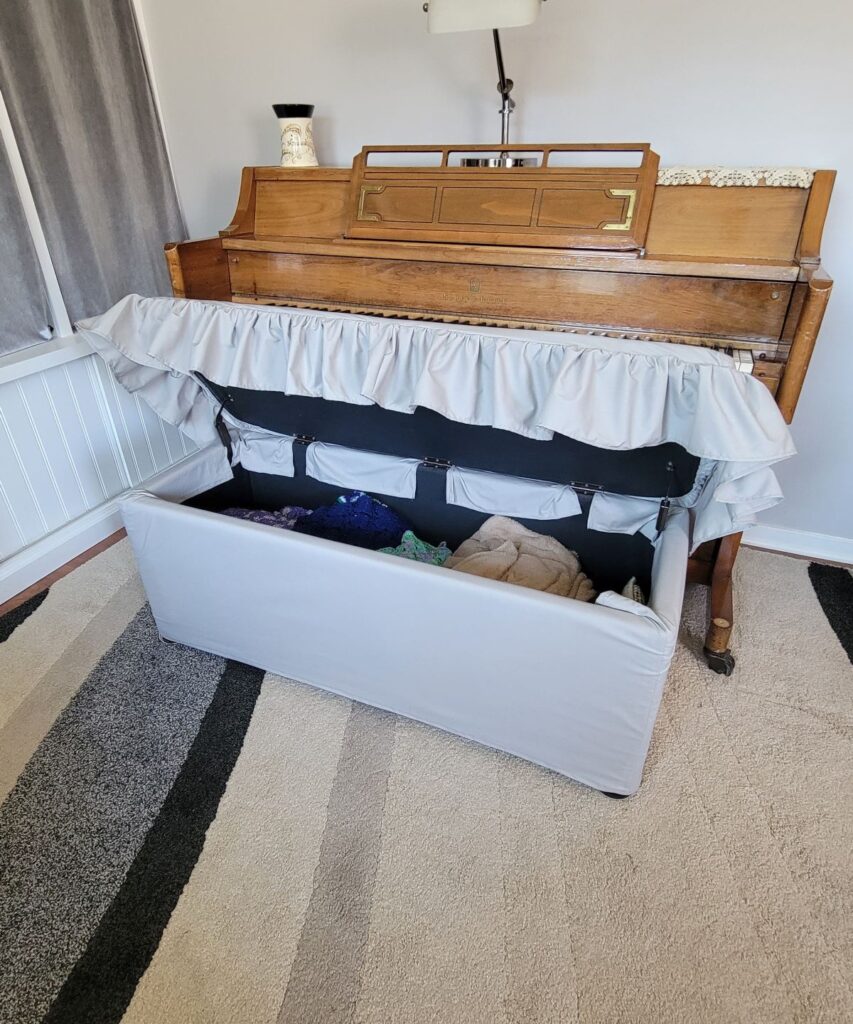
How do you like the ruffle? It hides the opening of the storage bench!
It looks so nice, and I really could stop here, but I wanted to do a little more. Get ready to see Version 3!
You can also see the video of Version Two if you wish.
(If you like this project, please help me spread the word by sharing it on Pinterest or elsewhere!)
Okay, now it’s time for the rest of the projects! I hope you enjoy them all. Again, if you’re visiting in order, then Chloe at Celebrate and Decorate is next. Thank you so much for joining us today!
How to Make Fabric Covered Easter Eggs
DIY Storage Bench Cover – B4 And Afters
How to Make a Decorative Fabric-Covered Clay Pot
How to add Spring to a Vintage Truck
DIY Mossy Wreath for Easter or Spring

Liberty, sewing long strips if fabric for ruffles is tedious, but this turned out so cute. Loved that you improvised when needed. I’ll be checking out your other versions. Happy crafting.
This is so pretty. Great tutorial too!
Cindy
Liberty, you’re very talented with the sewing machine! Ruffles can be tricky. It was easy to follow along with your great tutorial. Sewing the ruffle to the ribbon was a great solution. I love how your bench turned out! It was fun crafting with you 🙂
So smart to use the ribbon to attach the ruffle! Happy to be hopping with you!
Liberty, I love the way ruffles look, but I must confess they are not my favorite to sew! Your storage bench turned out lovely, and it’s a great tutorial! Blessings, Cecilia @My Thrift Store Addiction
Liberty, this is one project that has been on my to do list forever! Thank you for the tutorial. The finished project is fab!
You have some serious creative sewing skills, Liberty! I love how your bench looks!
What a fun idea Liberty, and I love the color and how it turned out. Thanks for sharing and wonderful crafting with you friend.
Very cute, love the ruffle!
You are so handy with a sewing machine! My mother will tell you when she wanted to teach me to sew, all I could say was, “I want to go ride my bike”. I guess I missed out. This looks great, and I see you have all kinds of options. I can see that these could be great options for hiding toys I keep on hand for my granddaughters! I hope you have a lovely Easter!
I love to learn new ways of doing things and It’s brilliant to use the ribbon – even if it means an added step. Love how it turned out Liberty! I’m so curious to see versos 3 :)!
Liberty your piano bench cover looks tailored made. You did a fantastic job. Thanks for sharing the tutorial on how to make one. Your tutorial was very simple to follow.
That turned out so cute! I’ve never made anything with ruffles, but your tutorial is really good. This would be so cute for a foot stool I’ve been wanting to do something with but I always assumed ruffles were beyond my sewing ability. Great videos. Thanks for being in the hop and Happy Easter.