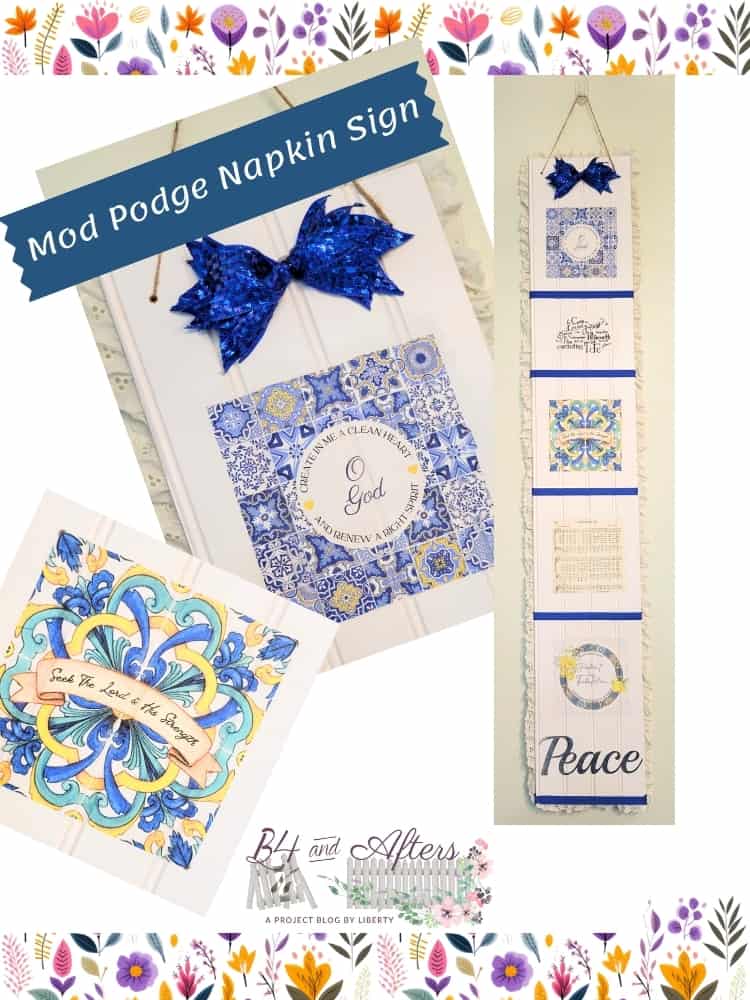
Mod Podge Napkin Sign
Today I’m going to give you details about how to make a Mod Podge Napkin Sign with specially designed napkins from the Christian Craft Paper company!
I was so excited when I discovered this company and realized what they offer. Hmm, should I show you the project first or tell you about Christian Craft Paper’s monthly craft club kits?!! If you are subscribed to my email list, then you may remember that I recommended them as a great gift idea for crafters.
You’ll see today why I think it’s a great gift —
- you can gift just one kit or a whole subscription–
- you can give it for absolutely any occasion (trust me, I would be thrilled to receive another kit!), and
- it may be appropriate for kids as young as 10 years old, or even younger with supervision.
- It’s not overwhelming because it’s just once a month – plenty of time to get the project done.
- Or if you have a busy month, then that month give your kit to someone else who would love it!
- and of course– it’s such a good deal– easy on your wallet!
Well, besides being able to order items separately, you can become a part of one of their two club options. One club is just napkins, and the other club includes the supplies you need for an entire project! And they always throw in a few extra goodies!! (I think you will be surprised how un-expensive it is– usually things like this seem like they cost too much– I’m thinking certain make-your-own-meal companies.)
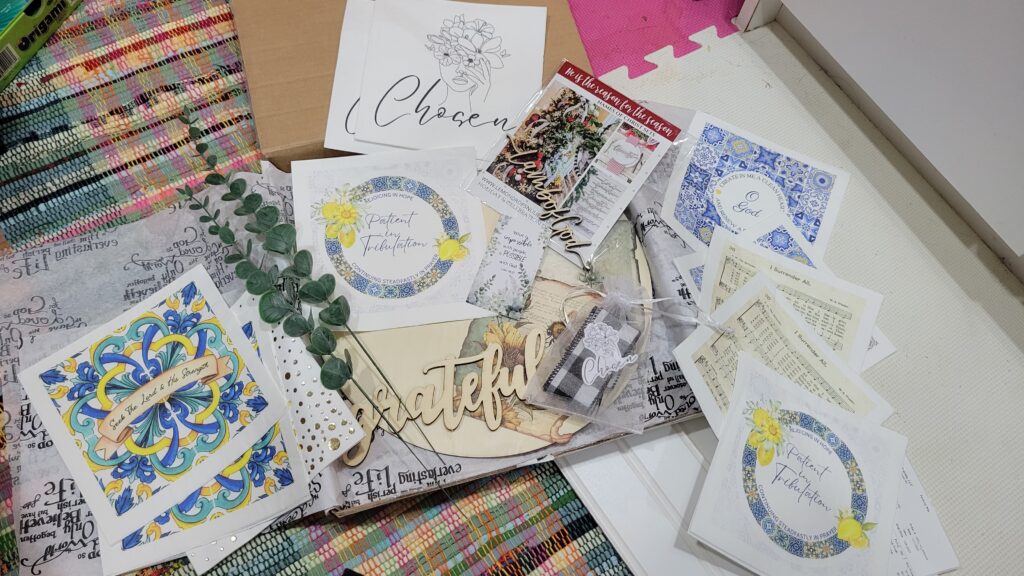
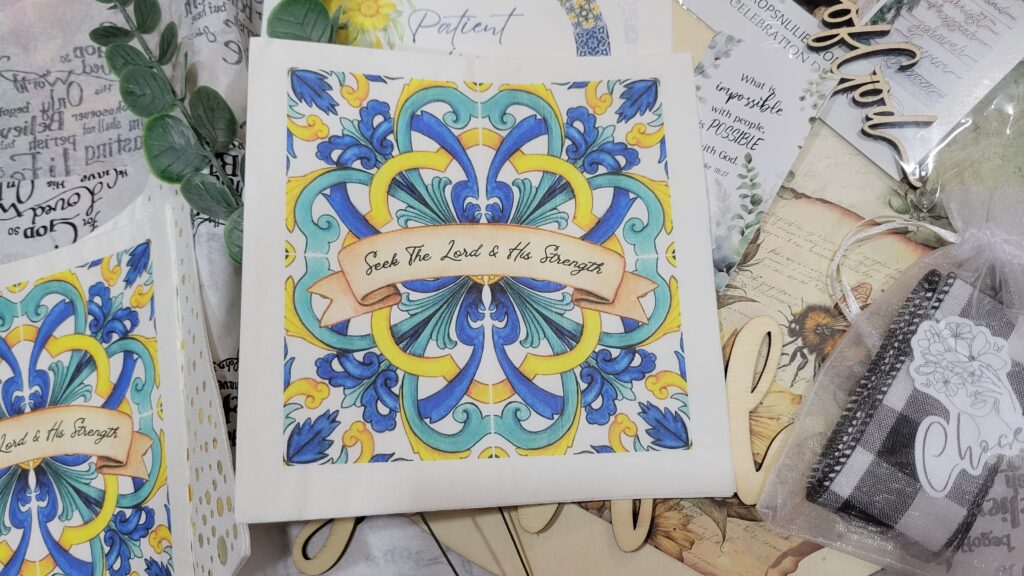
Melanie was so kind to send me one of the kits to use and share with you– oh how fun!! I was so excited when I saw which one it was– because I LOVE the blues, green, and yellow in this napkin collection!
Now if you know me, you know that I like to alter ideas to fit my own plans– and it was no different with this project. So please remember that my project does not match the one she sent in the box–I did use a lot of what she sent to me though. And of course you can alter your project too to fit what you like.
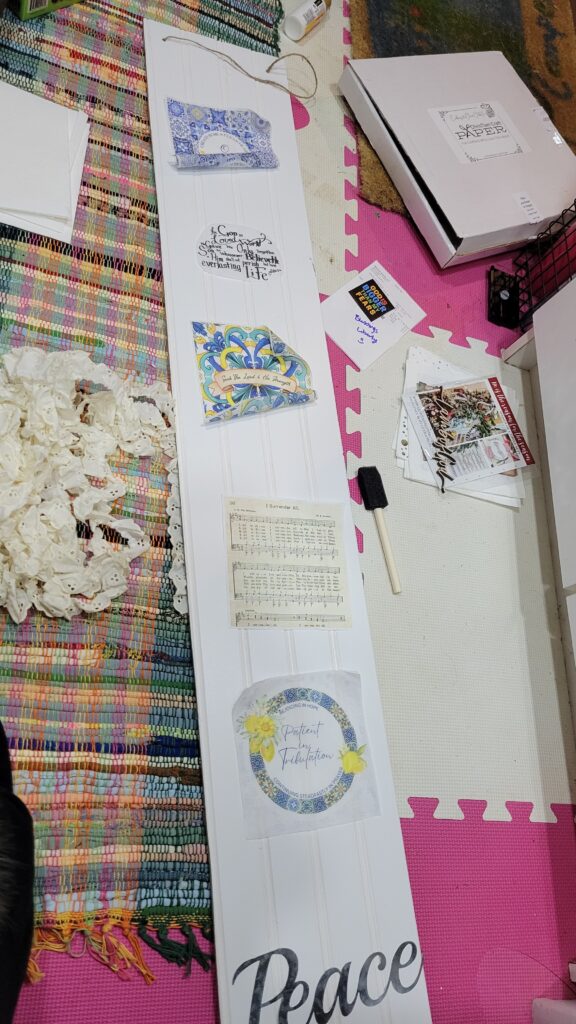
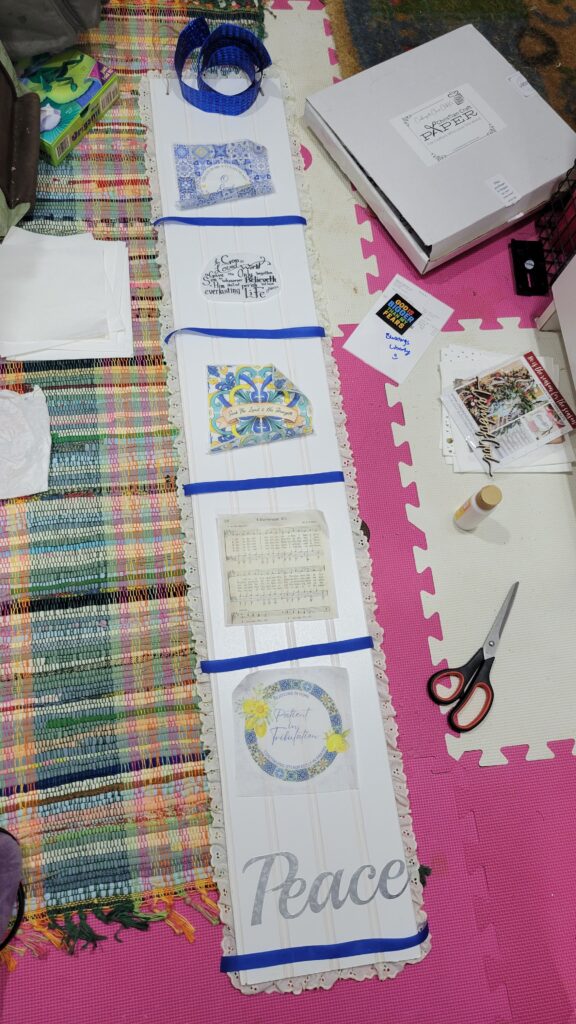
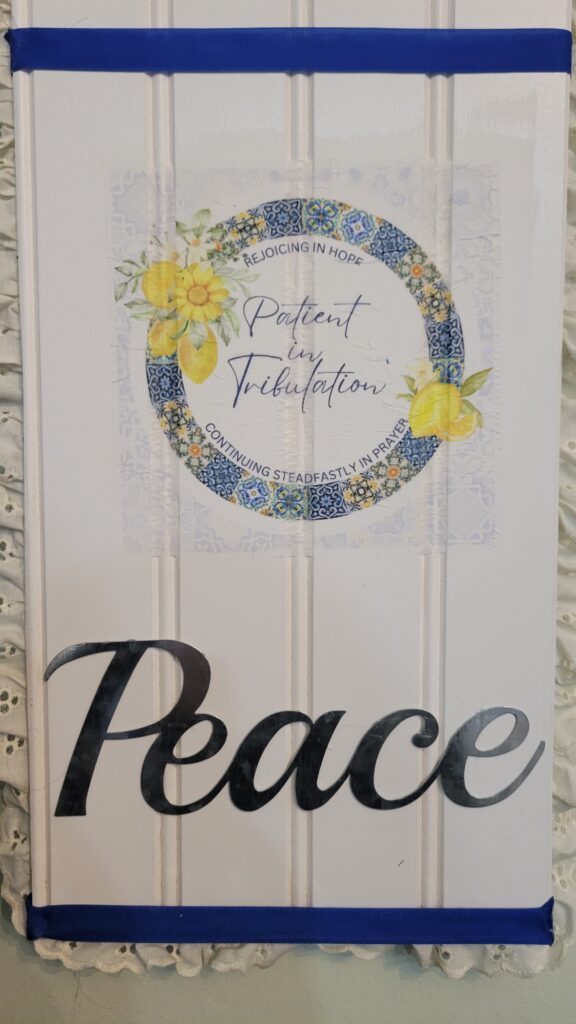
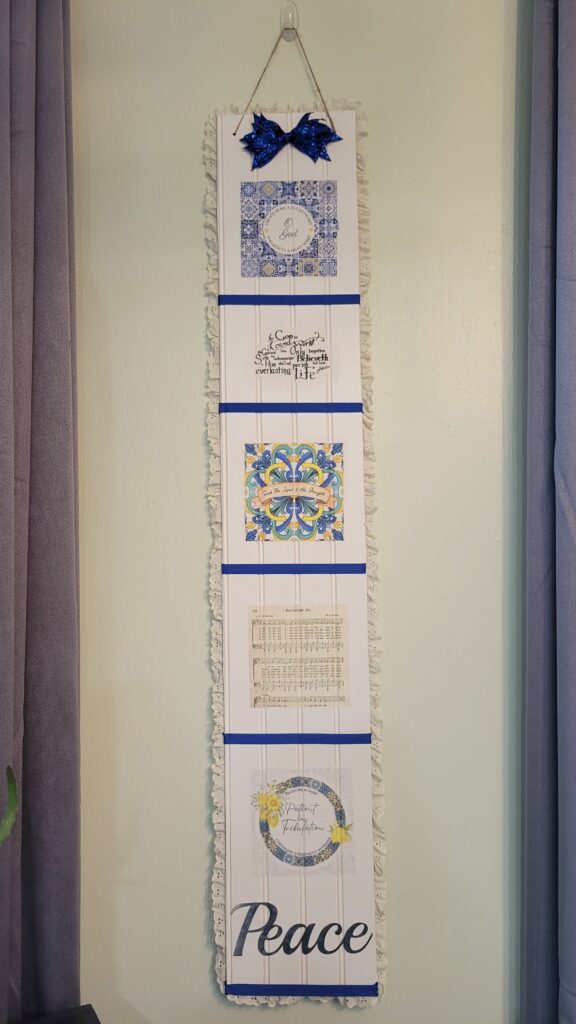
This month’s project was a round sign with a buffalo check bow and eucalyptus sprigs. (They even give you a video with a full tutorial of how to make their project every time!!) But I have a space in my kitchen that is perfect for a long sign, and I had a long piece of beadboard that was perfect for that spot. [I’ve used a small piece of beadboard before to make a Christmas themed sign, and gave it away.] So my project is completely different. And…. I already had everything I needed in my craft stash so I didn’t have to buy anything extra!
I waited until I had some time to myself, and then I set to work. First I separated the layers of the napkin, called “ply.” These are 3-ply, or 3 layer napkins, and the layers are good and strong. So when I peeled them apart gently, they didn’t rip or tear at all. You can tell it is a good quality.
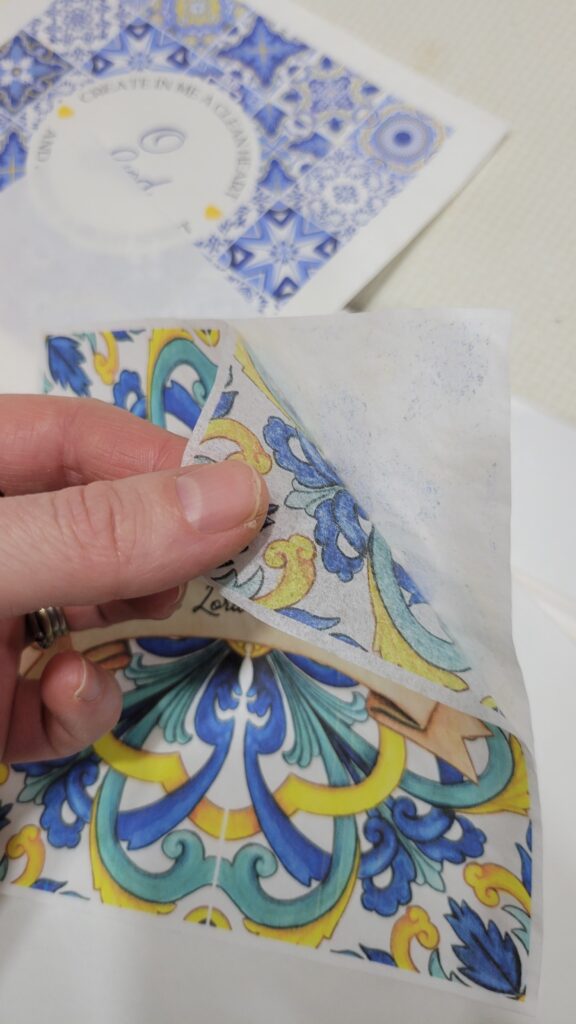
The design is printed on just the front of the napkin because they are printed in the USA (YES!) and it would be too expensive otherwise. However, there are TWO of each design in the box.
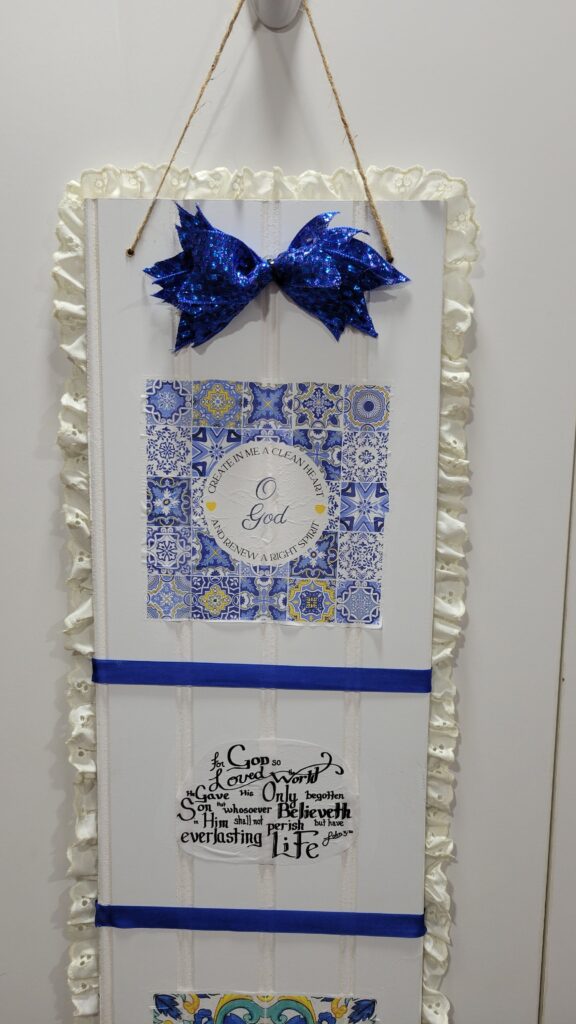
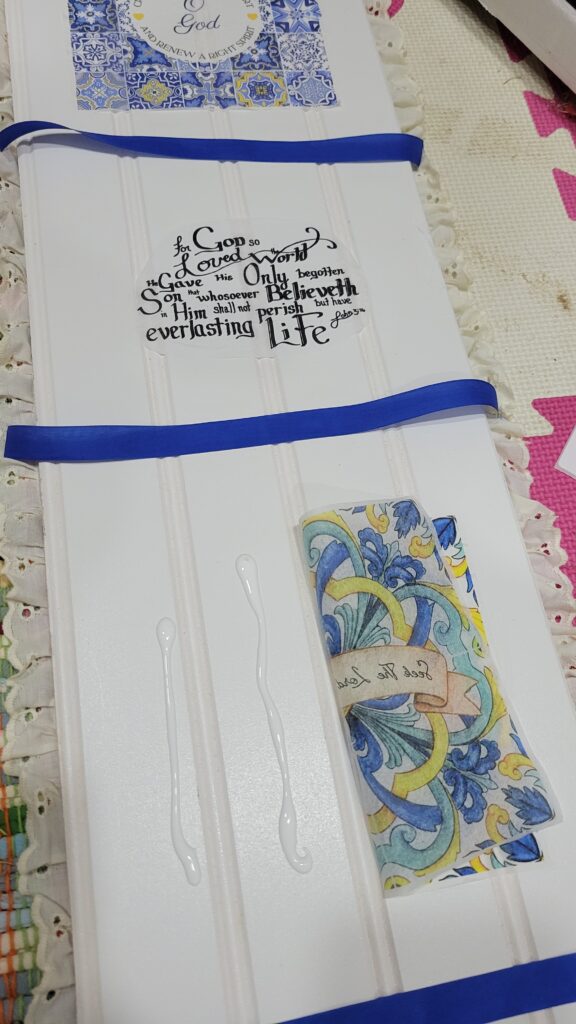
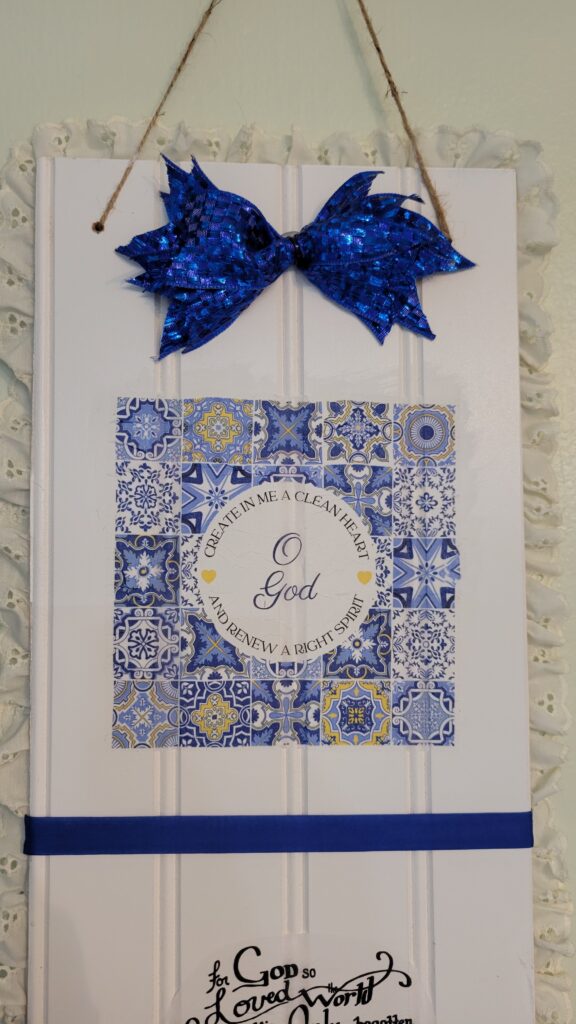
My sign was so big that I laid it on the floor to work on it. I drilled 2 holes at the top for my string. You can knot the string on the front or the back to hold it in place. Then I laid the napkins out to see how it would look. I decided to use some of the printed tissue paper that came in the box, and also a metal Dollar Tree word.
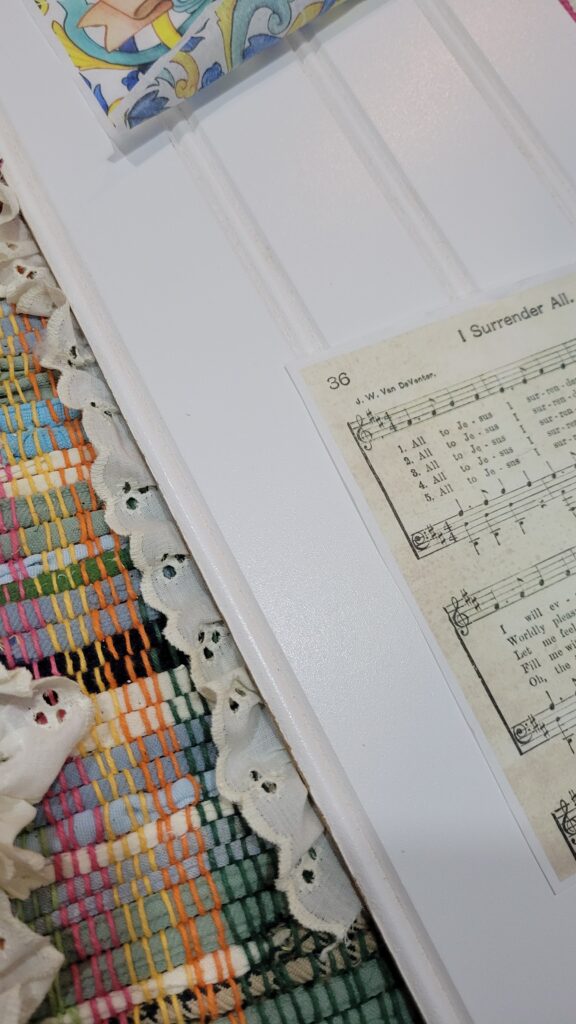
I have a ton of lace that somebody gave me, and I thought my sign could use some sort of border. So I chose this eyelet lace. Then I thought about whether to attach it to the back or to the front. I thought if I put it on the front, it would need another piece of narrow ribbon to hid the unfinished edge. So I hot-glued it to the back– but before I did that, I painted the small brown cut edge of the beadboard white with acrylic craft paint all around the sign.
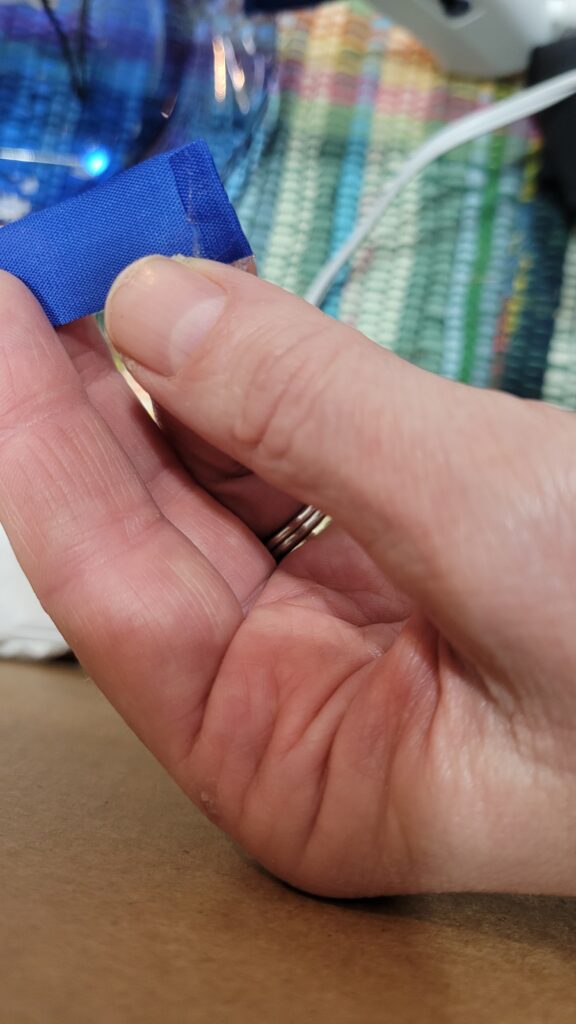
Then I thought it might look better with a divider between each napkin– giving them their own sections. And I found a piece of bright blue ribbon in my leftover ribbons container– probably from a gift someone gave me. I made that bow in the same style as directed in the craft video by Christian Craft Paper.
I decided to Mod Podge the napkins in place first, and then attach the ribbon. That plan worked! To smooth out the napkin you will want to watch this video on how to use a sturdy self-zipping bag to smooth out wrinkles without ruining the napkin. By using the ziplock bag, you don’t touch the napkin and accidentally tear it since it is wet.
I worked from side to side. Depending on your design, you may want to work the top half first and then the bottom half. Side to side worked perfectly for me. You can watch my video to see how I did it.
I think the blue ribbon is basting ribbon. It’s old. It tends to fray on the ends, so I hot glued it, folded it over, then hot glued again and folded it over to attach it to the board.
It took me a little over an hour to do this Napkin Sign with Mod Podge, and that included videoing and taking pictures! It also allowed for the first layer of Mod Podge under the napkins to dry, before putting the top layer on top of the napkins. It dries fairly quickly.
If you decide to do Mod Podge projects with napkins, be aware that it is not a perfect sort of craft. The napkins will be a little wrinkly– at least they are for me! Maybe I need more practice! I think as the napkin dries, it shrivels up a little bit. But step back a step or two and you can’t really tell.
Also, be sure that you are careful to get the bottom layer of mod podge under every bit of the napkin. Your sign will turn out nicer if you do. You will see that in Melanie’s video she is very careful to do that. Since beadboard has stripes, I did allow some air under the napkins in the stripes, but probably I should’ve mod podged the stripe area too. I will probably try that the next time I do another sign.
Do you love how it turned out? I used 4 napkins plus tissue paper– and still have plenty of supplies left for more signs!
Let me know if you have any questions. Yes, they do send seasonal boxes in time for you to complete the project before the holiday. Like I think Christmas things were sent in the November box. Oh, I think I would love to use the Easter box– I’m sure it’s special! I think the box I received was the December box for the month of January– no special holiday so they used these bright colors– sort of wintery into Spring type colors.
Enjoy watching the video! And be sure to check out the website at Christian Craft Paper to see all of wonderful things they have to offer you!