
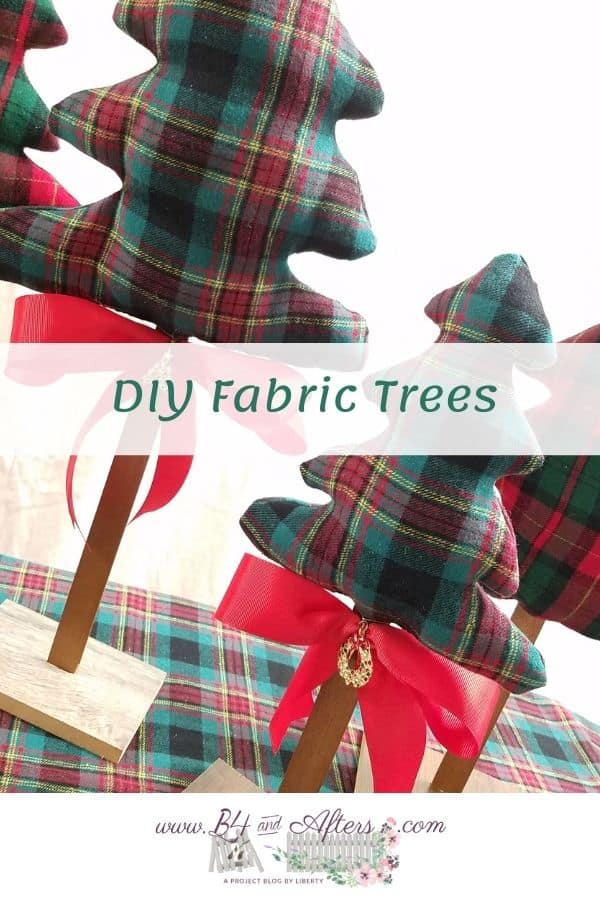
DIY Fabric Trees
I hope you are ready for the first Christmas post of the season….. easy DIY fabric trees! Don’t worry, I still have a couple of fall themed posts to share with you if you aren’t ready to move on to Christmas yet.
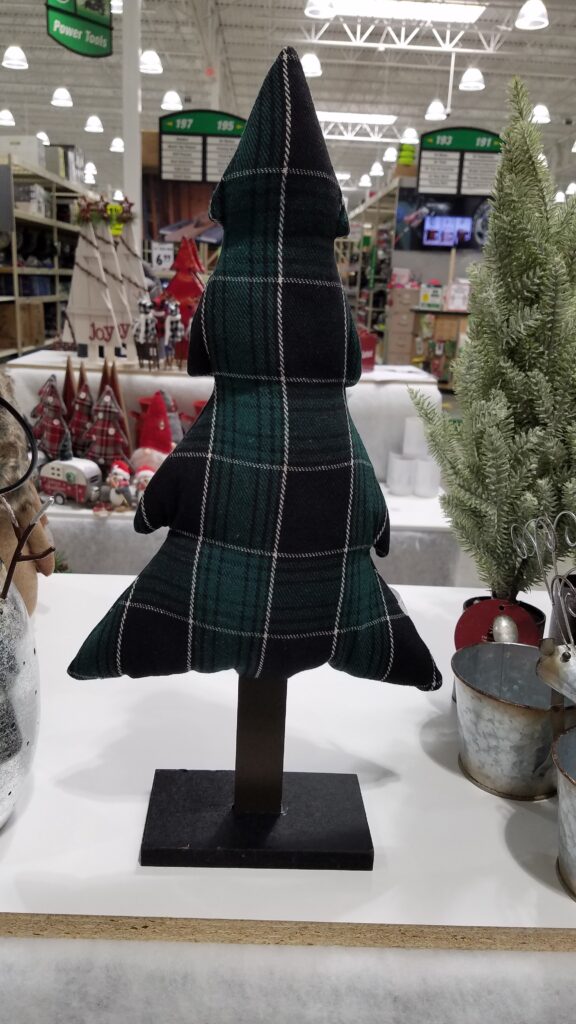
My idea for this project came when I was shopping in September the day that this store was putting out their Christmas selection and saw these cute tabletop Christmas trees. Of course I thought– “I can make one of those!”
Then I was challenged to make a project without spending any money, using just what I had. And this is how I did it!
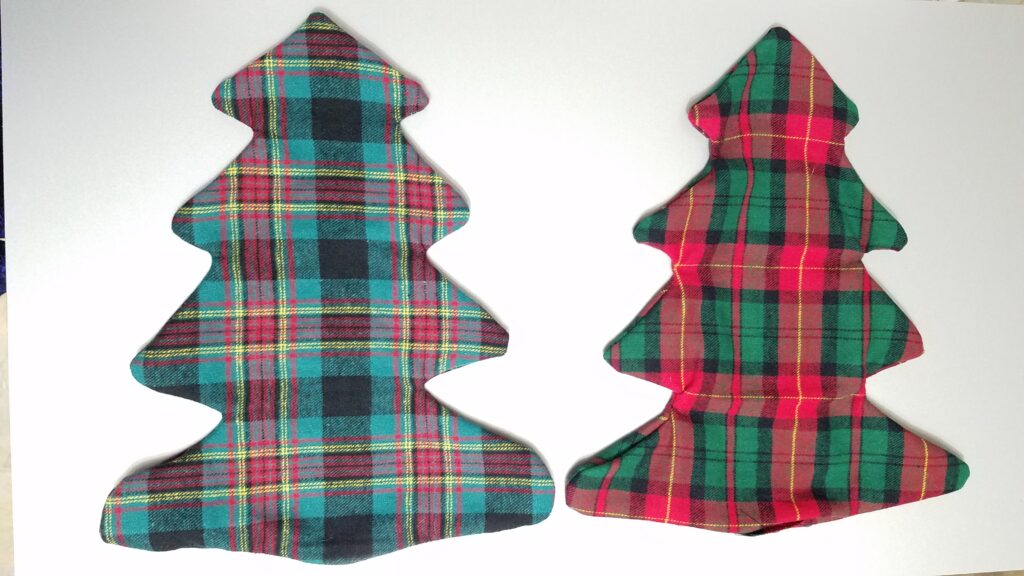
Then an amazing thing happened. Fabric Wholesale Direct sent me some FREE fabric to show you here on the blog! I used two different combinations of this Christmas plaid cotton flannel.
Instructions for DIY Fabric Christmas Trees
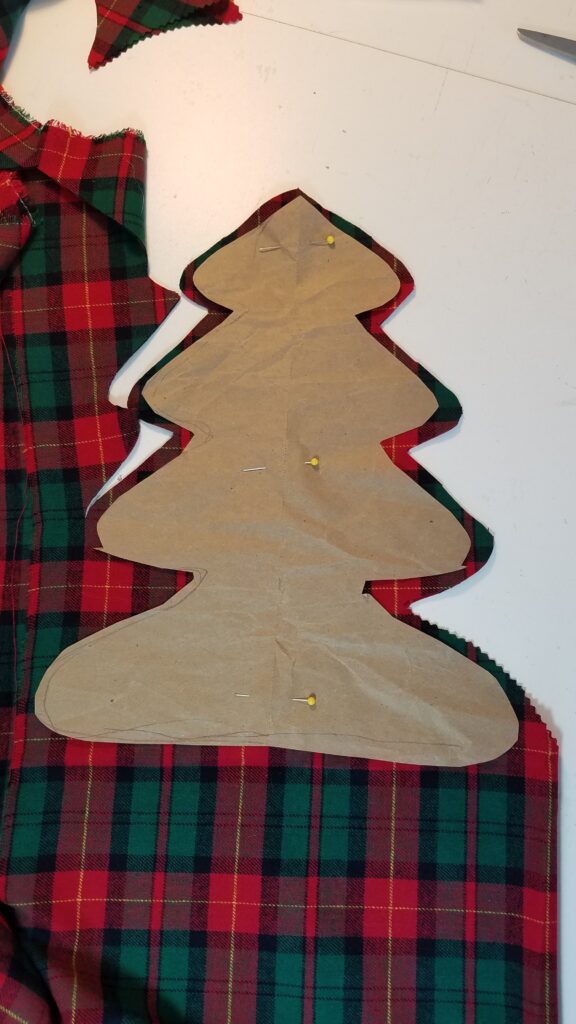
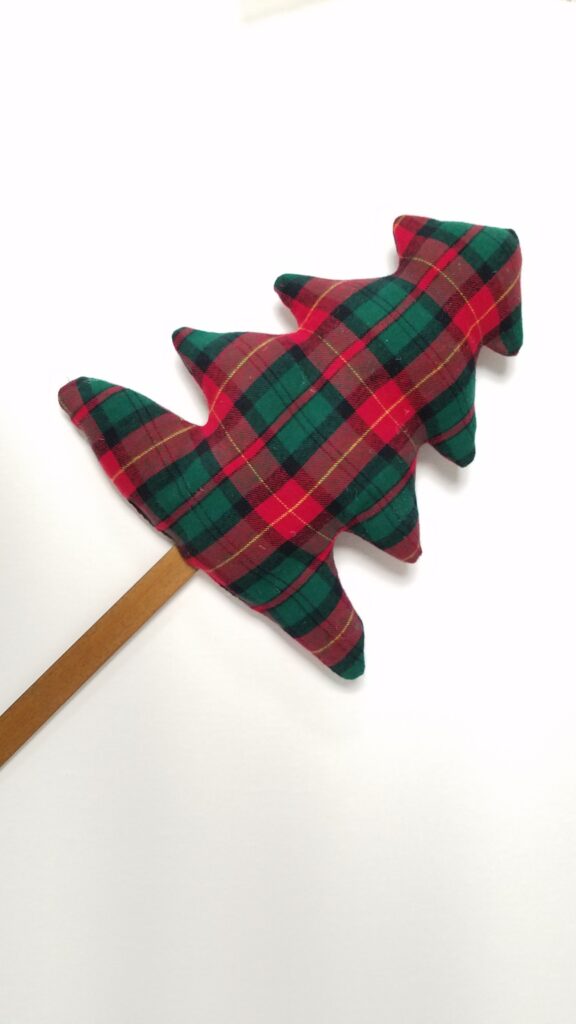
I could have looked on Cricut Design Space for a Christmas tree shape, but instead I visited a friend who drew one for me! Actually, she drew a half, then we folded the paper and cut it out. My friend drew 3 sizes for me.
Would you like to make these trees with my patterns? You can get it right here!
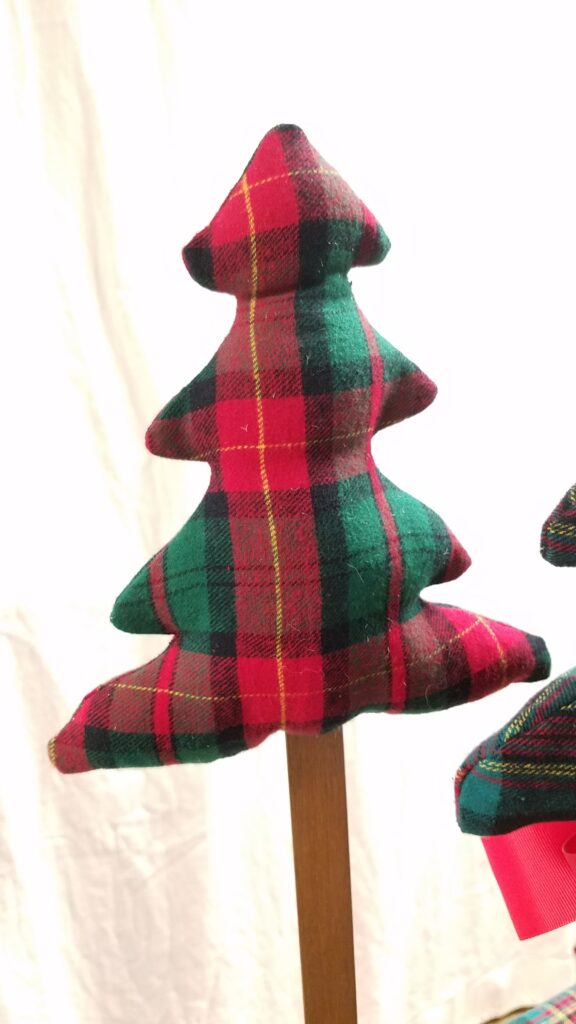
Buy my productBecause of the stripes, you may want to place your trees either on a stripe, or off center. I chose off center. I made sure mine all went the same direction (the yellow stripe is vertical).
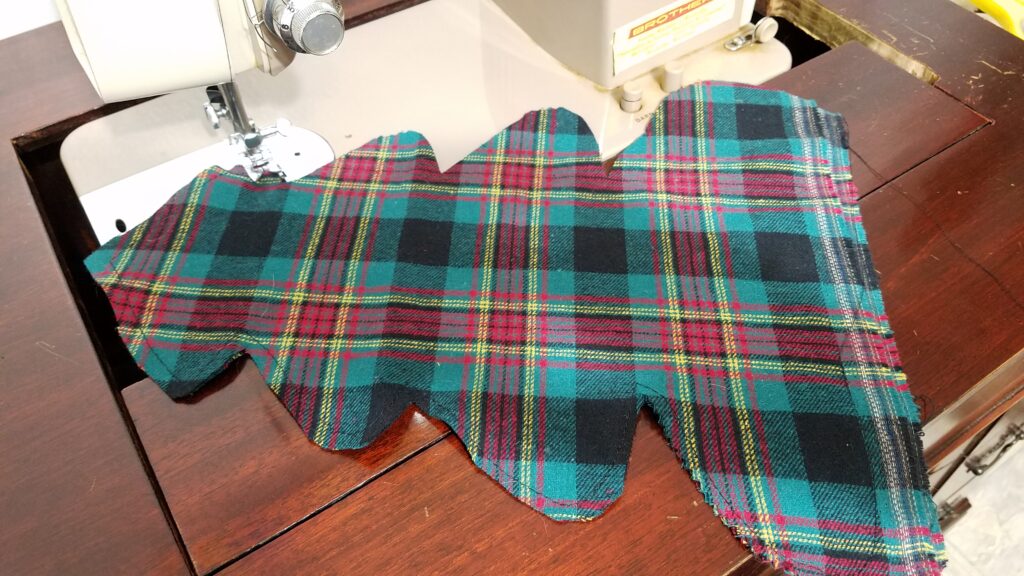
Next, sew fabric right sides together, leaving the bottom open so that you can turn it right side out and stuff it.
Steps to create a Fabric Tree
- Draw and Cut paper pattern
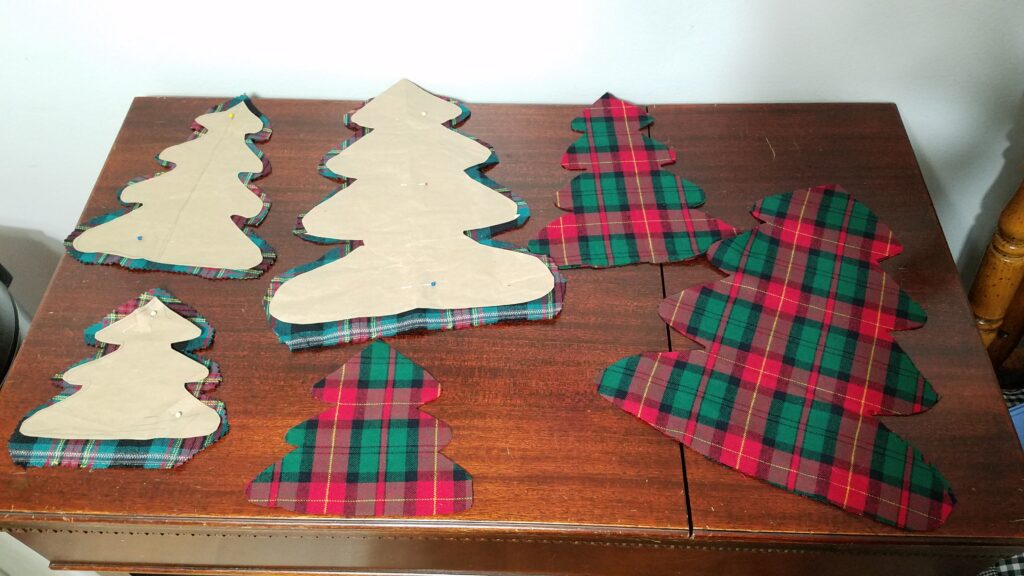
- Cut two layers of fabric
- Sew right sides together, leaving bottom open for stuffing.
- Stuff tree
- Insert dowel rod or stick
- Sew opening closed
- Insert dowel rod or stick into prepared base
- Add ribbon or embellishments as desired
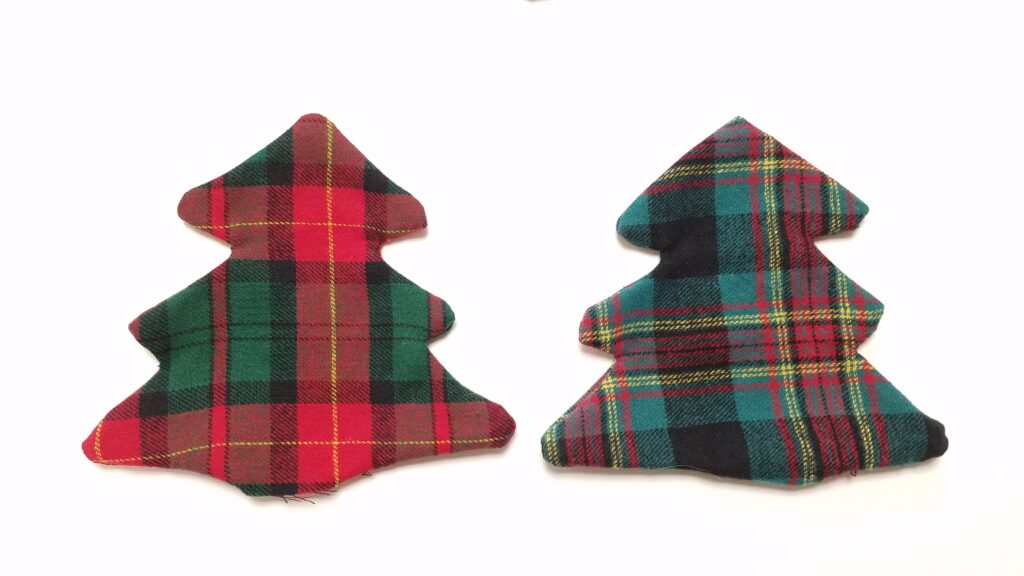
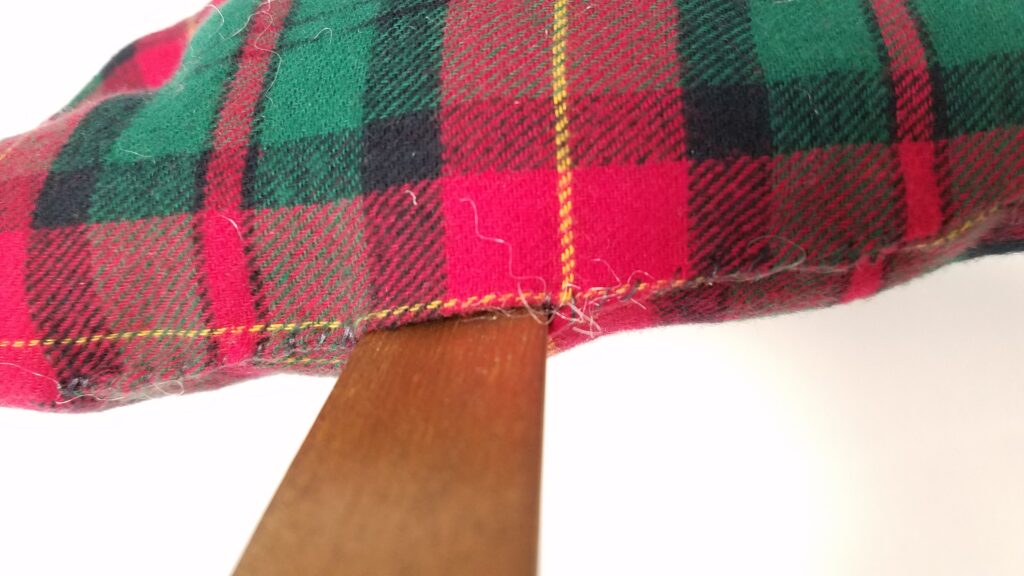
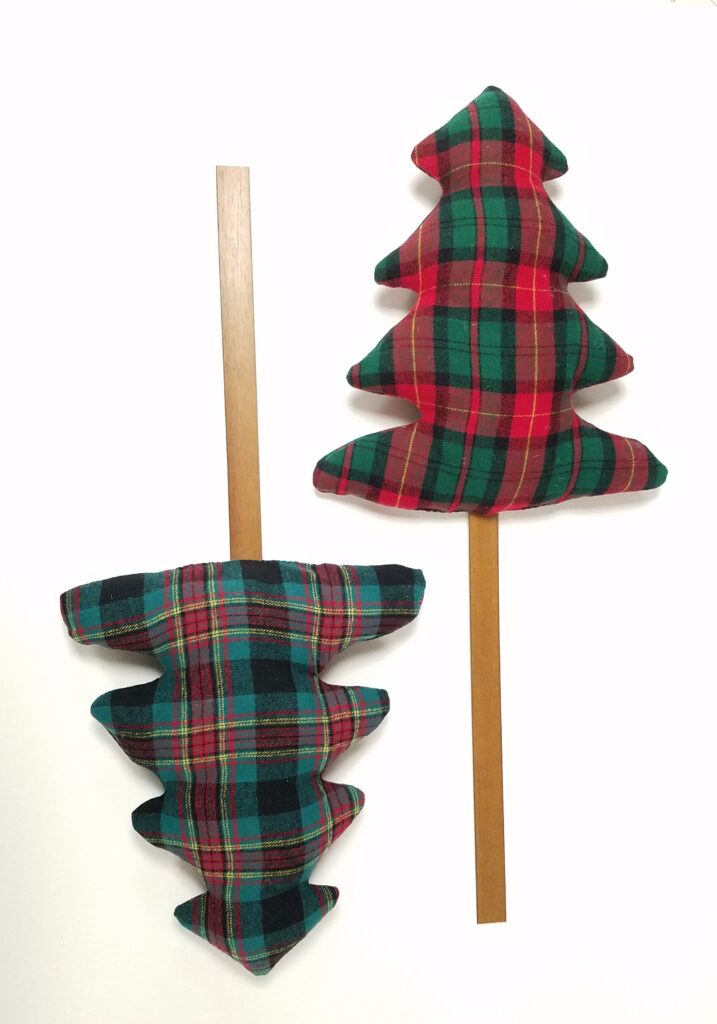
You will need to carefully clip the inside corners with sharp scissors close to the seam.

If you don’t, the tree will pucker. Below you can see the puckers in the tree on the right. The tree on the left has been clipped.
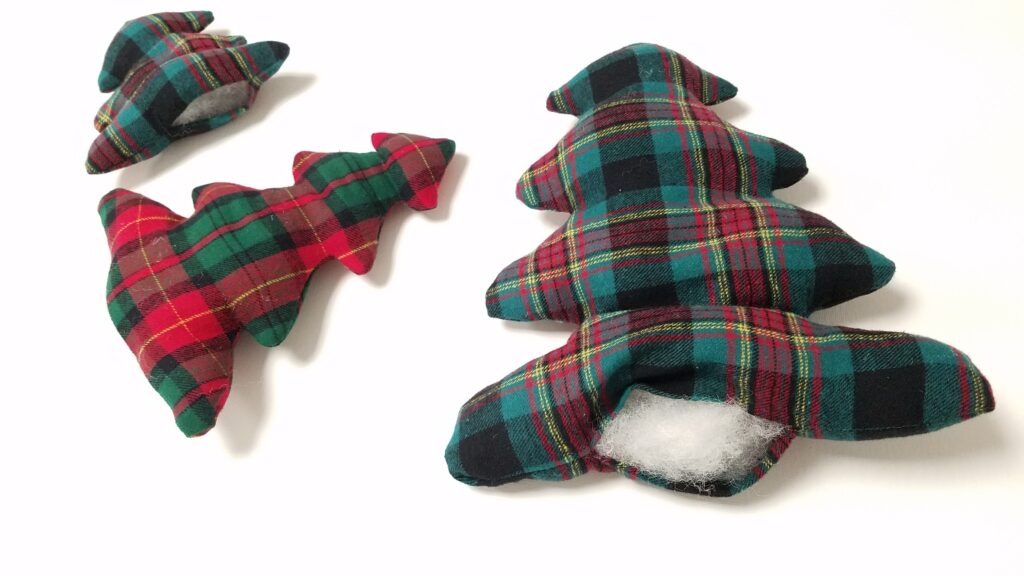
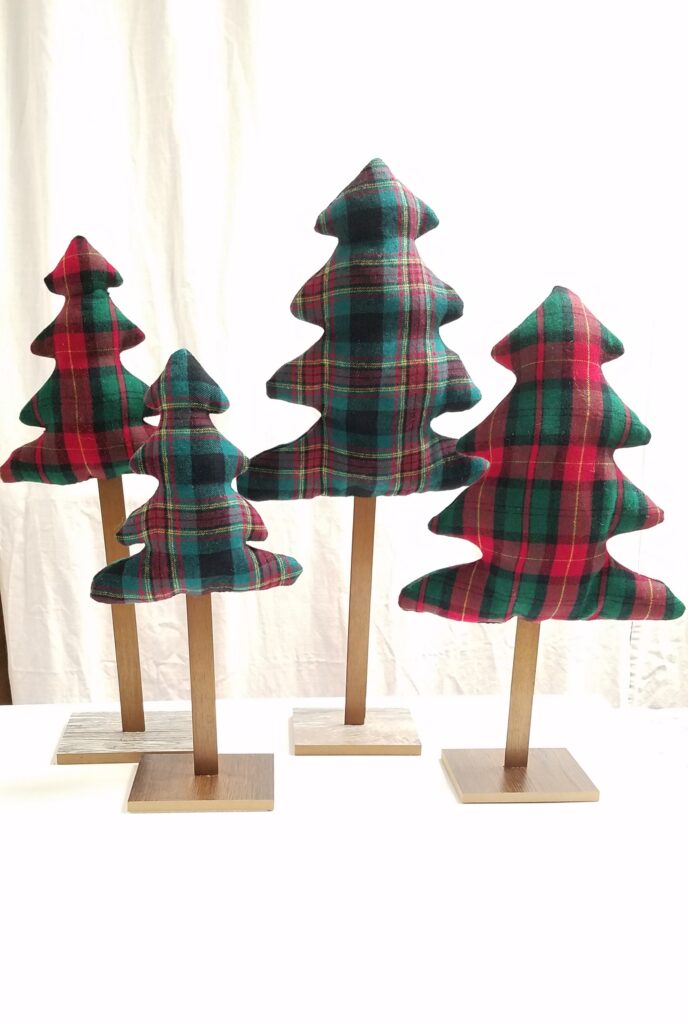
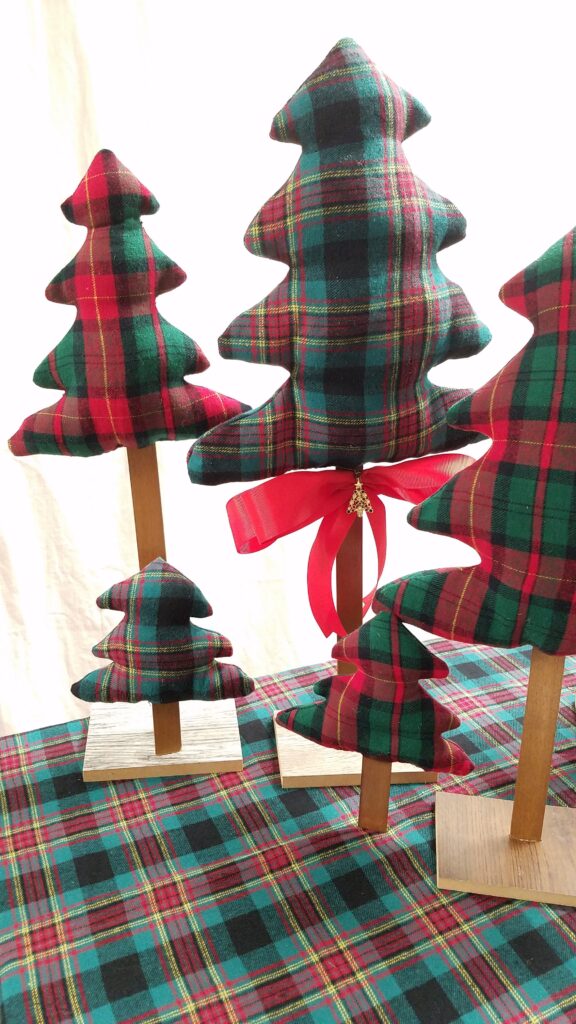
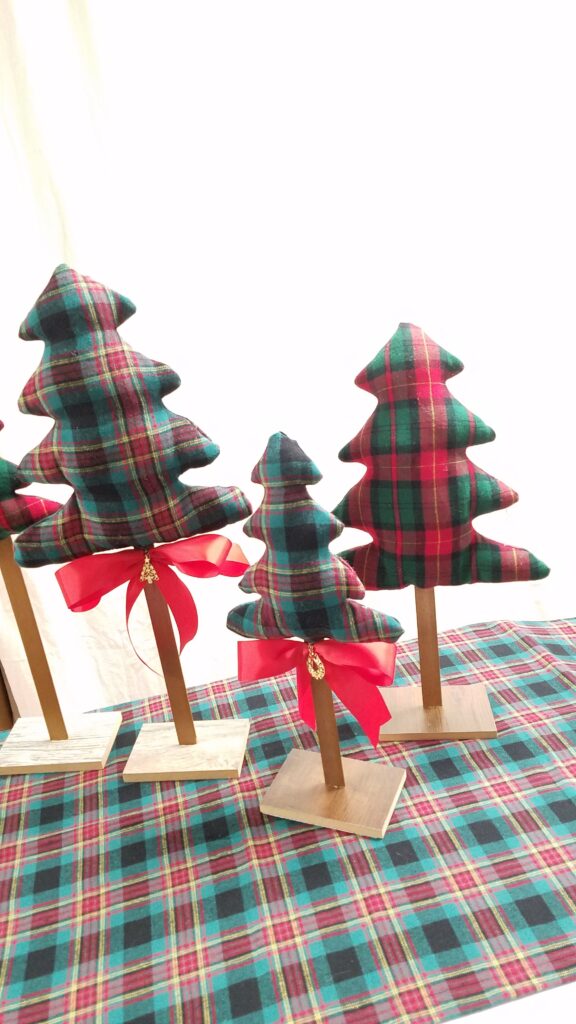
I made 2 each of 3 different sizes— six trees in all! I am going to use the two smaller trees for a different project.
The next step is to fill the trees with stuffing, or polyfil. If you had a pillow you didn’t want anymore, you could unstuff it and repurpose the stuffing. I took small bits to stuff each corner, then stuffed the middle section.
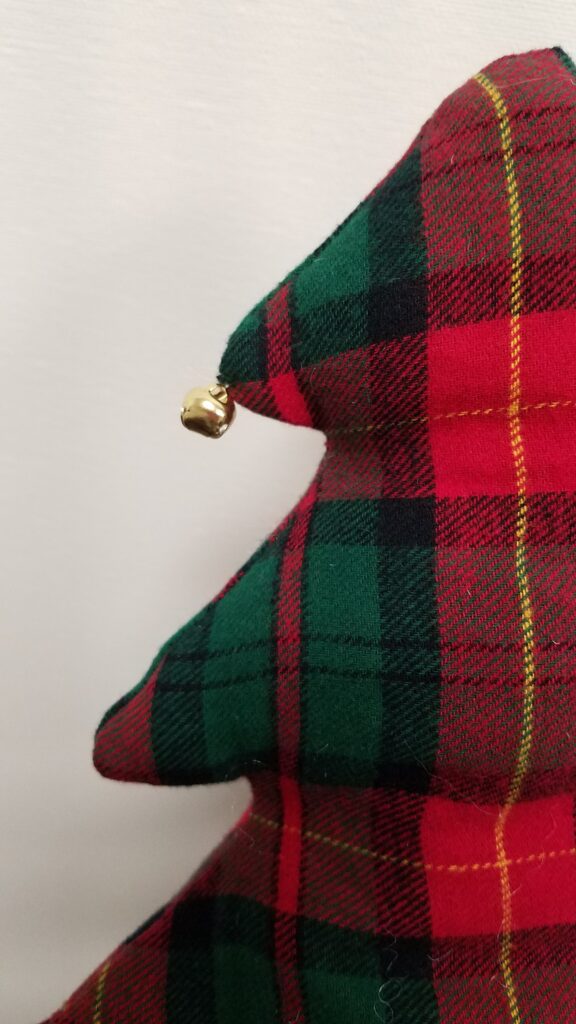
I thought about adding buttons or bells, but I didn’t have any buttons that I thought would look nice. And I thought the jingle bell took away from the look instead of adding to it, so I decided not to add anything except…..
These diy fabric trees are going to be self-standing. I was going to use a dowel rod and a sliced log piece, but had technical difficulties. : ) Thankfully, I had salvaged some wooden blind slats thanks to Terrie’s creative inspiration! I knew they would come in handy some day, and this is just the first project I plan to use them with.
It was easy to whip-stitch the opening closed around the stick.
Fabric Tree Base
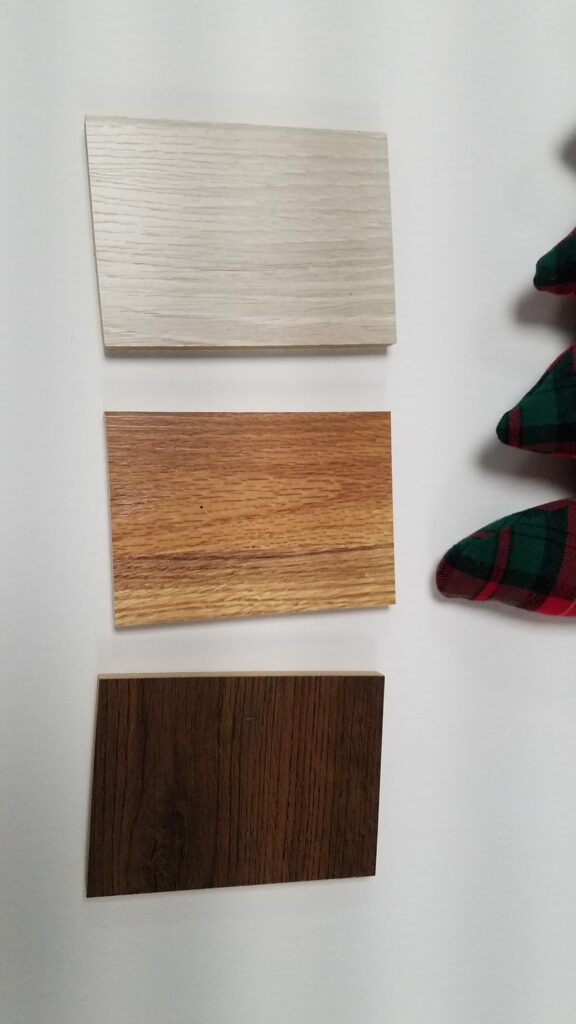
Some time ago I had grabbed some free flooring samples from my local home improvement store.
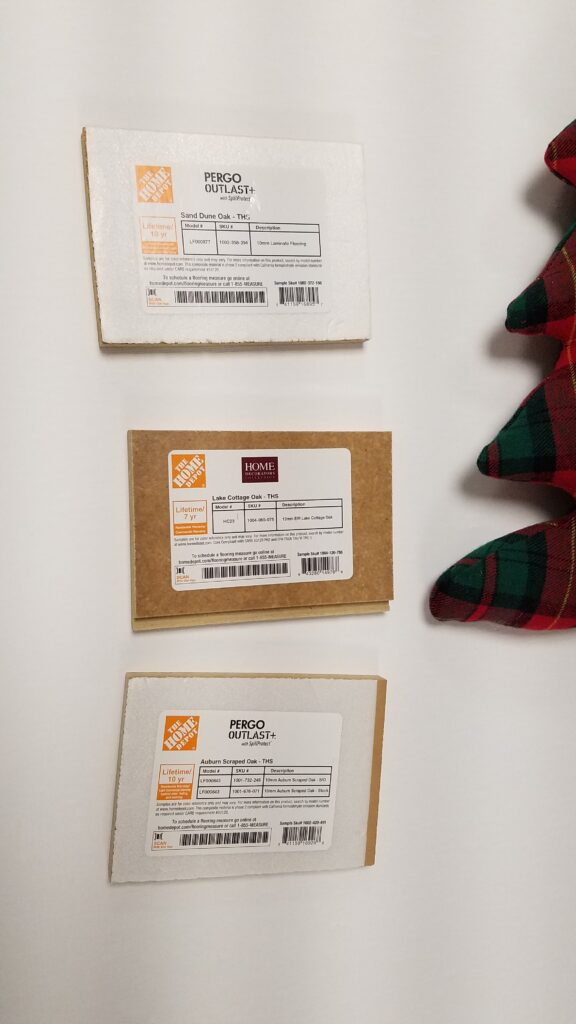
There are different colors available.
I drilled some holes in the wood.
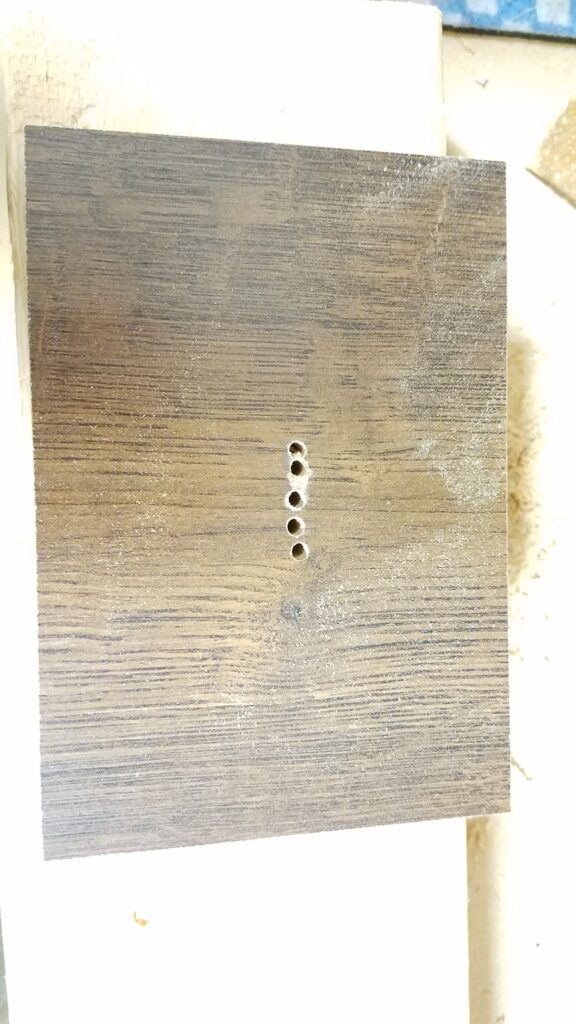
Then I slanted the drill to connect the holes together. Very unconventional, or shall we say “innovative!” : )
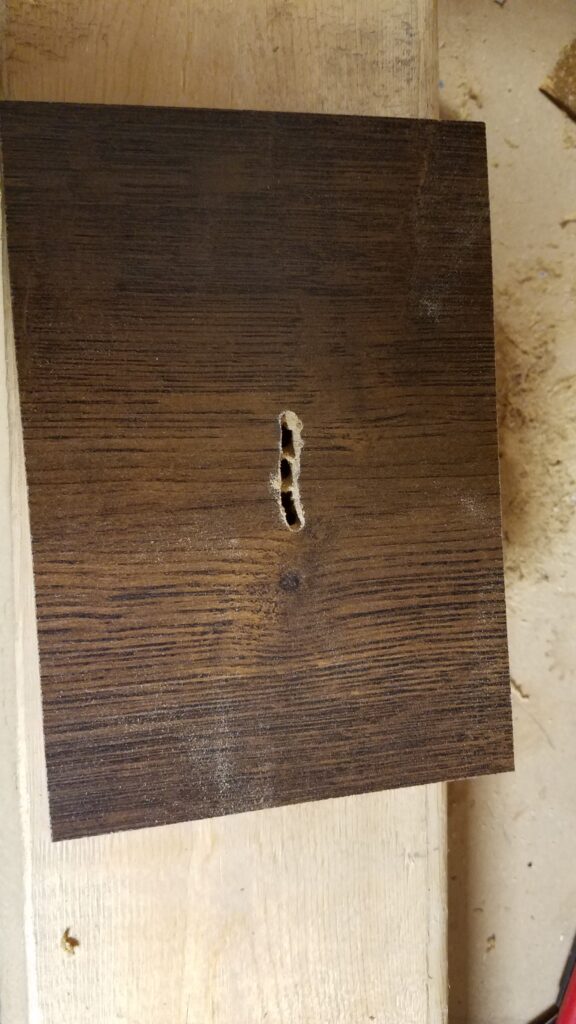
Then the wooden sticks fit right in! I want them to be removable for easy storage. Otherwise I could glue them in to make them more sturdy.
Making these cute little Christmas tree pillows was so much fun! But wait! There’s more! Fabric Wholesale Direct also sent me some gorgeous 1.5 inch red grosgrain ribbon— two spools of it!! I’ve been using it on all sorts of projects. My new mini bowdabra helped me easily make these bows.
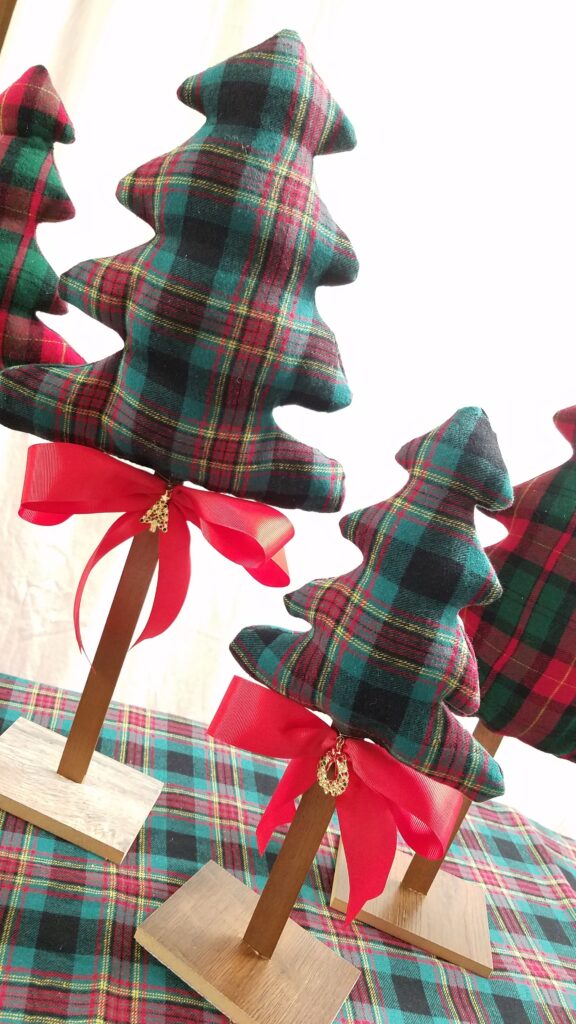
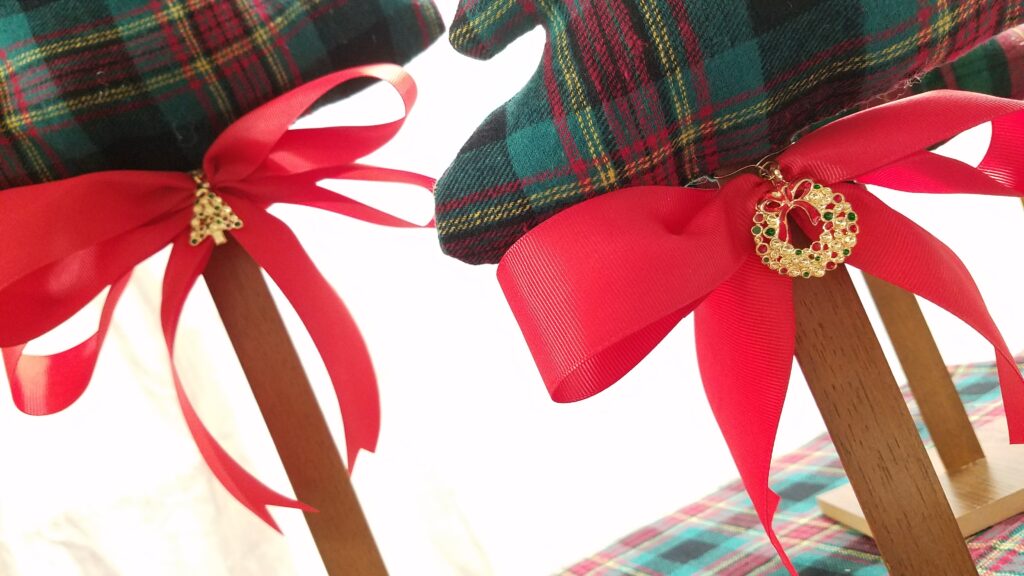
I had saved these cute metal accents that came in a ribbon set for years, and am so glad to use them for this project!
Step by Step Instructions
- 1. Start by drawing a paper tree template. I used 3 different sizes.
- 2. Then cut out 2 pieces of soft flannel fabric.
- 3. Sew the right sides together, leaving it open at the bottom.
- 4. Clip the insides of the corners so it doesn’t pucker when turned right side out.
- 5. This is the smallest one turned right side out.
- 6. Fill with polyfil stuffing by putting small amounts into the corners first. Then fill the rest.
- 7. Insert a flat stick or dowel rod and hand sew the rest of the opening closed.
- 8. Use a small piece of wood or a wood slice for the base.
- 9. Make the trunks as tall or short as you like.
- 10. Add red grosgrain ribbon bows, with Christmas metal accents (optional).
- 11. Attach the bow to the stick with the same wire you used to make the bow.
- 12. Glue the sticks to the bases, or omit the gluing for easy storage. Enjoy your new decor!
DIY Challenge Completed
So there you have it! I made these fabric trees without spending a single penny! These trees would look so pretty in any color scheme– it does not have to be the traditional green and red that I used. They could be hand stitched instead of machine sewn, and if you don’t have fabric, perhaps you have an old shirt or something that needs upcycled.
I hope these cute DIY Fabric Trees have inspired you!


magnifique…merci pour ce beau tuto…..je ferai pour le Noël prochain…Bonne année…bisous
Gracias Elisa! Thank you!
I was wondering if you could send templates for the three sizes for the Christmas trees.
I can’t draw good. Thank you.
Hi Stacy!
My templates are available at this link: https://pages.b4andafters.com/products/fabric-tree-patterns
Enjoy!
Liberty
Hello!
I love your trees! I tried to make one but I wanted to ask the question of how do you make the polyester fiberfill stay in the branches? It seems like it just slips right out. Do you have any suggestions? Thank you.
🤓
Thank you Lisa! After I stuff the corners, I add more stuffing up the middle. Maybe you need more stuffing?
These are so cute. I would do exactly the same – I always think I can make things myself too.
Your handmade Christmas trees are darling and will be a wonderful addition to any Christmas decor.
These are so cute!! I love the fabric you used!
Liberty I was just looking at some DIY trees to make for our home this year. I love how yours looks. Thanks for the inspiration. How fun for you to get fabric to share with us. That is so cool!
These trees are absolutely adorable! I can’t believe you made them without spending any money! How awesome! Great job.
Your fabric trees are super cute, Liberty! I love the fabric you chose! These would be so cute as ornaments too!!
Liberty,
These are adorable and I love the charm hanging on the bottom for some whimsy! Pinned to my boards!
Cindy
Thank you for pinning, Cindy!
These are just the cutest! I saw some at WalMart recently and loved them. But yours are so much cuter! Pinning it in hopes that I get some made.
I’m so glad you like my trees, Tammy!
I love these, and they could be do versatile. They turned out adorable. Thank you for the inspiration.
I’m so glad you like them, Corine! It’s great crafting with you.