
How I Painted a Hutch with Black Dog Salvage Paint Part 1
*Black Dog Salvage Paint generously sponsored this post.
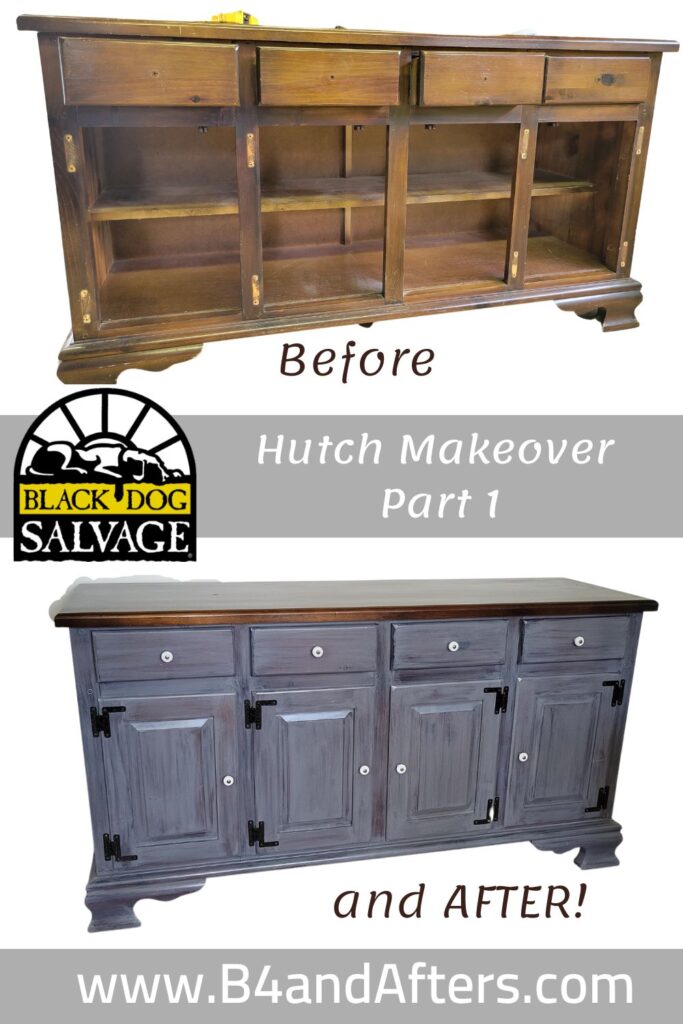
Today I get to tell you all about how I painted my hutch with Black Dog Salvage Paint! I painted the hutch in two sections– I started with the bottom and then I painted the top completely differently.
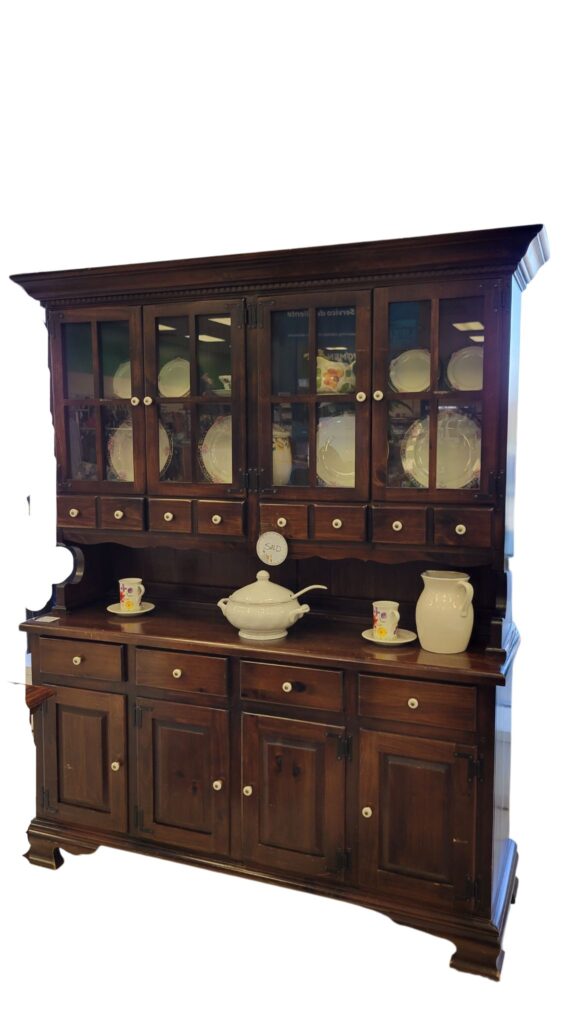
Hutch, Before
So this is Part One, to tell you all about how I painted the bottom part of the hutch. Stay tuned for Part Two!!
You may go ahead and watch the video if you like. But remember that I will include info after the video that is not in the video. So I hope you’ll read the rest of this post, too. : )
Is Black Dog Salvage Paint Chalk Paint
A question I get asked a lot, is — Is Black Dog Salvage Paint Chalk paint? No, it is not. It is actually a combo of latex and acrylic. But yes, it does Feel like chalk paint before you add the topcoat. So I can certainly understand why people might think Black Dog Salvage Furniture Paint (BDSFP) is chalk paint.
Which color of paint did you use?
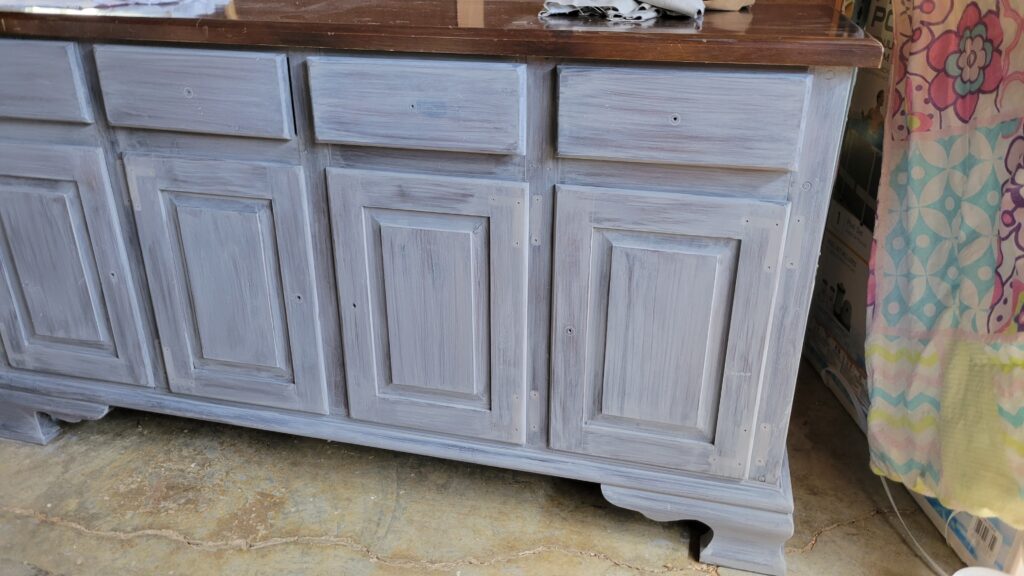
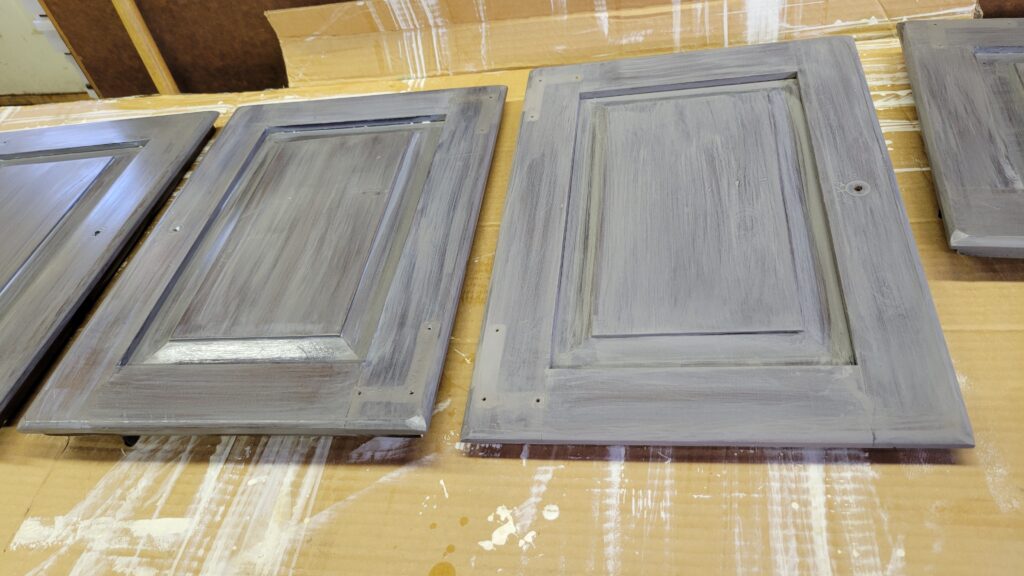
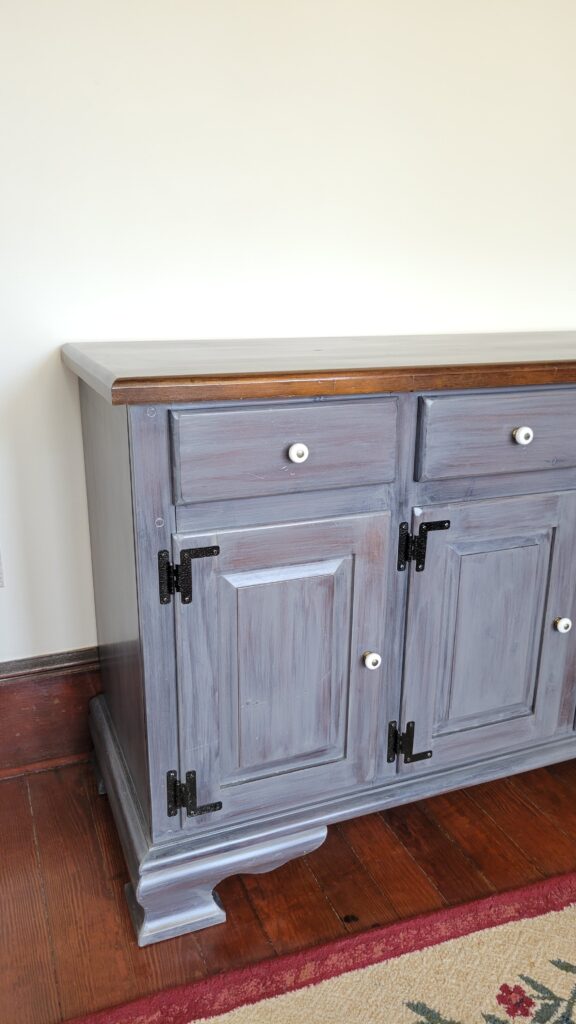
I used one of BDSFP’s paint recipes for “Silver Lab.” It uses 3 colors– 3 parts Galvanized (gray), 2 parts Dirt (brown), and 1 part Black Dog (black).
Here’s a funny story– or a frustrating story– depending how you look at it…. The good folks at Black Dog Salvage mailed me the paint I needed for Silver Lab. I put some of it away, but the Dirt was left out. I remember thinking that I needed to move it so it wouldn’t get knocked over.
I may have opened it to look at the color. And then I lost it. I don’t know why I didn’t put it on the shelf with all of my other cans of Black Dog furniture paint. I think I remember putting it in a tote or a drawer, tucked away somewhere.
I looked and looked for that can of paint– for 1 or 2 weeks. During that time I started organizing my house, looking into every nook and cranny. I tried making a similar paint recipe and leaving out the brown, but my color was too dark– just not right at all.
Wherever I tucked that paint, I seem to remember a still, small Voice telling me that “you don’t look there very often, that’s not a good place to put that.” And I didn’t listen. Instead I spent hours looking in all the places that I don’t look very often…. And I still have not found that can of paint.
One day on social media, when I shout that “I have found the DIRT!” you will know what I am talking about….. at least I hope that one day I find it….
Which Topcoat did you use?
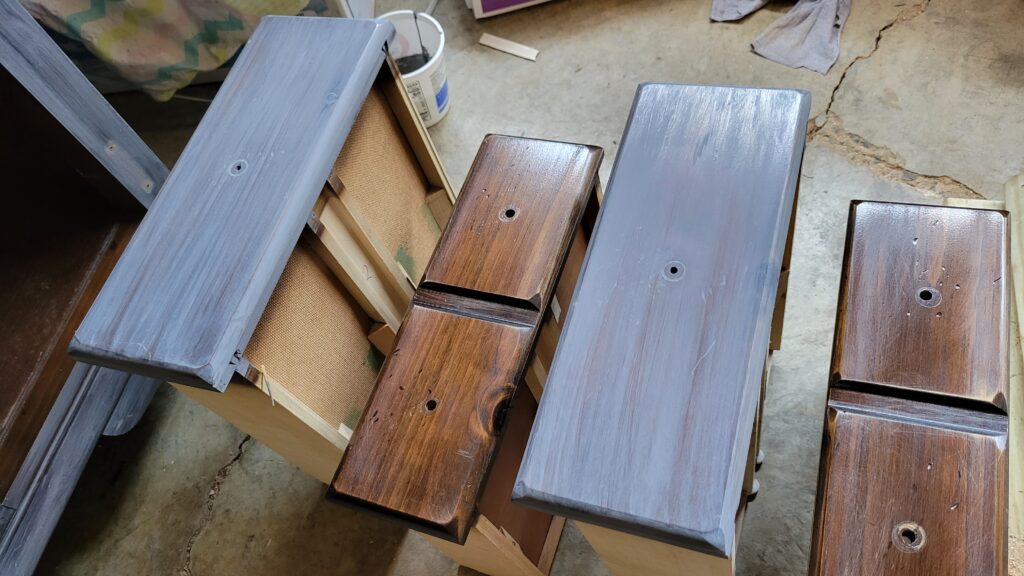
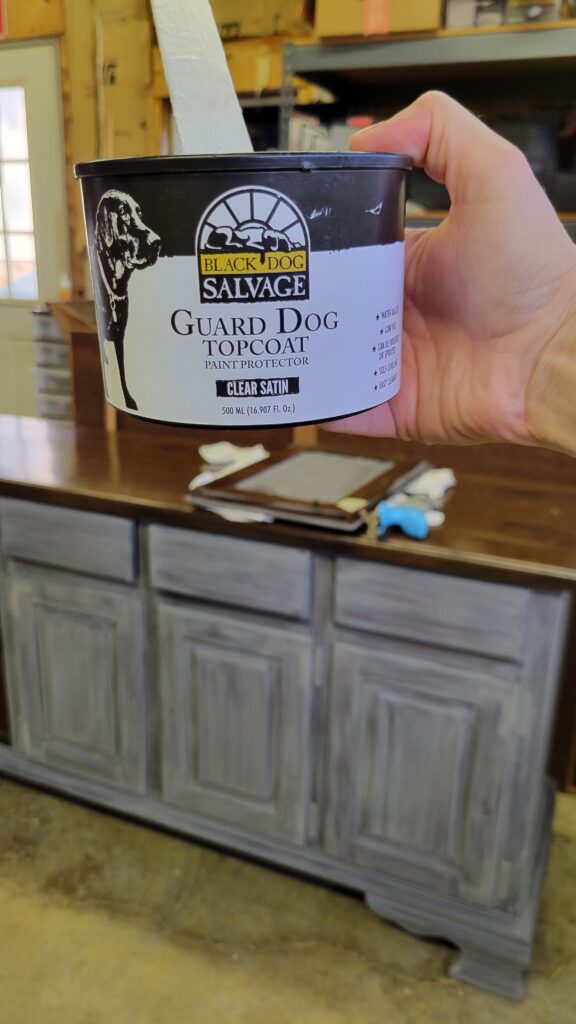
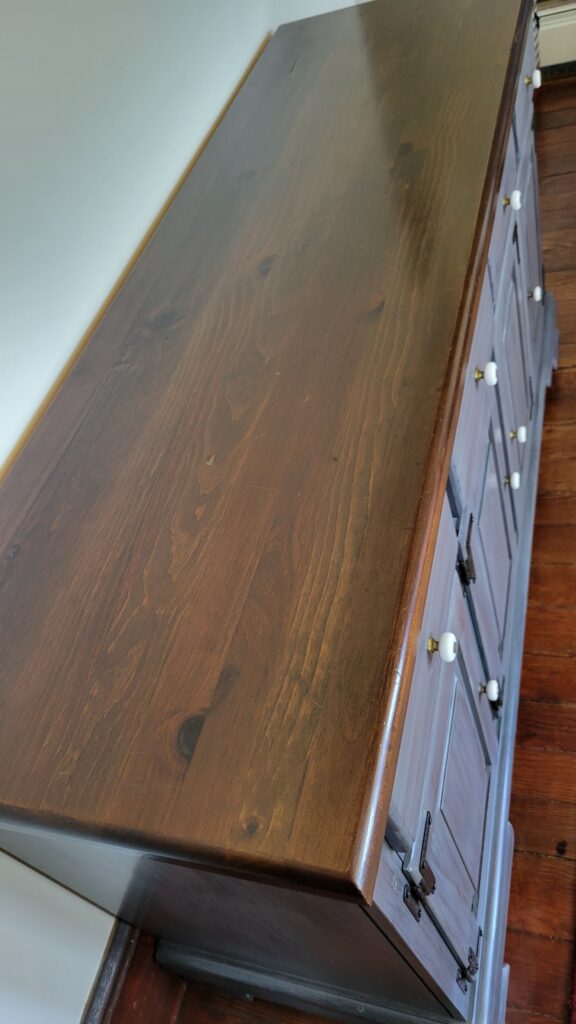
I used Black Dog Salvage’s Guard Dog topcoat in Satin (they also offer it in Matte). Since I expect to use my doors and drawers alot, I wanted my hutch to be very durable. Not only is this topcoat durable, it is so silky smooth.
(In the picture below, you can see the paint without the topcoat on the right side, and with the topcoat on the left side.)
By the way, I did paint another hutch once upon a time with a different paint brand. I was disappointed in the finish, and also in the paint itself because the color was not consistent. So trust me when I tell you how nice of a finish the Satin topcoat is– in either Guard Dog or Show Dog. : )
To finish the top of the bottom hutch section, I cleaned it. I filled in scratches with Old English Scratch Cover, wiped it off really well, and then I used the same Guard Dog topcoat from Black Dog that I used on the rest of the piece.
Do you have to sand before you paint?
No! You definitely do not need to sand your furnituer before you use Black Dog Salvage Paint. I did, because I wanted a super smooth finish when I was all done painting. But the paint will still stick to the piece even if you don’t sand it. If you do want to sand it, sand it AFTER you clean it (in the video I’m pretty sure I did it backwards, so don’t do what I did….)
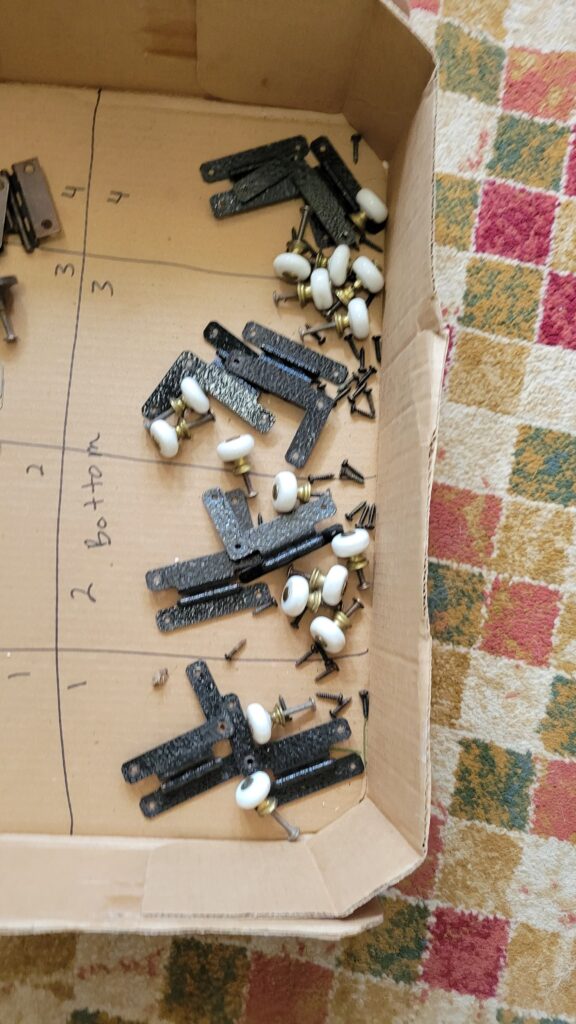
I didn’t have to sand and fill the old hardware holes because I reused the original hardware.
Here’s a Tip for you
Before you remove the hardware, get a box and draw sections and number them left to right to correspond with your furniture piece. Then place your hardware in it. You will be so glad when you go to reinstall it because you won’t have to try to figure out which piece matches what.
Do you have to clean before you paint?
Yes! You do definitely want to clean your furniture before you paint it. Use TSP mixed with water according to the box directions. Then be sure to rinse your bucket, rinse your rag, and wipe your furniture off with clean water to rinse the TSP off before you start painting.
There was a filthy dirty drawer that I show you in the video. If I had not cleaned it, I can pretty much guarantee that that drawer would have turned out awful.
Just so you know….
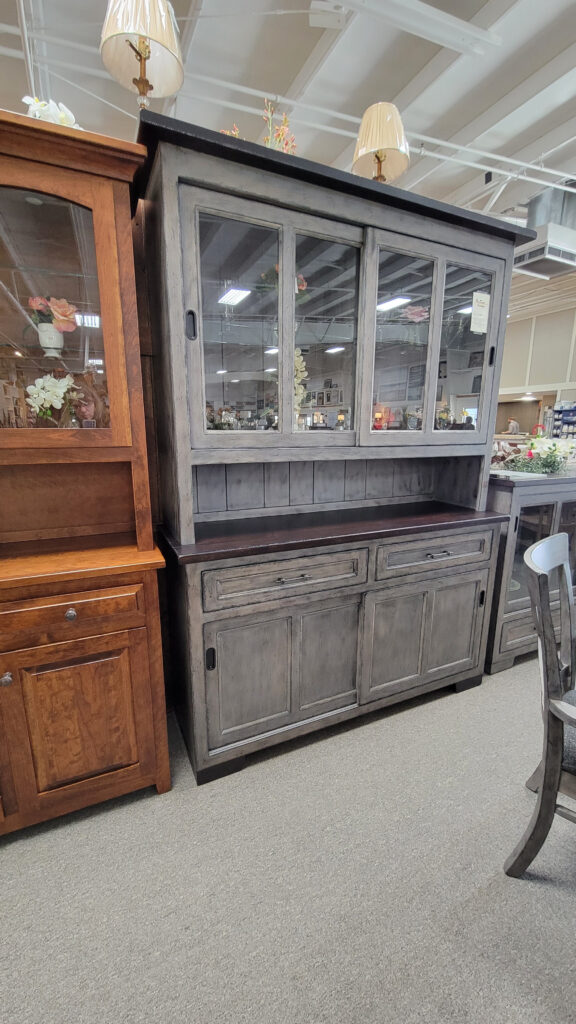
In the video I mention an expensive hutch at our local Amish market— it costs more than $6,000!!! But I want you to know that I like our Amish market very much! The food is good, the quality is good– everything is really great about it— I just couldn’t afford to buy furniture there unless it is in the clearance section or something!!!
Hutch, AFTER!

Here it is! The bottom part of the hutch is all finished! I love how it turned out. This would make a great dresser or buffet, if I didn’t want to use the top part also.
The weathered finish was so easy to do by thinning the paint with distilled water. You can do this technic using any color, not just gray. Think picture frames, wall shelves, bookcases….
If you like how this project turned out, let me know!
What You Will Need to paint a weathered finish with Black Dog Salvage Paint
🛒 *SUPPLIES YOU WILL NEED TO PAINT A WEATHERED GRAY FINISH ON FURNITURE:
*Affiliate Links for products help us run this blog and make videos. Thank you for your support.
*Black Dog Salvage Furniture Paint: Dirt (brown) Galvanized (gray) Black Dog (black) Guard Dog topcoat in Satin *All of these can be found at the link above! Use coupon code B420 to get 20% off your order! Made in the USA!!
*Paint Brush The brush that allows me to paint for hours without hurting my wrist!!
*TSP


Hi Liberty! Just wanted to tell you how much I love this transformation! I love the color you chose it’s so pretty! I’m a fan of Black Dog Salvage Furniture paint too! Great job! Donna
Thank you, Donna! They are a great company!
I SO relation to losing the Dirt. I’ve yet to find some clothing labels that I put away thinking I was putting them in a strange place. One day they’ll come back!
😊 I’m glad you understand!!
Good morning. Black Dog paint is so good! Thanks for sharing.
I’m glad you liked my post, Linda! Thank you!