
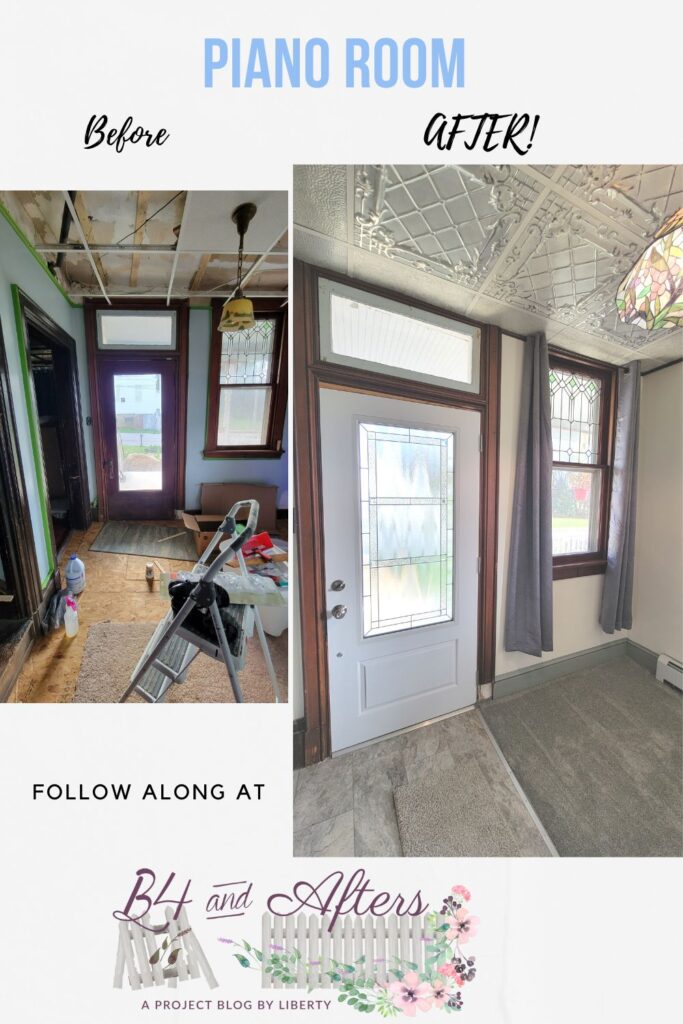
Piano Room Renovation Before and After
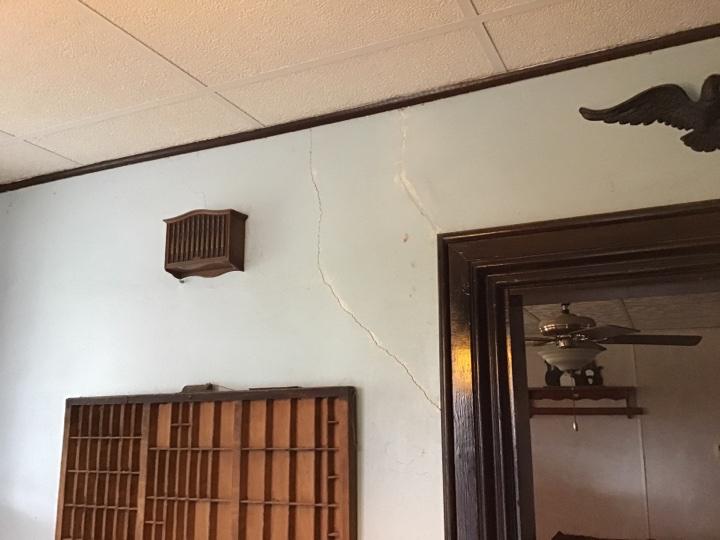
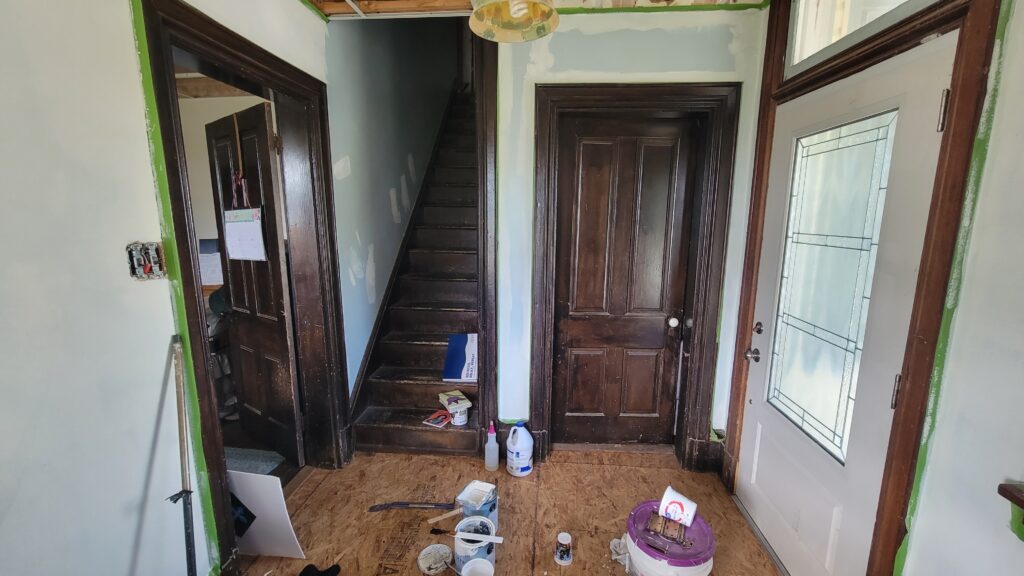
This is an overview of what our Piano Room looked like before we renovated it. While it is the smallest room in the house at 7×8 feet, it needed a ton of help. It also was a key turning point in getting the rest of the rooms organized.
This was because the piano was sitting in and crowding the living room. I realized that if I could finish the piano room and get the piano moved in there, that not only could I begin giving piano lessons again, I could also get our living room in order. With the piano out of the living room, I would have room to move the couch in order to reach the windows to install curtain rods and curtains!
[We did have several delays. One began a month after I started working in earnest on just this room. I had an acute case of thyroiditis that lasted for several months. That slowed me down quite a bit. I was very thankful to get back to my full functioning strength when it was all over.]
Piano Room
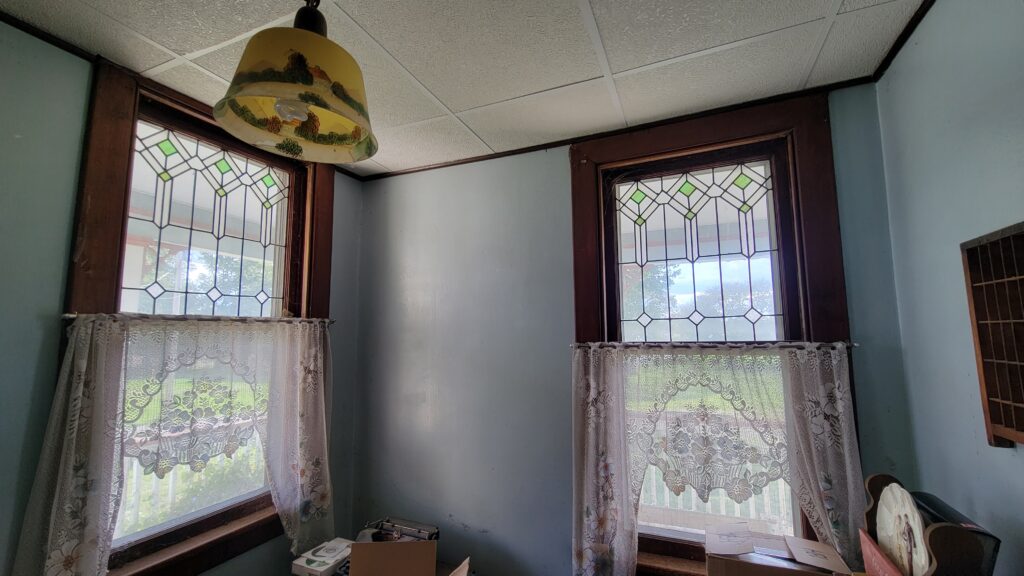
The piano room has the prettiest leaded glass/ stained glass windows. These curtains belonged to the previous owner.
As I give you a look at each room at Century Farms, I hope you will check out every room to see the difference! You can also see our month-to-month progress of the house as a whole while we lived in and renovated it.
I was not crazy about the light fixture or the drop ceiling. But that was not the worst of my problems in this room…. [The Ceiling is Gorgeous Now!!!]
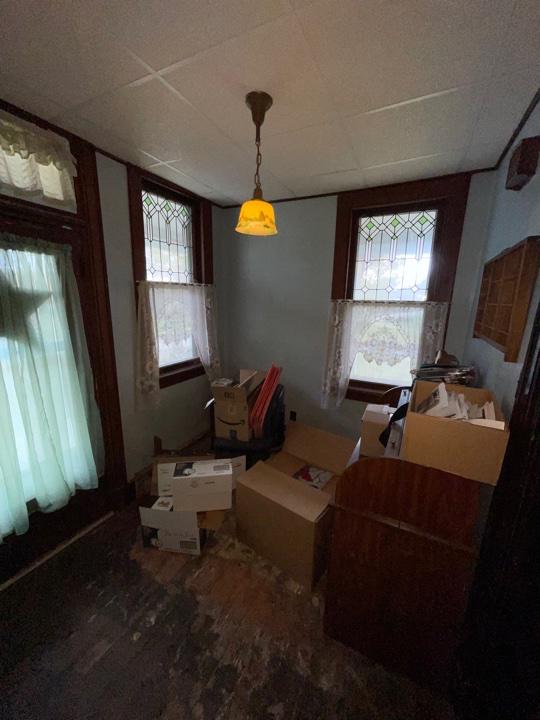
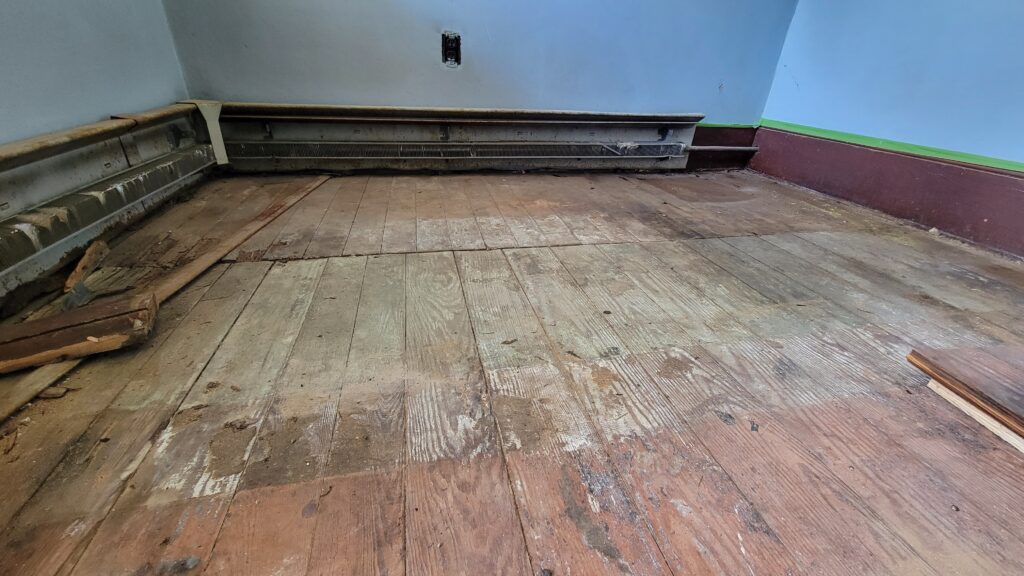
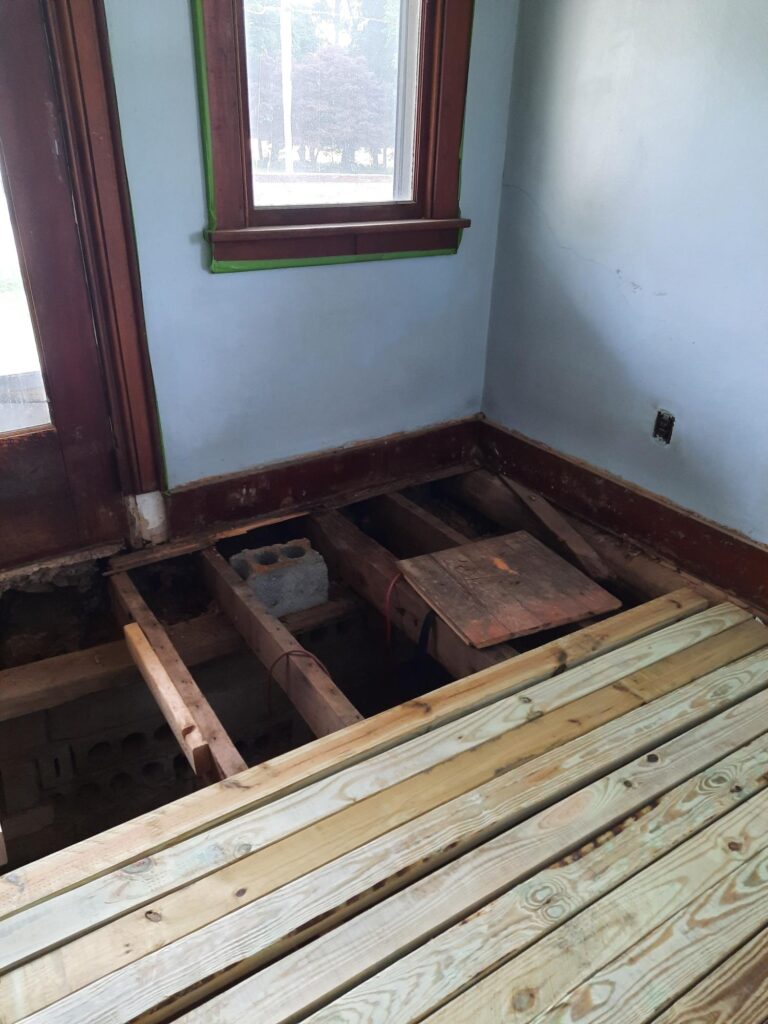
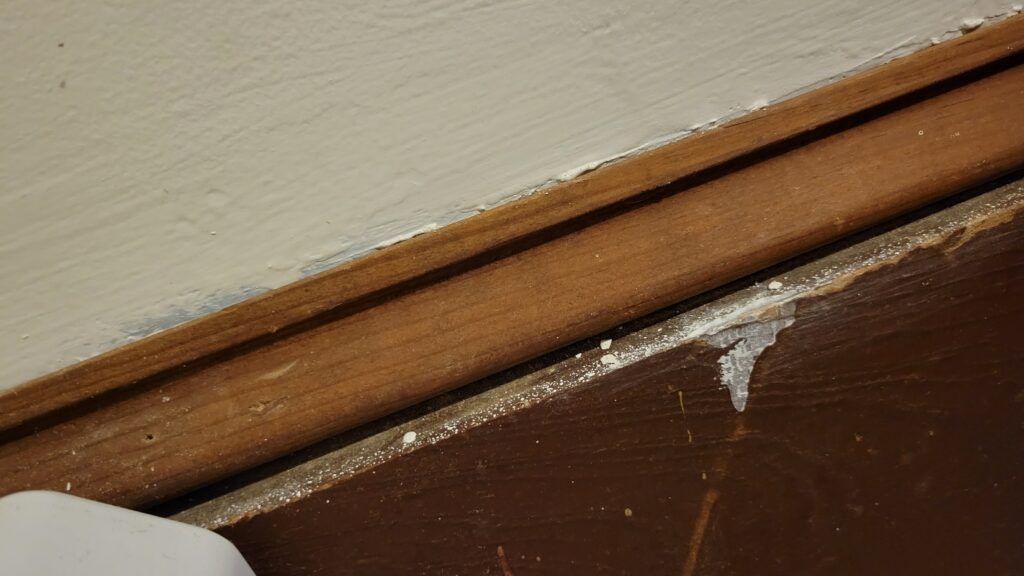
The wood floor was in terrible condition. It had some sort of dark stuff sticking to it, and several people who helped us work on the house spent lots of time trying to get it off. The baseboard heaters were in terrible condition, too.
And yet, that was still not the worst problem in the piano room….
Floor Replacement in an Old House
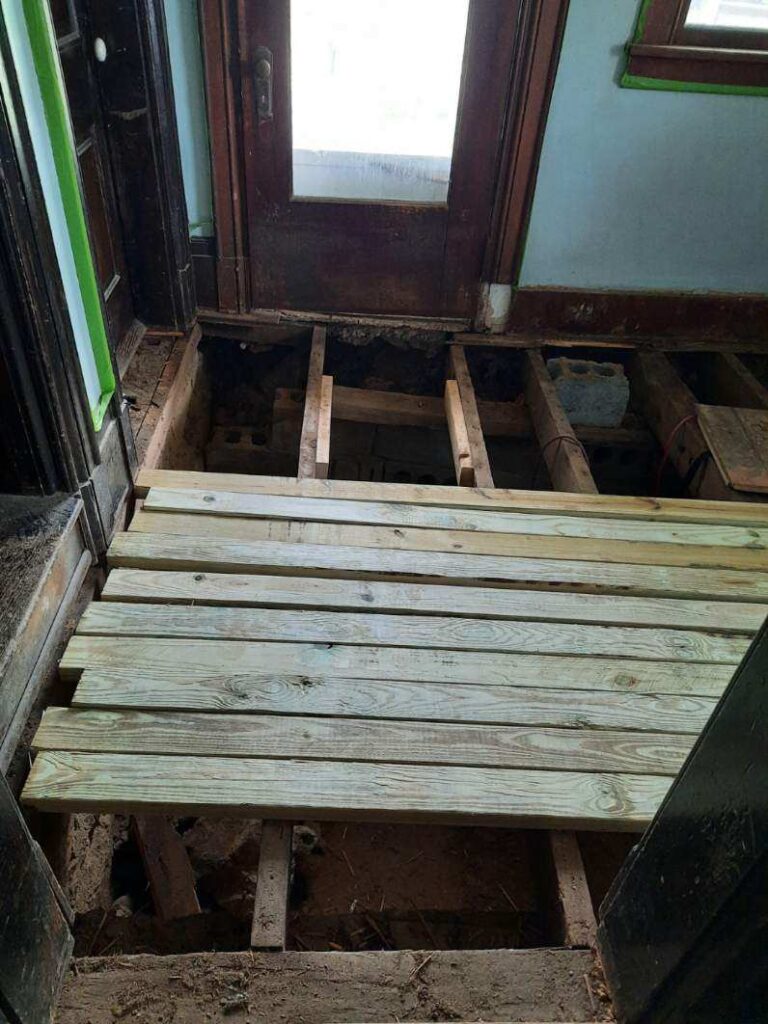
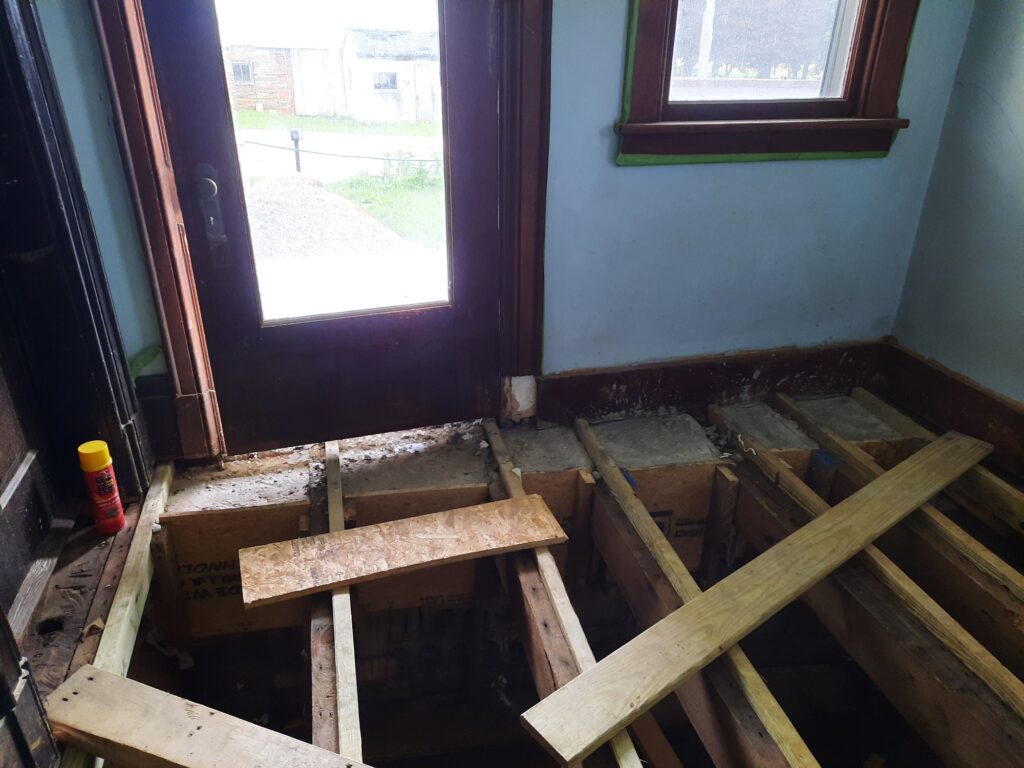
Five months into our house projects, a contractor was working on making this front door open and close without hitting the floor. He removed the threshhold piece below the door, and discovered that the beam that should have been supporting the wall where the door is— was loose, rotted, and basically non-existent.
Even crazier? The water pipe for the heating system was in this unaccessible part of the house. What if there was a leak? Or what if it had frozen?!

Well, that all explained why the door wouldn’t swing properly….
The timing ended up working out really well for us because we were planning a trip out of town. While we were away, a concrete contractor who also happens to be a neighbor, was able to put a concrete wall underneath the floor to support where that beam should have been.
I was disappointed that the original wood floor was going to have to be removed. But all along I had been wondering if that floor could have supported my piano. It was a crooked floor, and now it would become a new, level floor strong enough to support my piano.
The two by fours were all attached to the orginal joists in a way that leveled and supported the new subfloor.
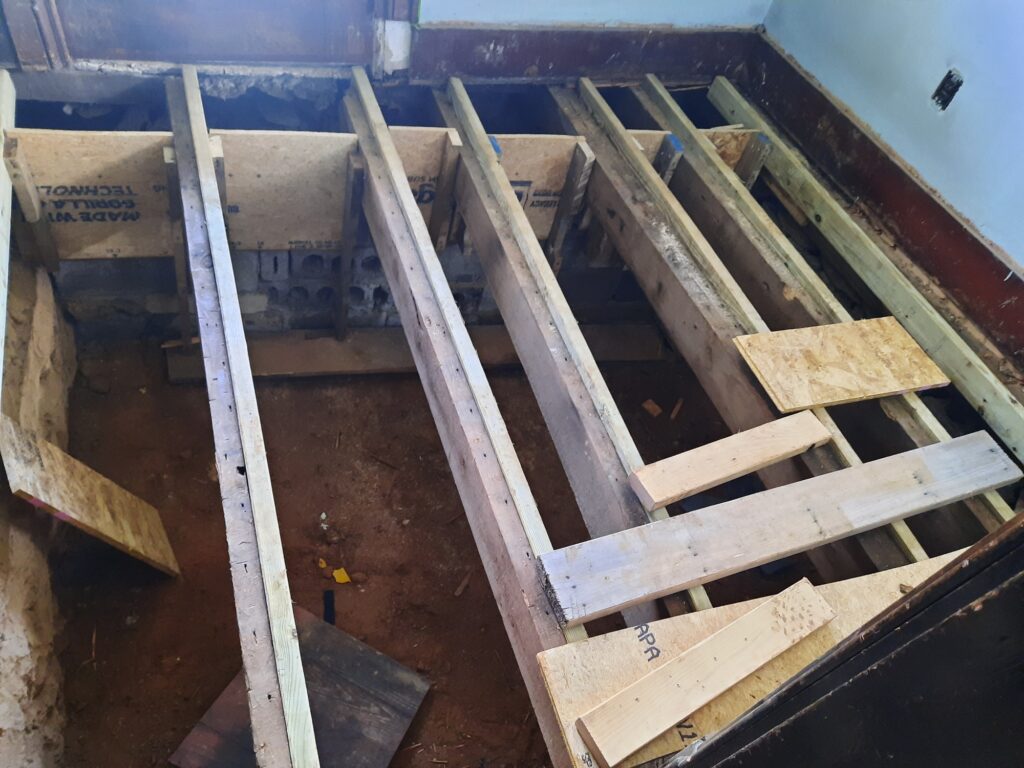
And a strong concrete wall was built.
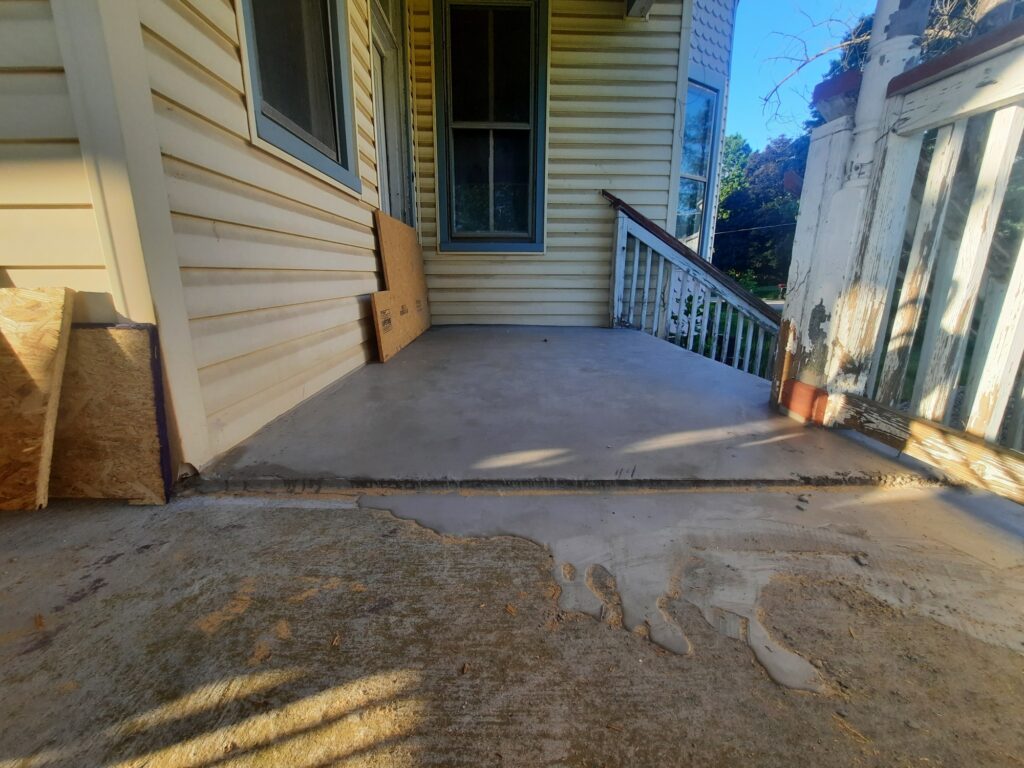
The porch was also leveled outside the front door, so that rain water would now flow away from the door. It had been determined that rainwater flowing in, had probably caused or at least expanded the problem.
What a lot of trouble just to get a door to swing, don’t you think?!!! While it wasn’t a project we expected, we are glad to have it all fixed, to avoid a bigger problem in the future. We also hope that we don’t find any more unexpected surprises like this one!
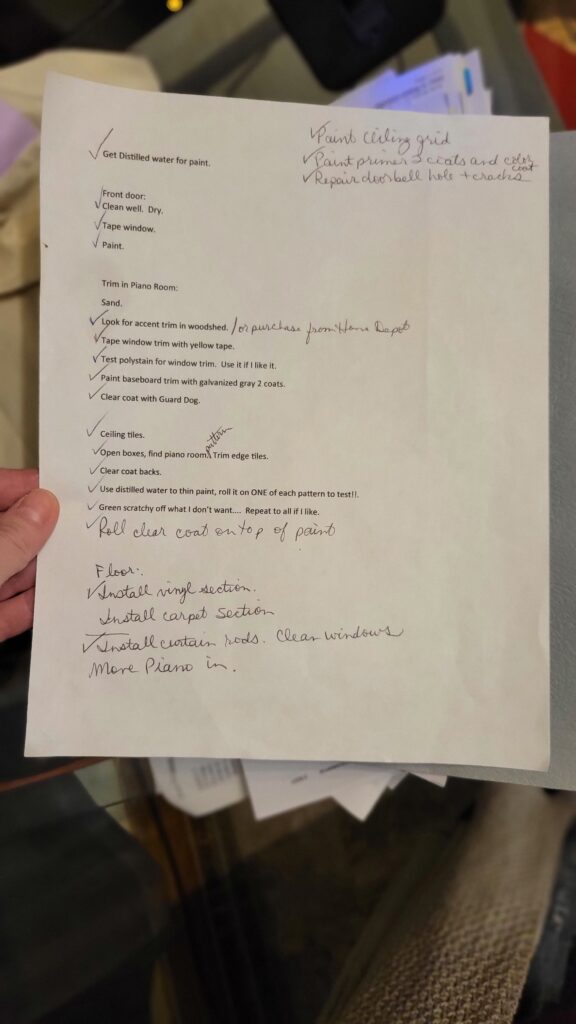
Well, at some point I made the list below of everything that needed done in the piano room. So many things to do in such a small room!!
Door Replacement in an Old House
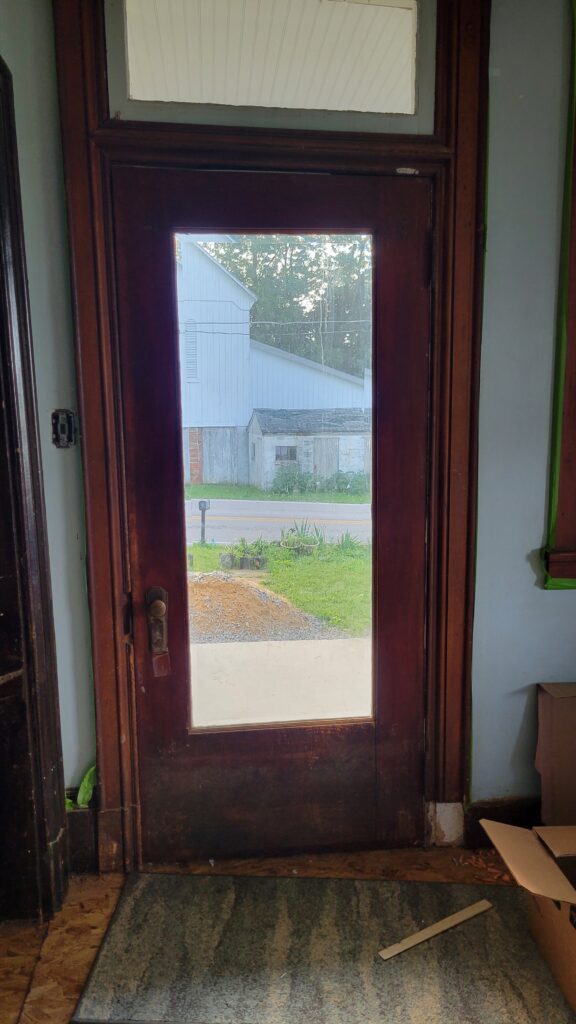
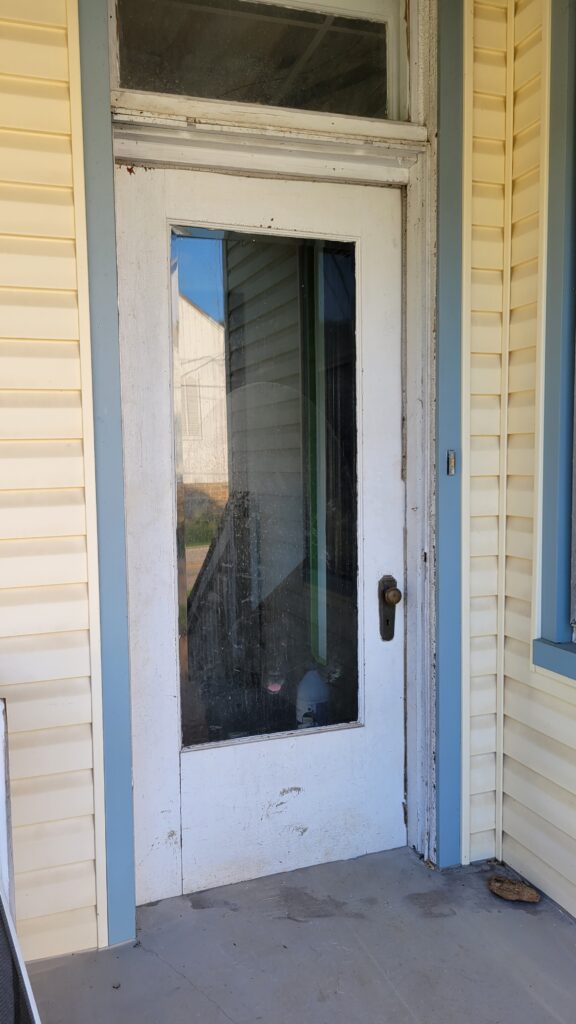
While the old door now swung properly, it still wasn’t ideal because it had an old fashioned skeleton key lock, and we didn’t have the key. It wasn’t secure at all…. so we ended up purchasing a new-to-us door from a second hand store.
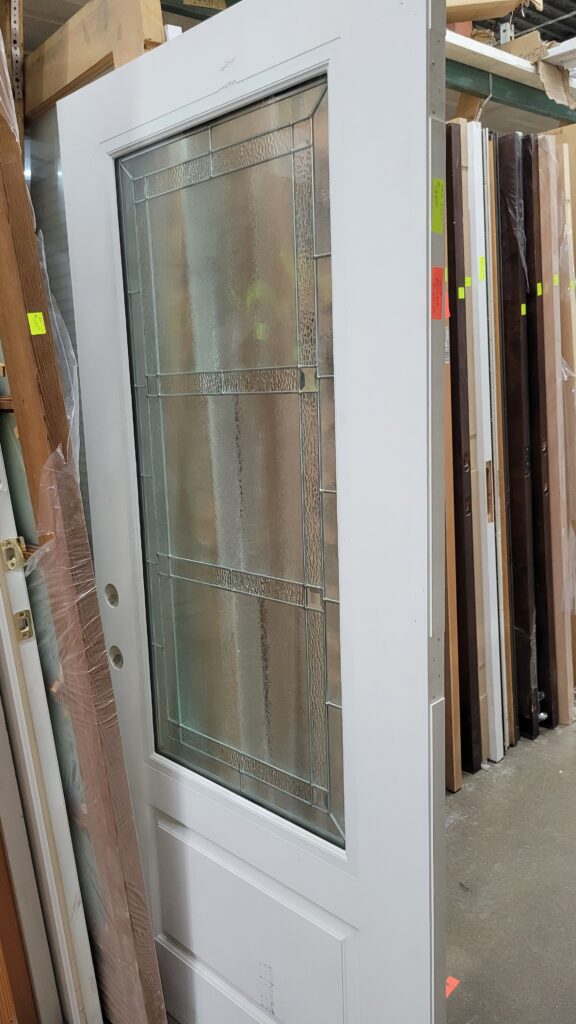
And after we finally found a contractor comfortable with installing it, we discovered why it was at the second hand store– ha ha! See how the holes do not line up for the handle/ lock set? Thankfully, our carpenter installer knew just how to fix it!
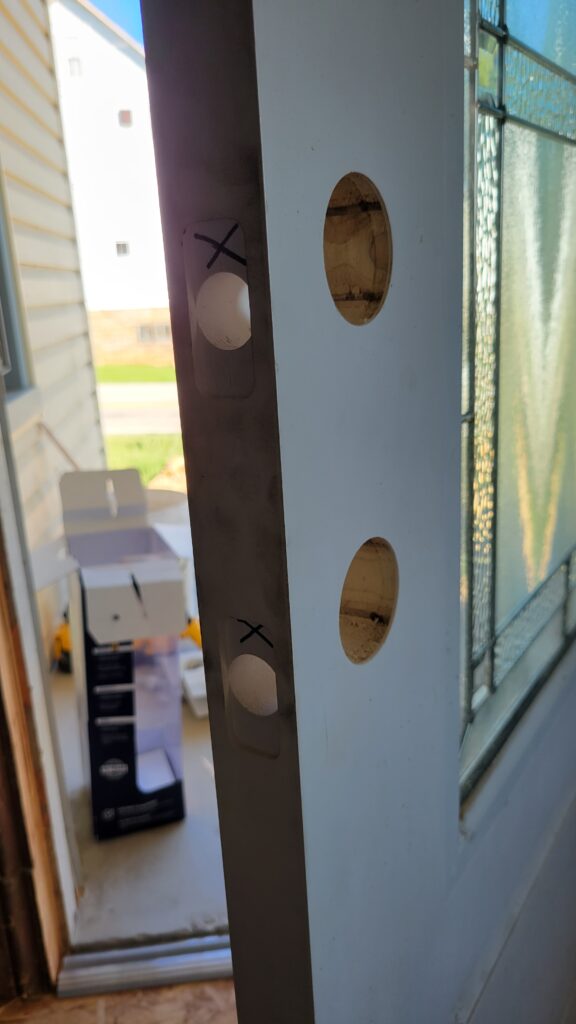
You might be interested to know that the knob/ lockset I bought for the door cost the same price as the door itself!
Since I hadn’t been able to paint the door before it was installed, I painted it on the hinges after carefully taping it. I received a box of Frog Tape a couple years ago, and I’ve finally used all of it!
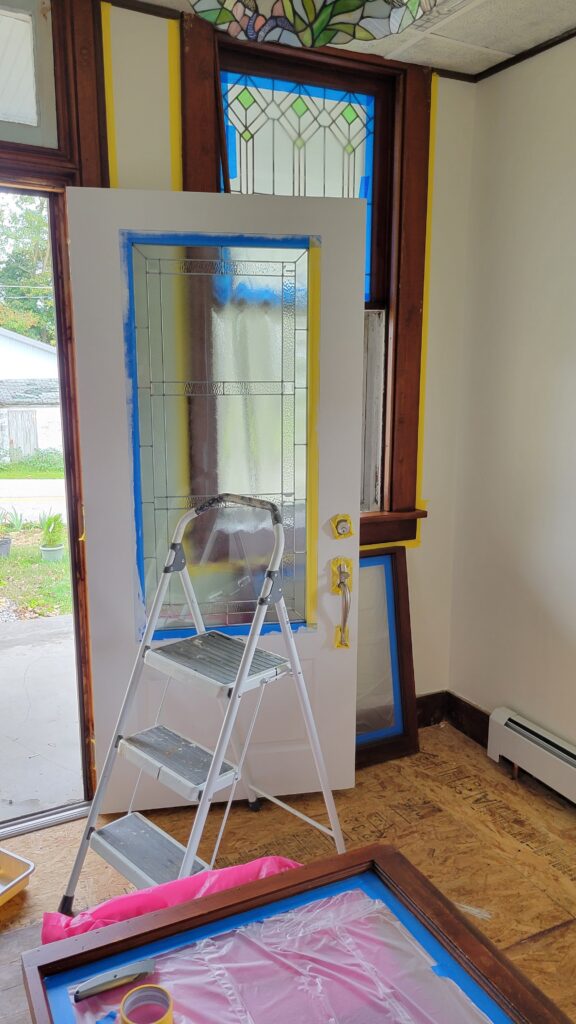
I had only painted a basement exterior door before, and I wanted this to look super nice. I’m glad that I chose Ace Hardware’s Ben Moore exterior soft gloss finish because it went on super nice with a roller. I used a Wooster purple velour roller and that really helped get a perfect finish.
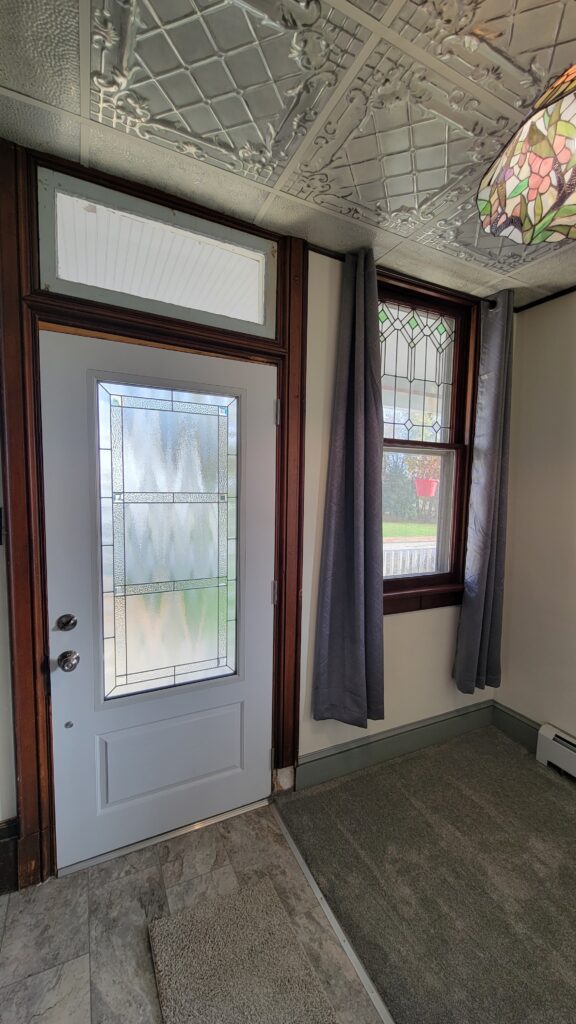
I think the new door matches beautifully with the windows and the look of the room…. something I didn’t really plan on! It’s so nice when good things happen like that.
Wall Repair in an Old House
So the walls in this room had badly cracked plaster– probably due to the rotten beam from years before. The box on the wall was a doorbell that no longer worked…
After removing the doorbell box, you can see how dirty the blue walls were… and that the doorbell box had been put on top of wallpaper long ago. This same wallpaper was in the dining room, living room, upstairs hallway, and also what is now our mudroom, I think.
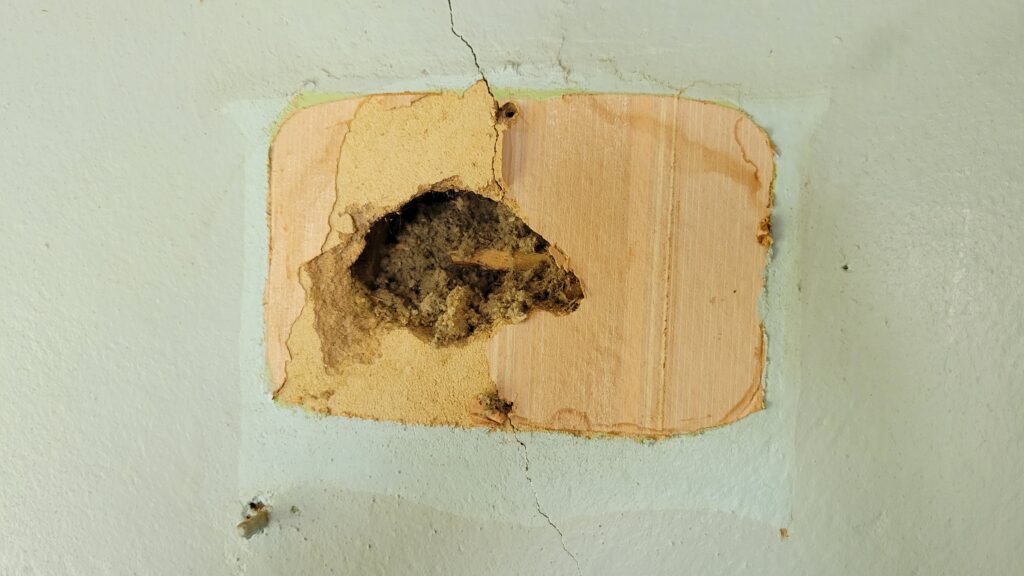
So I patched the hole and the cracks….
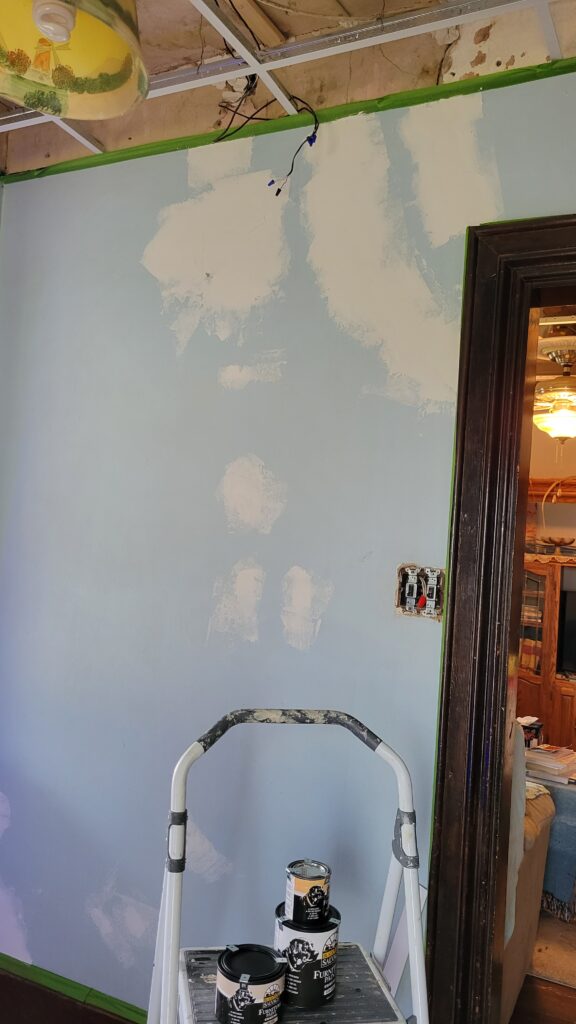
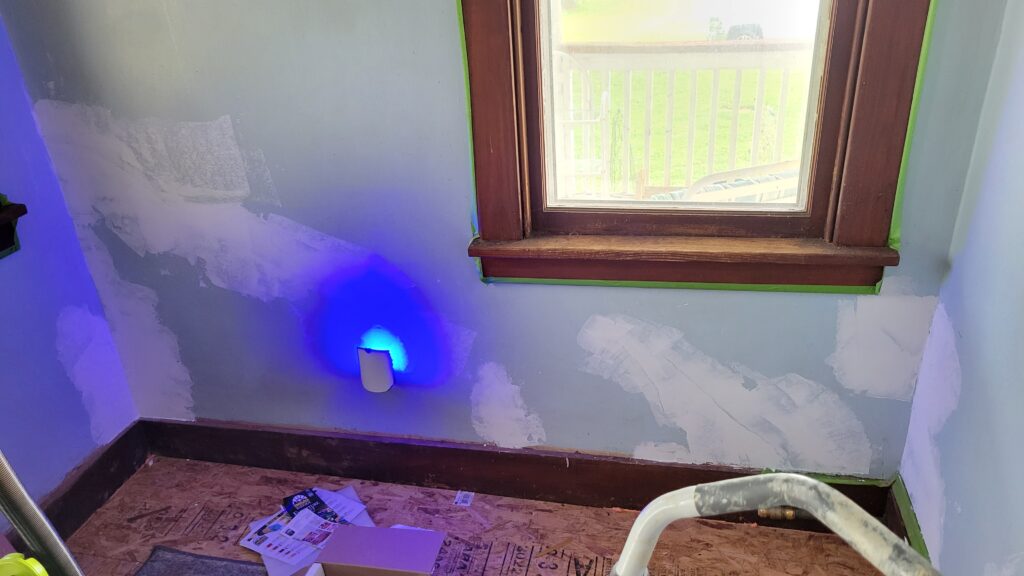
And finally started painting. You know, I can understand now why an estimate to remodel a small room might be high. I have no idea how much time I spent in this room…. How much do you think it would cost to redo this room from floor to ceiling if I had hired someone to do all of it?!
Here is a picture from one side.
And this is the picture of the other side.
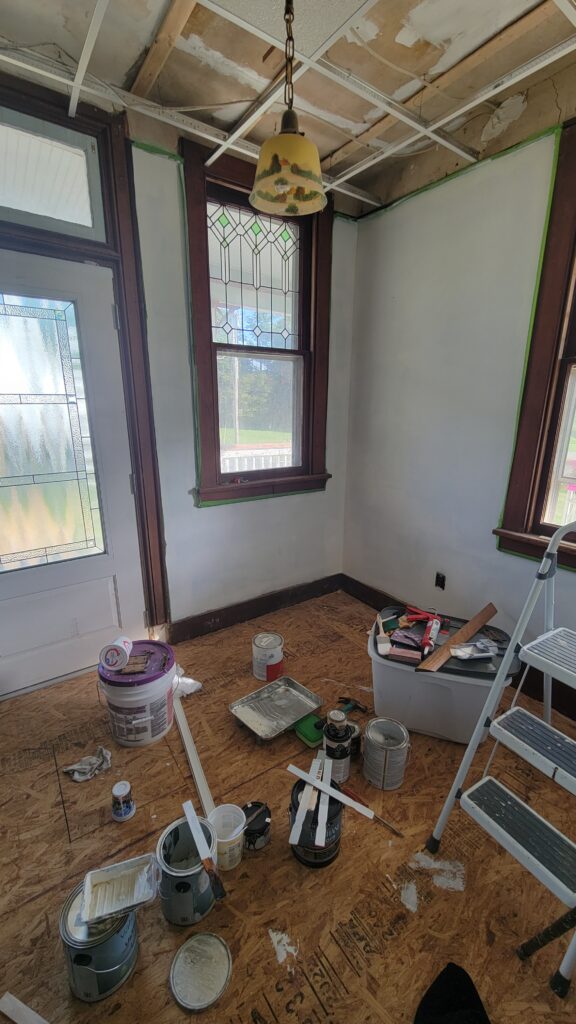
Windows in an Old House
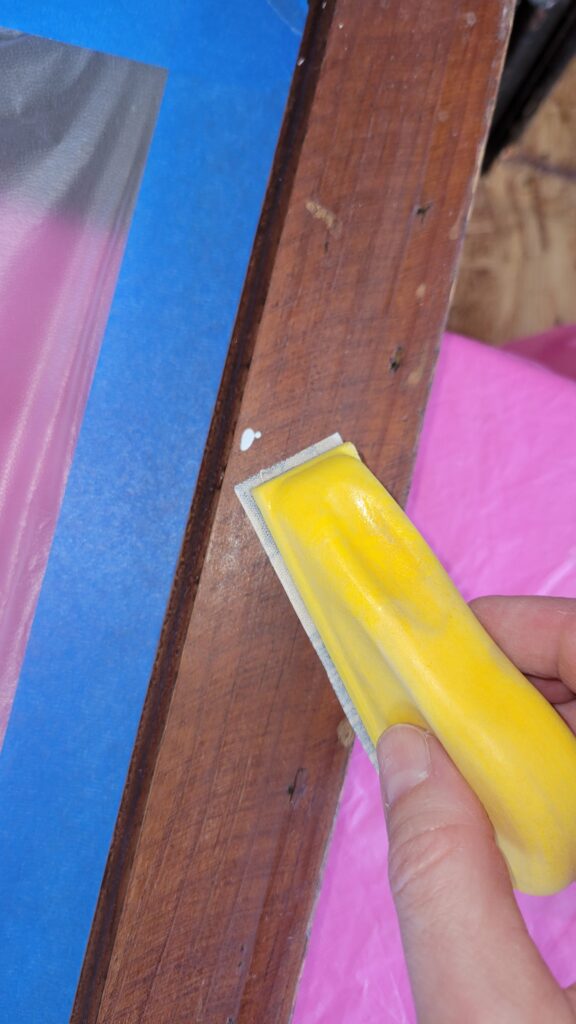
This room has 2 stained glass leaded windows in it, so I didn’t want to replace them. I did want to freshen up the trim though. So I took the lower windows out, cleaned them well, sanded them a bit, and put a satin topcoat on them. I’m glad I went to the extra effort to remove them, so that they still operate in the summer when we need a breeze (since we don’t have AC).
The little tool I am holding is a mini hand sander where you can change the smoothness/ roughness of the sandpaper. It is one of my favorite tools!
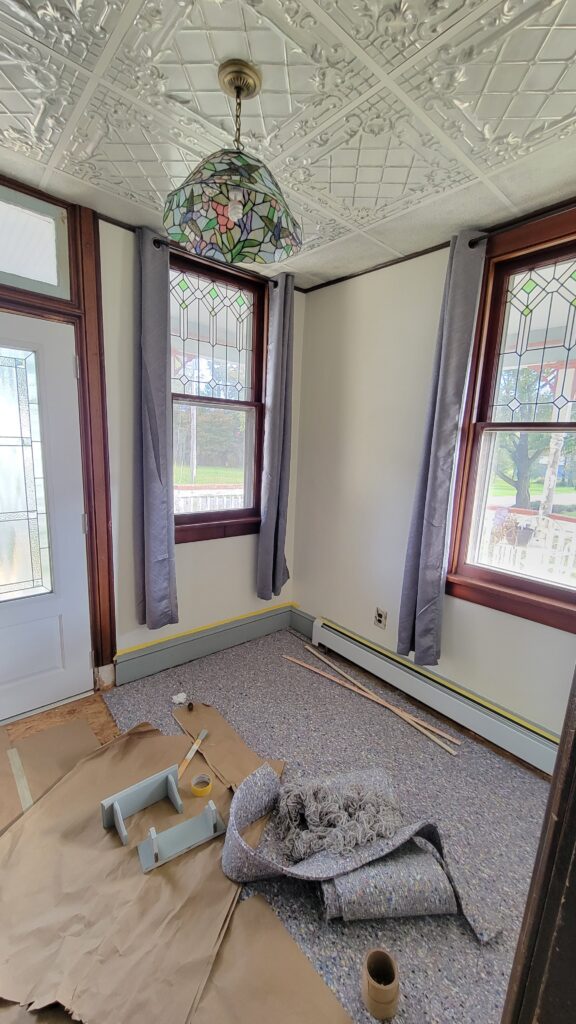
Tin Ceiling Panels
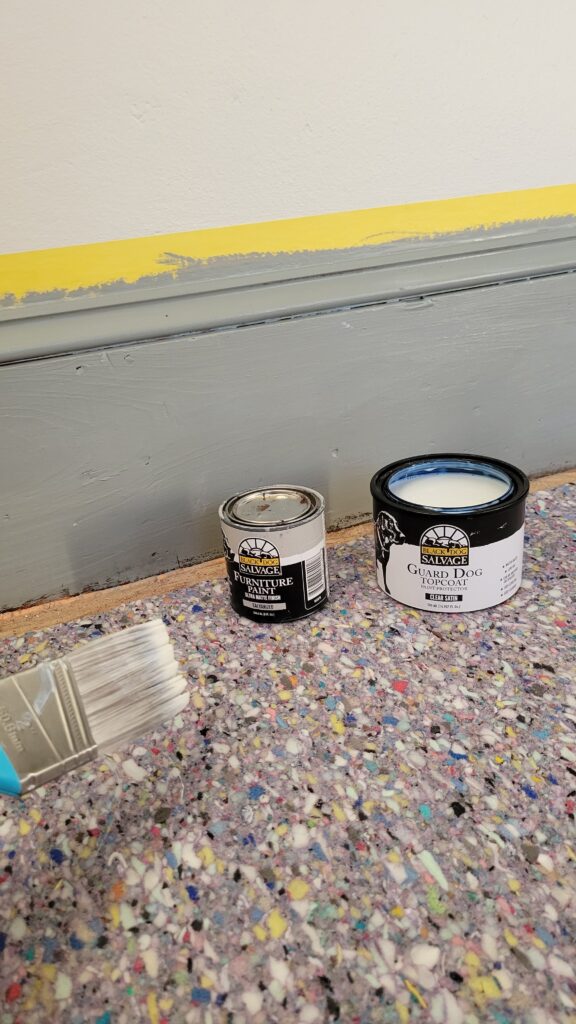
The ceiling is a story all its own— it was the first of 3 tin tile ceilings that I hand painted in the garage. I did each ceiling a different way using Black Dog Salvage Furniture Paint. [You can Use my Coupon Code B420 to get a 20% off discount!]

Putting new Flooring in an old house
The baseboard had been painted, and a decorative piece added on top.
But one side didn’t have the decorative piece, and I was glad to find a good match for it at Home Depot.
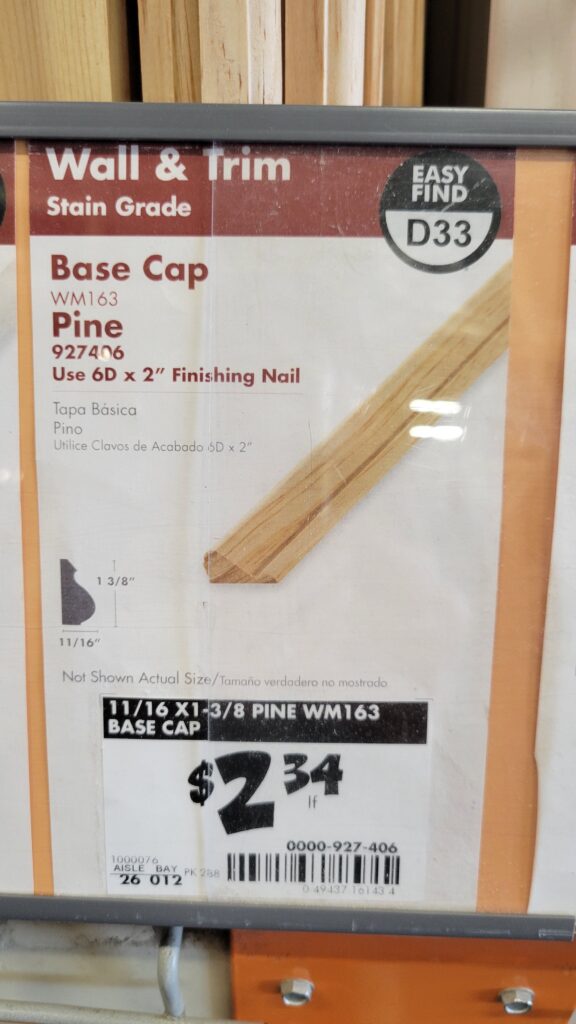
A few finishing nails later, and I was able to paint the baseboard. I had a small can of Galvanized Gray from Black Dog Salvage, and so I used that to go with my gray flooring.
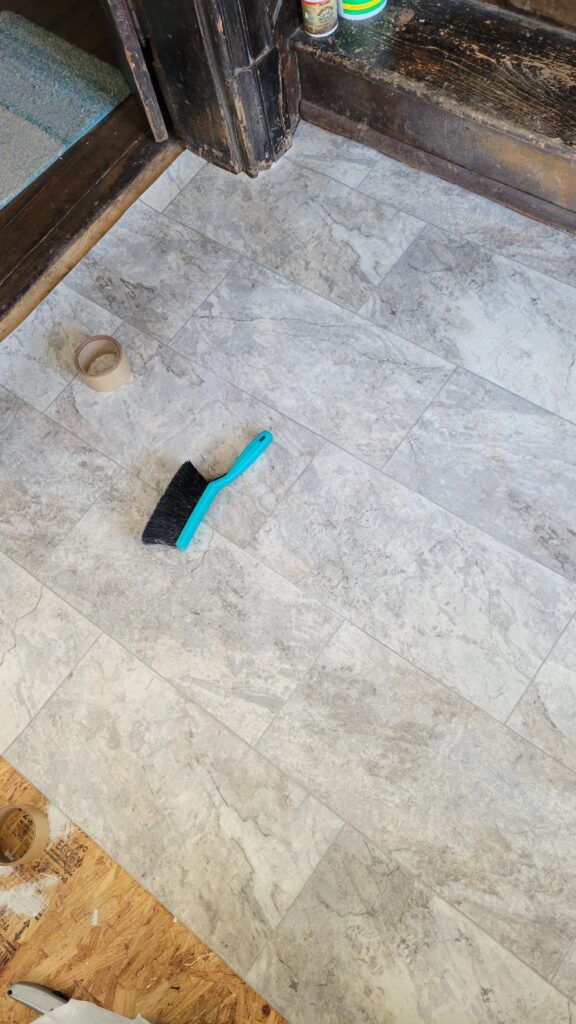
Sheet Vinyl Installation
I decided to put sheet vinyl in the part of the room that would get a lot of traffic from the front door. And I wanted carpet on the piano side. I’m glad I went to the trouble of doing this in my tiny room! It has worked out perfectly.
My vinyl needed to go around a lot of tricky molding, so I was glad when I found our contour tool.
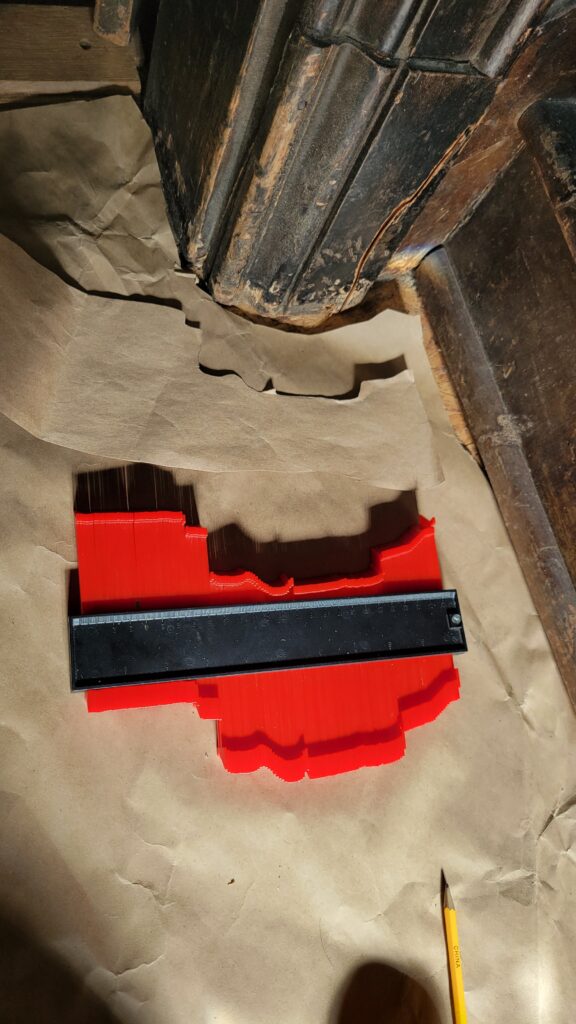
First, I carefully cut a paper template using some brown builder’s paper leftover from our upstairs bathroom. Then I carefully cut the vinyl from some bathroom/kitchen leftovers. That was scary because I didn’t have any extra if I made a mistake!
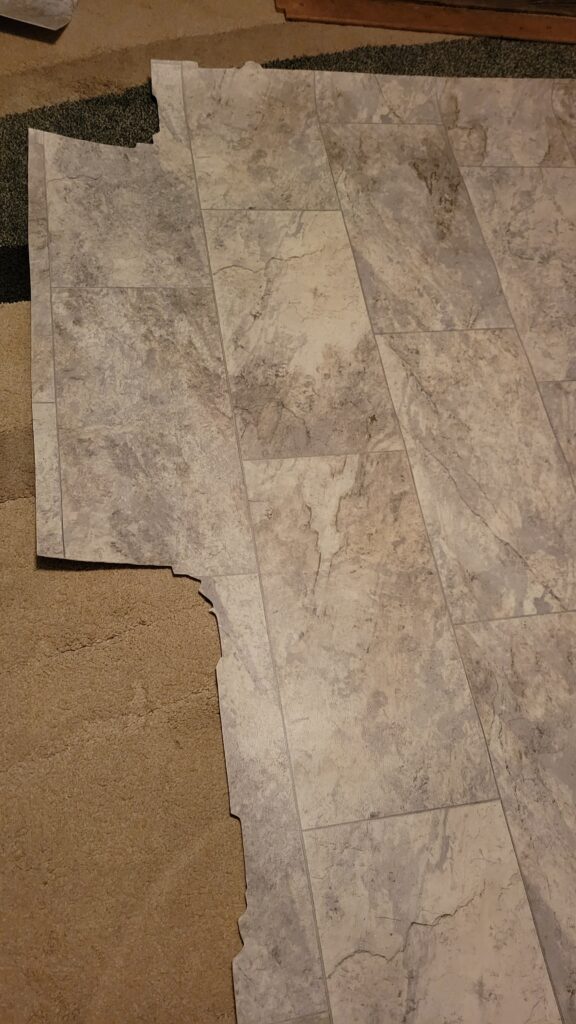
I still had to trim it a bit— which is always better than wishing you could stretch it– because you can’t stretch sheet vinyl!
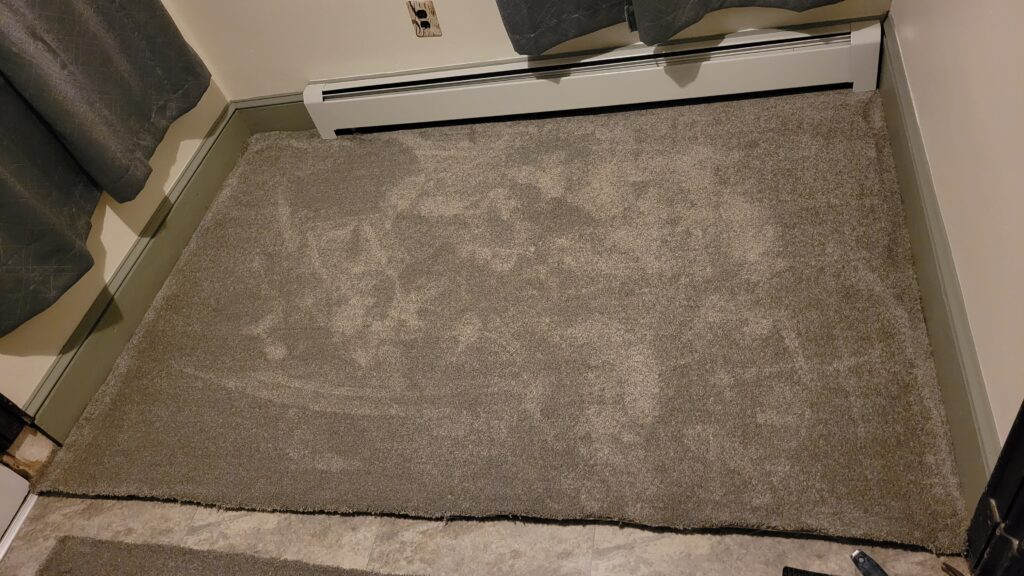
Carpet Installation
I installed the tack strip and stapled the carpet pad down.
I tried super hard to install the carpet myself, but I couldn’t get the waves out even with a borrowed knee kicker. So I ended up having to pay $80 to have a professional do it. Sometimes even us DIY-ers have to hire somebody— and in this house, we’ve had to hire quite a few people!
The professional carpet installer had to put longer nails to hold down the tack strips which were coming loose.
I knew I couldn’t have poorly installed carpet under my piano pedals. This way, if it comes loose, I will be able to call them back to have them redo it!
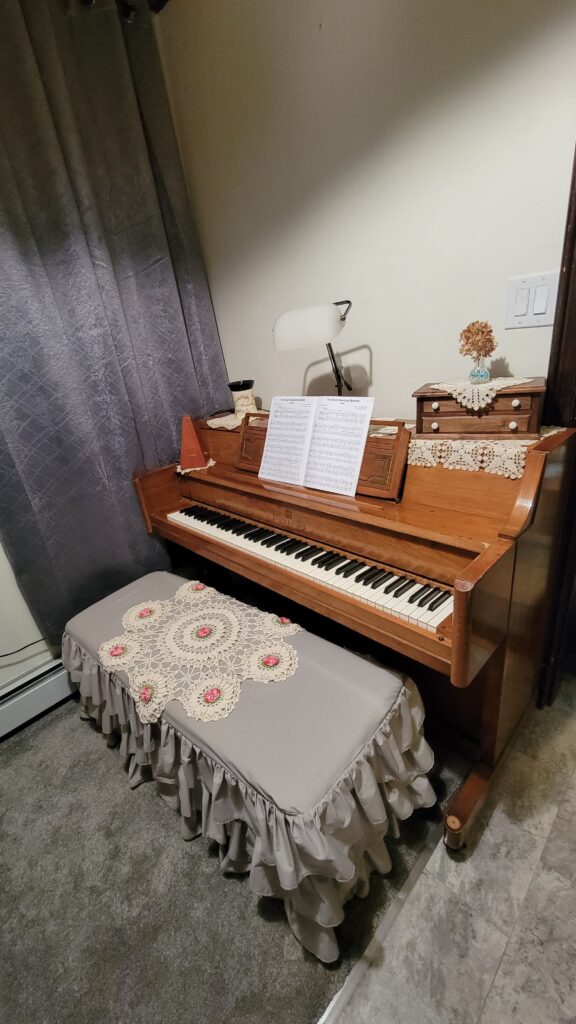
Piano Room Renovation
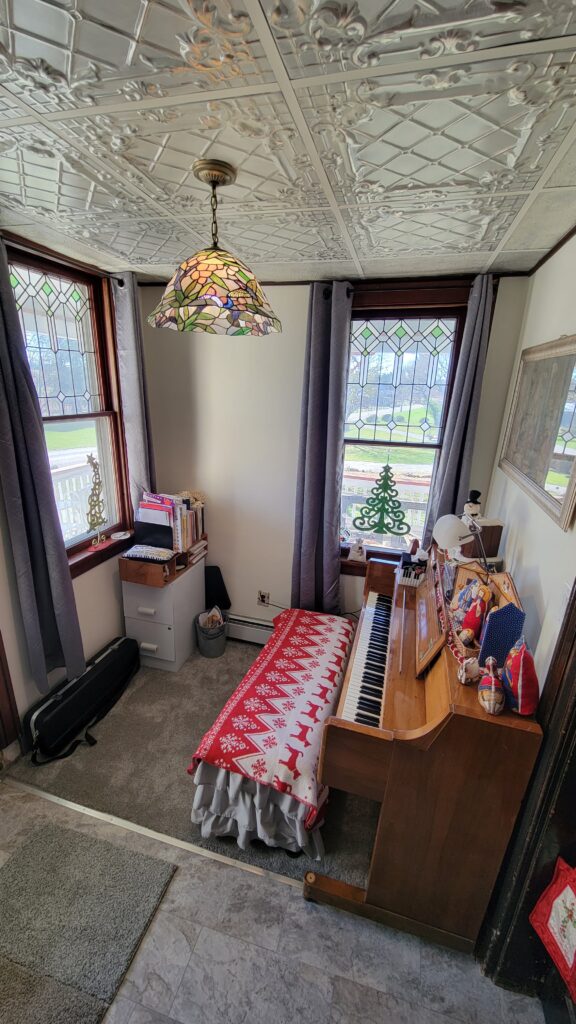
I finally finished the piano room! Friends helped my husband move the piano in, and I was able to host my first piano student just before Christmas, less than a year after we bought the house!
Here are a few video clips of the Piano Room in Progress.
Now I can finally turn my attention to other rooms at Century Farms!
You can see all of my released videos about Century Farms here.


Cleaning up and renovating old homes is an adventure. Good thing you found that floor/ door issue. We had someone do our renovations in our old house at different stages. So glad you saved the windows and found that door! Having a seperate entry for astudents must be a plus. Good job.
Thank you Linda! We are enjoying our adventure, but it sure takes a lot of time, $, and energy!
It’s mind boggling how much work a small room can take, but one thing always seems to lead to another. Congrats on getting it done to your liking, and for all that hard work you accomplished on your own!
Thank you, Amy! Right now I may envy you a bit at your FL condo, with probably no fixing up necessary! We had a city condo when we were first married, and I longed for a garden space. I surely have it now!
Love it!!
Thank you Cheryl!