
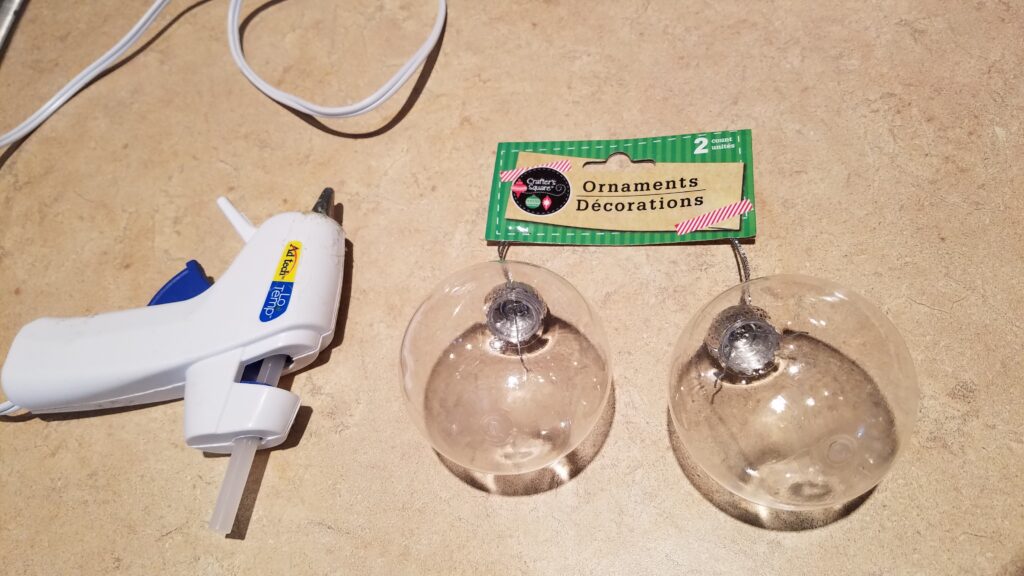
Clear Ornament Ideas
Here are some Clear Ornament Ideas for you to try!
First of all, let me say that if any of you know how to easily photograph Clear Christmas Ornaments, please tell me! I tried cloudy, I tried different rooms, I tried blocking out the light. Everything still left a glare on the plastic ornaments… Maybe if I had had a white umbrella?
Anyway, I think you will like these 5 ways to fill clear Christmas ornaments. My favorite is my variation of a ship in a bottle. I’d love to know which one you like best!
This is a DIY Challenge hosted by Terrie of Decorate and More with Tip. I’m so glad for these challenges– they are so much fun! And this time especially I’m grateful that Terrie had patience with me since I was the last one to get my project finished. Thanks for everything, Terrie!
I wasn’t sure what I would do, but as I thought about it one night, I actually came up with 5 different ideas for filling clear Christmas ornaments. If you are here from the House House Blog and you started at the beginning, then I am the last stop.
What Should You Put in a Clear Christmas Ornament
Clear Ornament Ideas
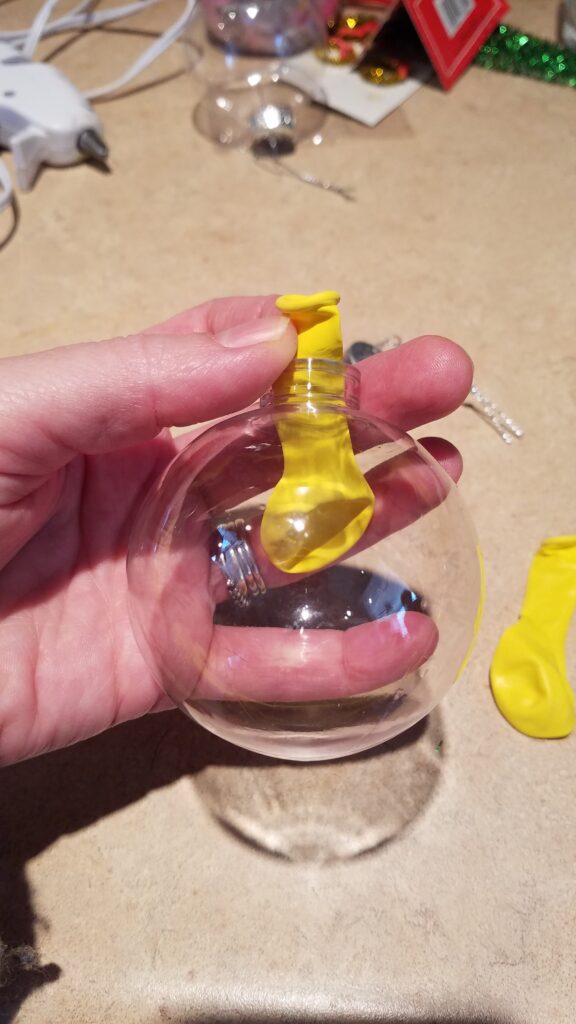
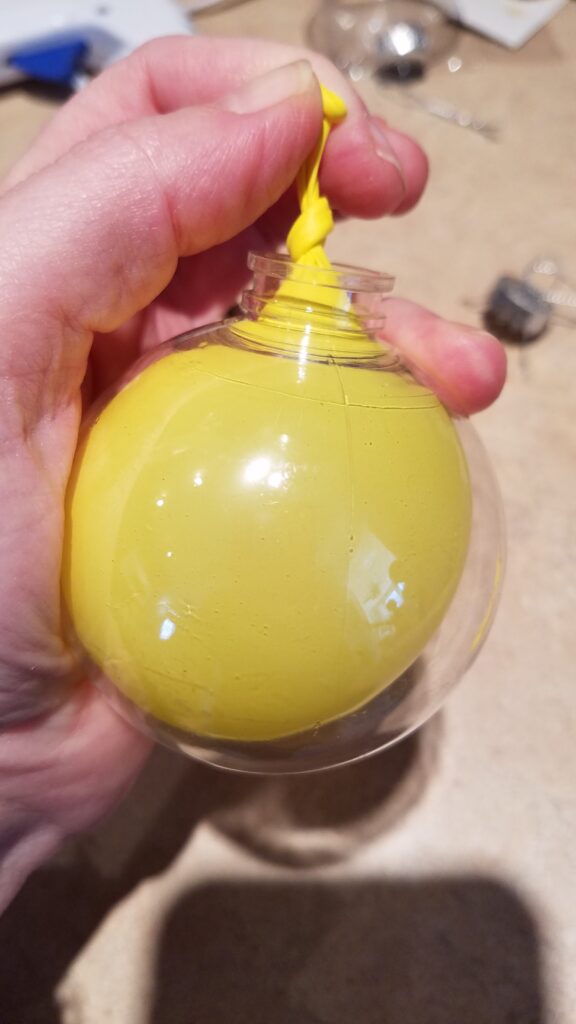
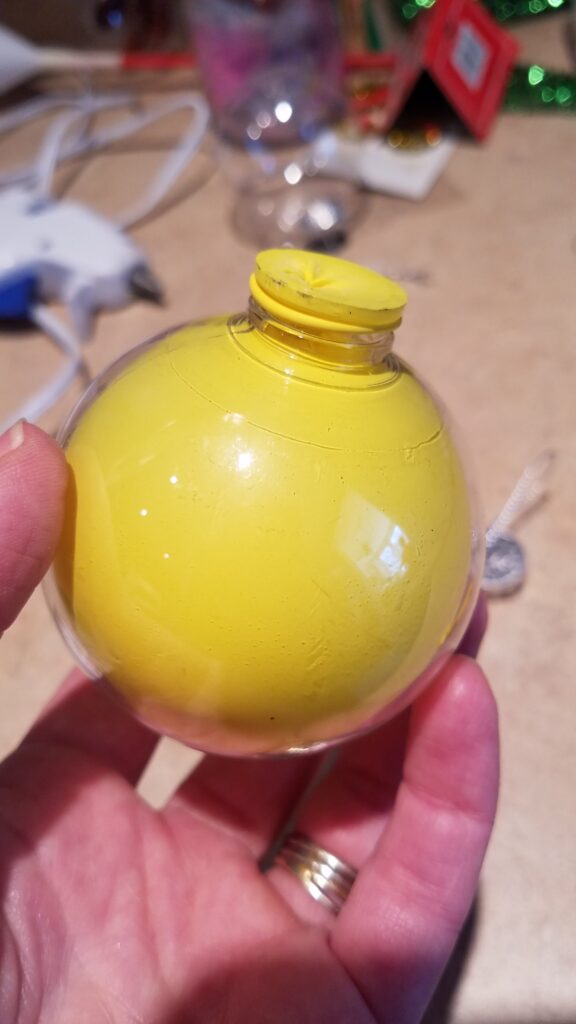
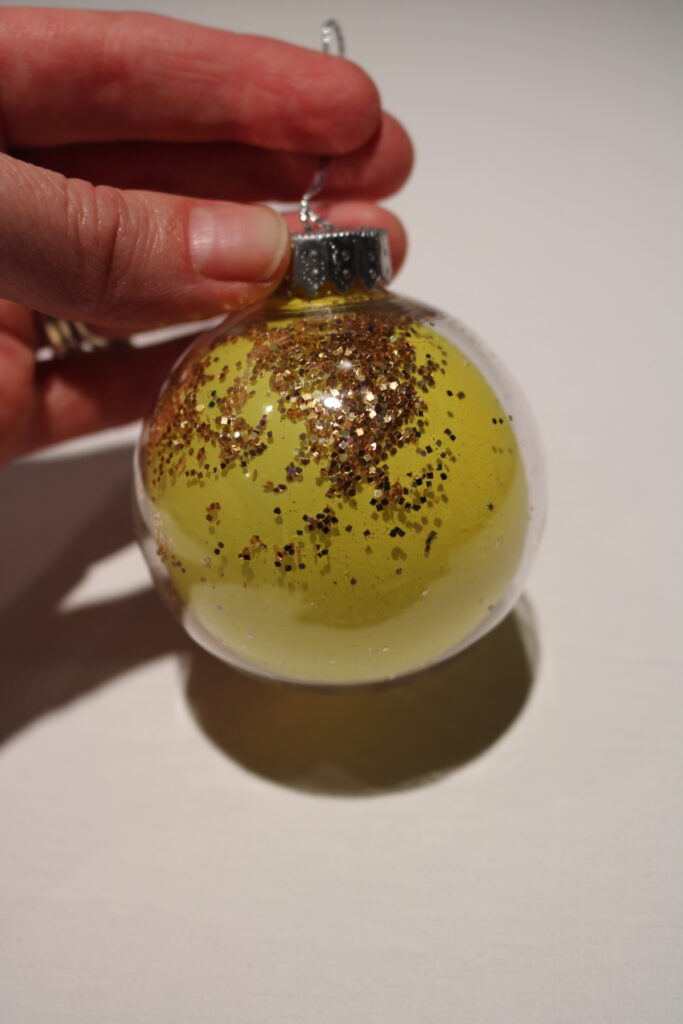
The first idea I am going to show you is very simple. I took a small balloon, inserted it into the ornament, and inflated it. I tied a knot, inverted the opening of the balloon, and put it on the edge of the opening of the ornament. Then I took out the wire piece from the cap so it would not puncture the balloon, and threaded the silver string back through.
After a few days, the balloon deflated. I had to puncture it to get it out and reinsert another balloon. The second time, I added glitter.
The balloon is an easy way to add color without painting!
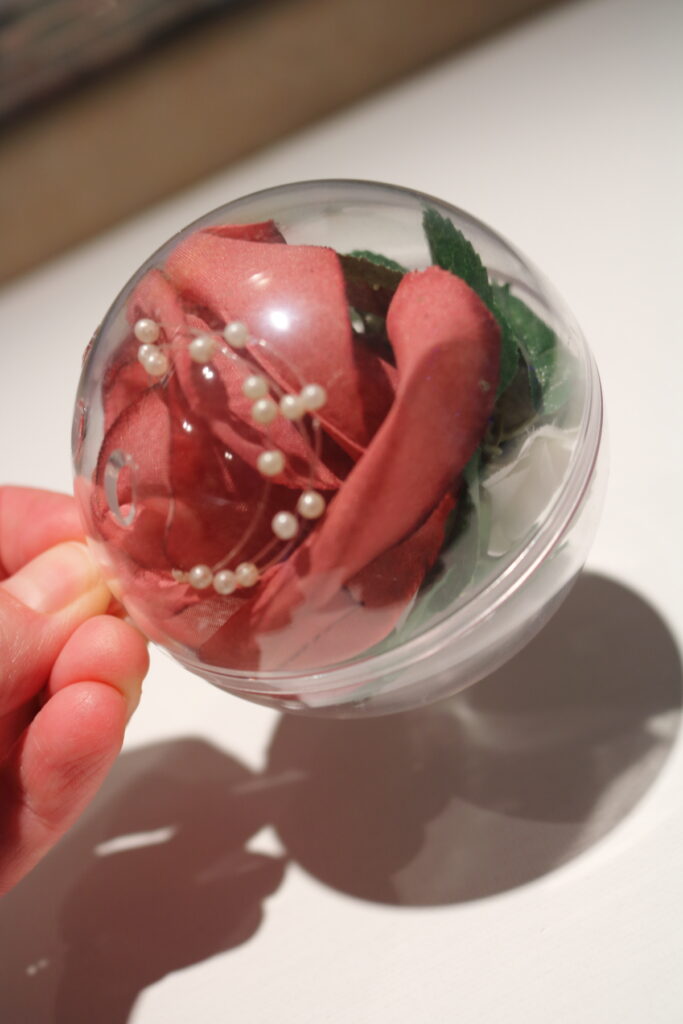
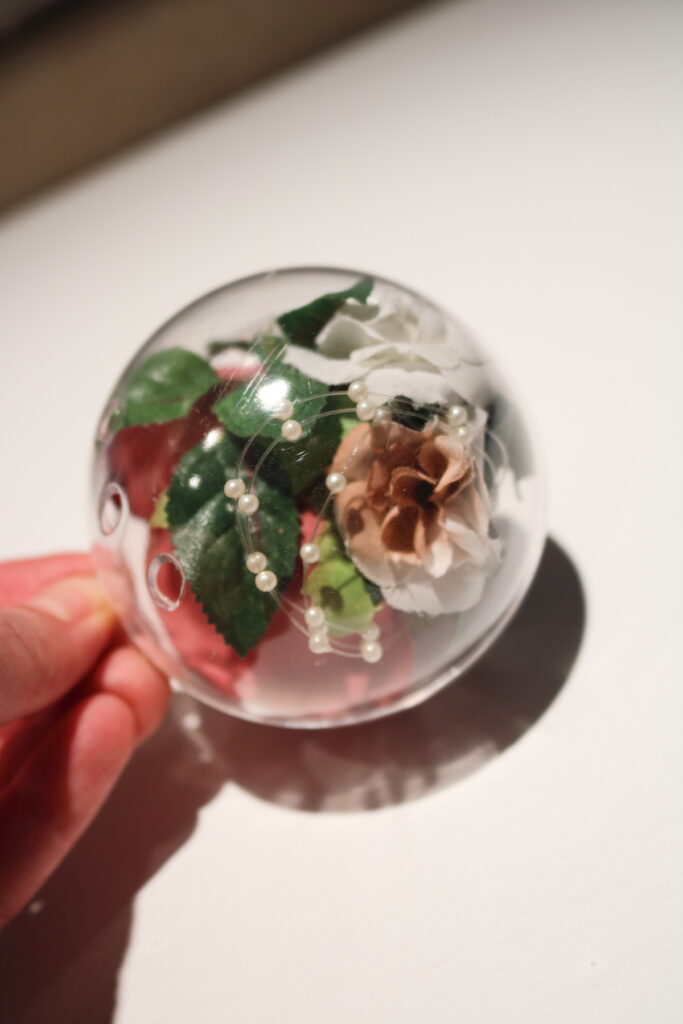
Clear Ornament Ideas for ornaments that split in half
For my second ornament I used the style of ornament that comes apart into 2 halves. Mine came with 3 holes on each side. I’m not sure why…. do any of my readers know why?
I have saved some bridesmaid bouquets for oh, only about 20 years. I used part of one of the bouquets to make this ornament. I started with the big rose and hot glued the smaller flowers and greenery to the underside of it. By making this ornament I can have a keepsake of that wedding/ friend, and not continue to save the entire bouquet. I can also protect it from dust by having it in the clear plastic ornament! (And now I can use the rest of the bouquet for other projects if I wish.)
Clear Ornament Idea using pine cones
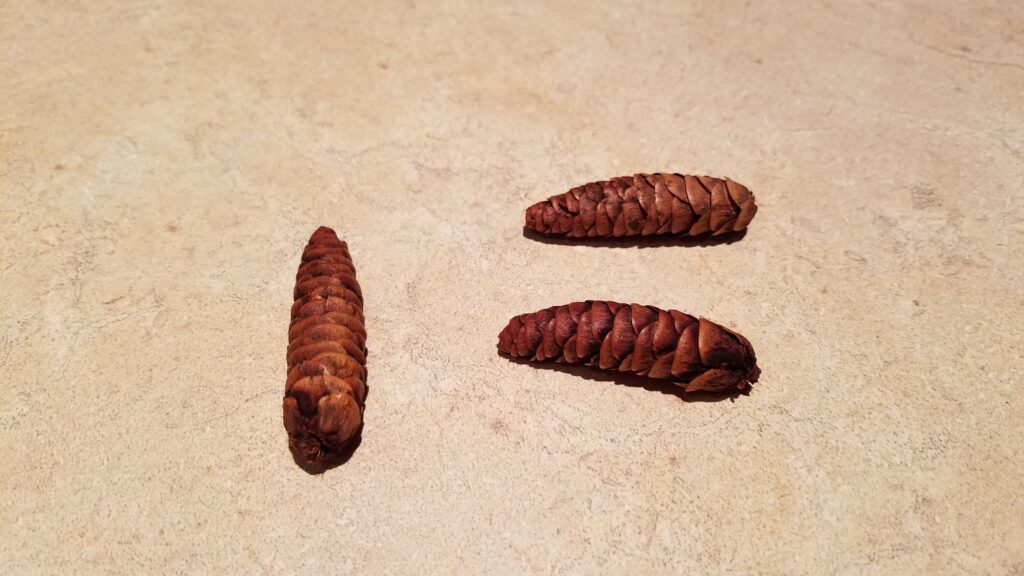
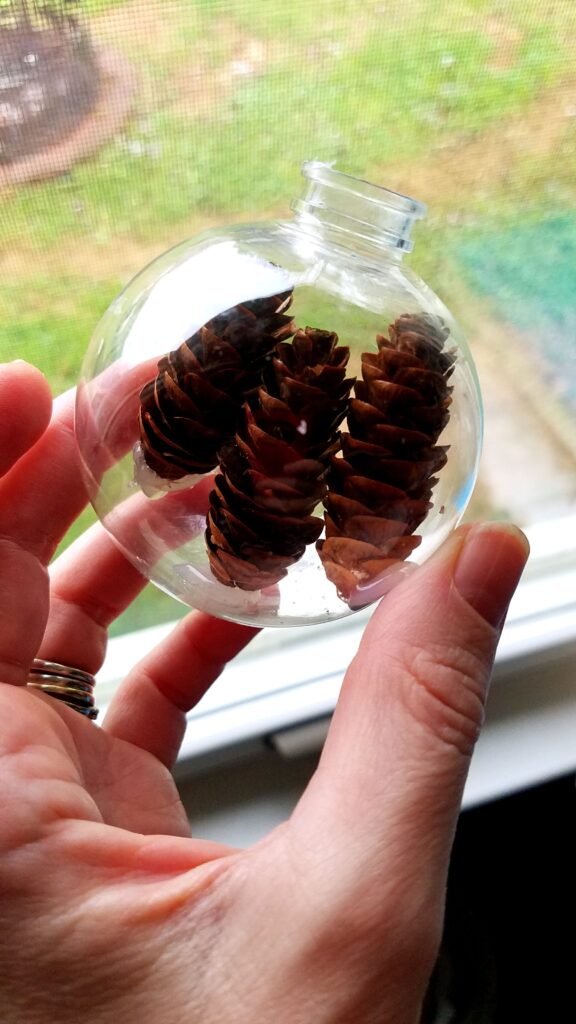
Okay, this one is my favorite clear ornament. I am so excited that this idea worked. Are you familiar with ships in bottles? Well….. I have put 3 miniature pine cones in an ornament!! While I would love to keep it a secret, the purpose of this post is to tell all the secrets, so aren’t you glad about that?
I knew that pine cones close when they get wet, and open when they dry out. I knew that when you wash pine cones, they close, and therefore shrink! What I wasn’t sure about, was whether my pine cones could dry IF I could get them secured into my clear ornament. I didn’t know if they might get moldy before they could dry… All I could do was experiment.
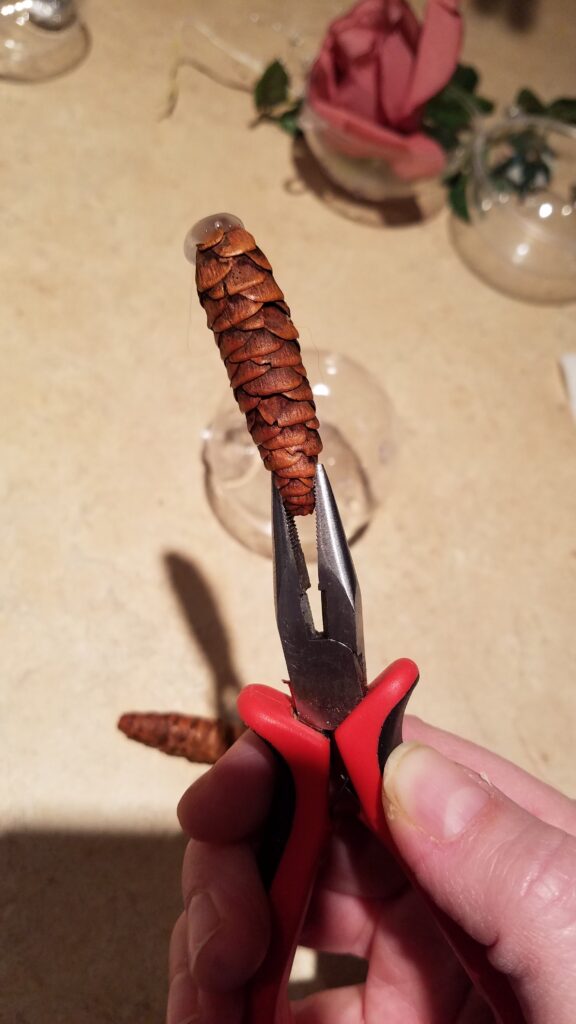
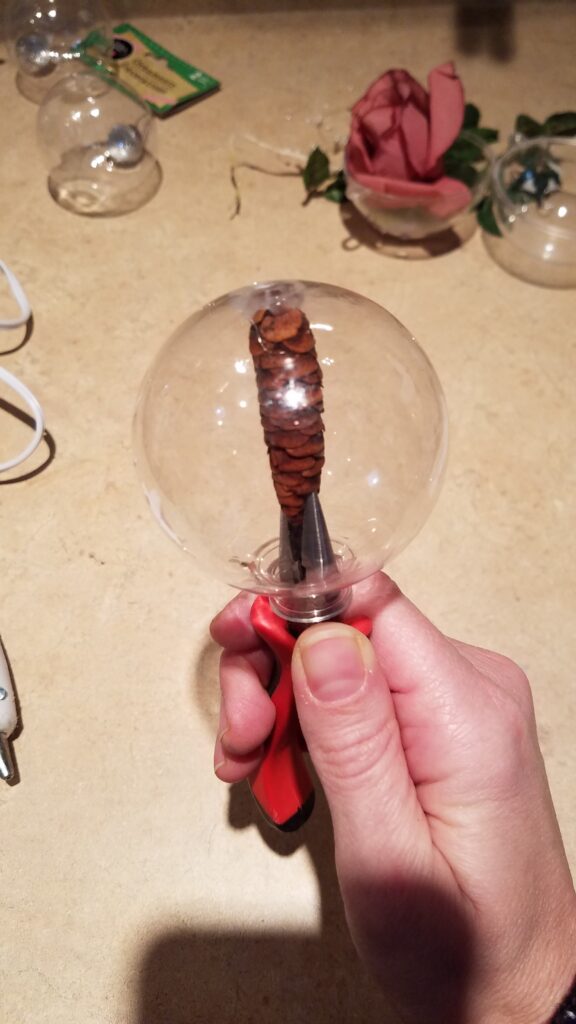
So I soaked 3 miniature pine cones, the kind I used on my miniature pine cone tree, and then I patted them as dry as I could. I used some pliers (I should have tried the ones I have that have a longer nose) to hold the top, added hot glue (snapped a quick picture for you!), and stuck the pine cone into the clear ornament while holding my breath.
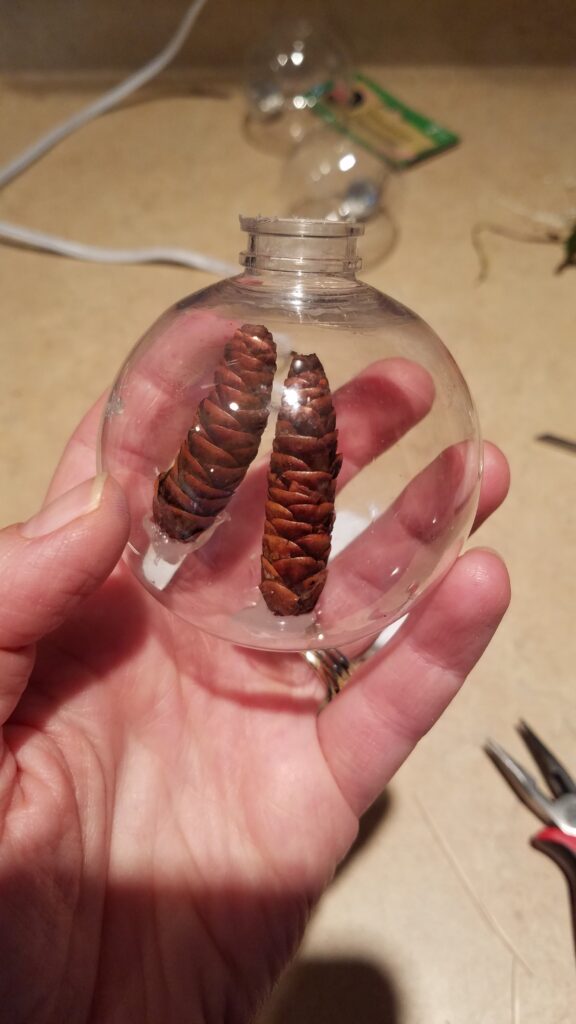
I held it there until the hot glue cooled, and was thrilled to see that my idea was working!! Then I added two more pine cones, but managed to get glue on the inside of one side, that I couldn’t get off. I tried using a toothpick and a Q-tip. If I made this again, I would first glue the side pinecones, and glue the middle one last instead of first.
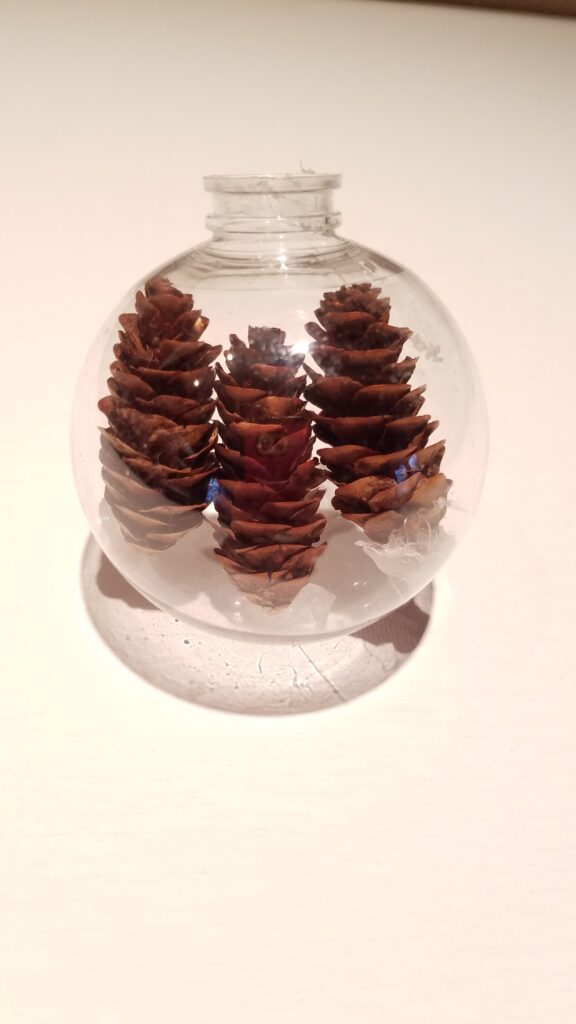
To try to accelerate the drying out time, I set the ornament beside my air purifier, on the side that pulls the air in. So I was not trying to blow air into the ornament, I was trying to suck the moisture out. After 3 days I was thrilled to see it was working!!!
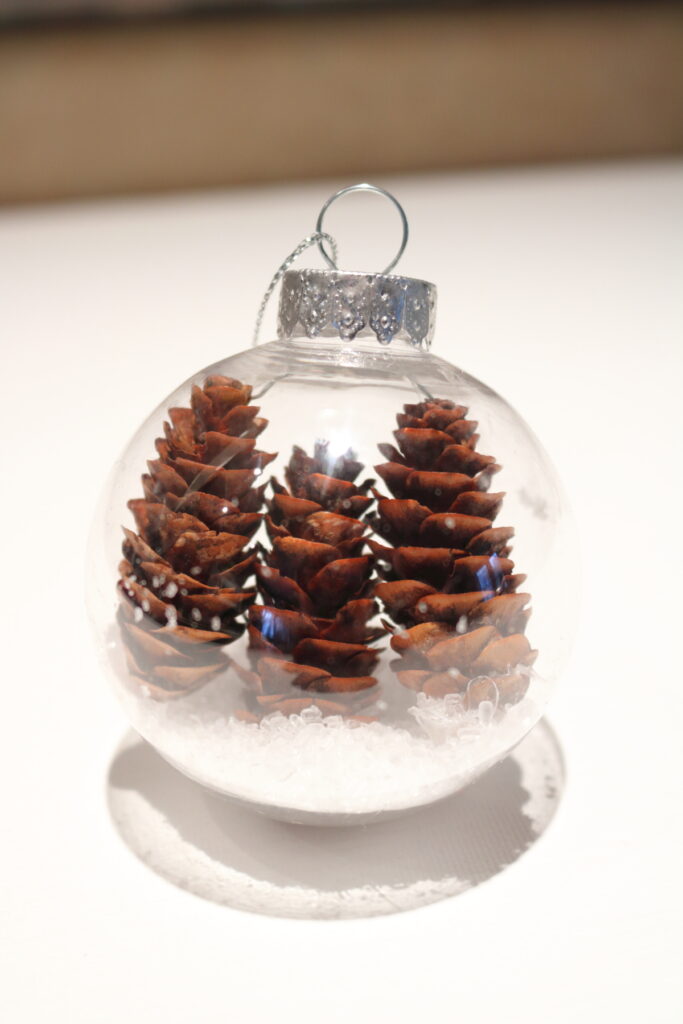
I waited a few more days until I thought they would be completely dry, because I wanted to add Epsom salt for snow. If Epsom salt gets wet it will melt like snow, so I needed the pine cones to be completely dry.
So here is my version of a ship in a bottle, except it is a Pine cone in an ornament! : )
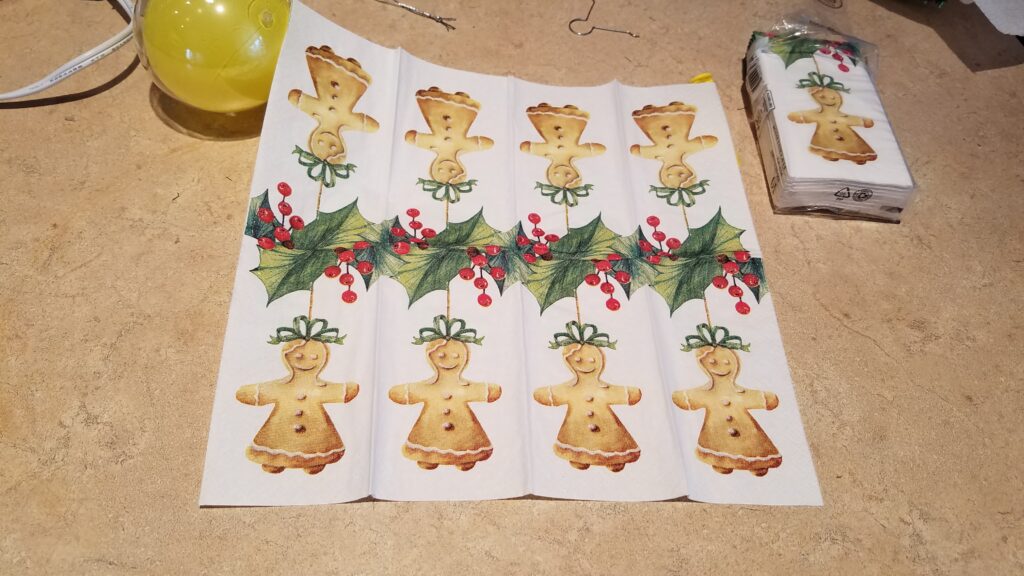
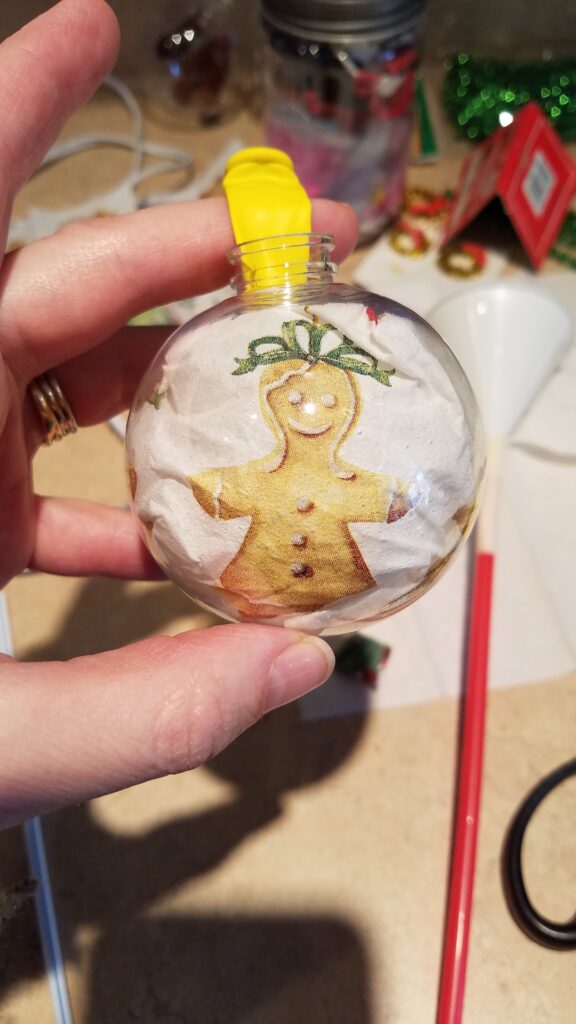
Clear Ornament Idea using napkins
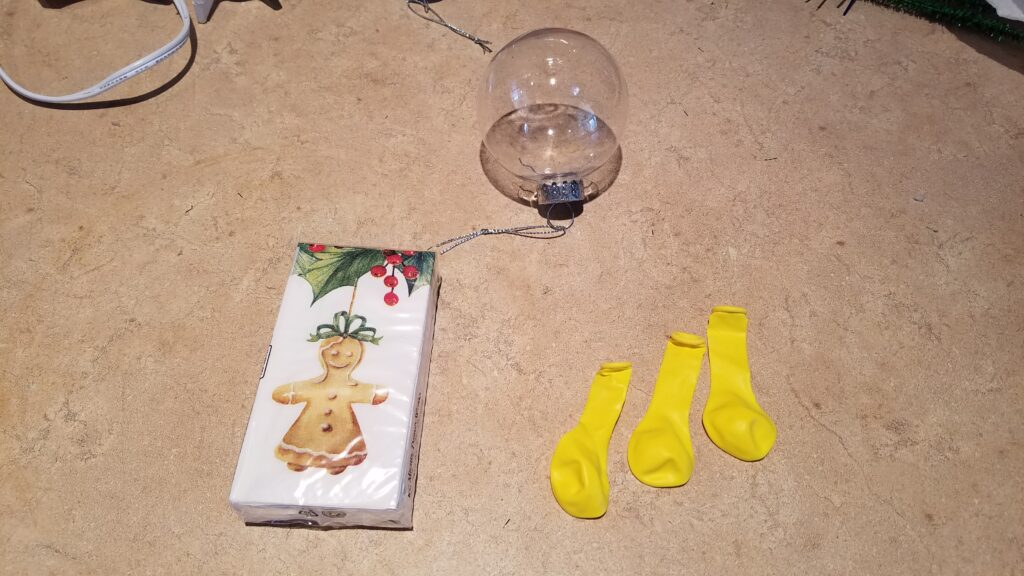
For my fourth idea, I used an unlikely item…. a kleenex tissue! I had found these cute gingerbread tissue packs for your purse, but I wasn’t buying them to use them for tissues. I bought them for crafting! I used the girl version— I bought the boy version too, so I could have made matching ornaments if I wanted to.
I was pleasantly surprised to see when I unfolded a tissue, that there were 8 of them! I cut it in half, and then trimmed the top off a bit to fit inside my ornament. It was tricky rolling the tissue up, and then trying to get it unrolled inside the ornament. It ended up being more crinkled than I would have liked.
Then I inserted the balloon and blew it up in order to push the tissue paper out to the edge, to take the round shape of the ornament. That worked like I hoped it would, and then I took the balloon out and the tissue remained in place.


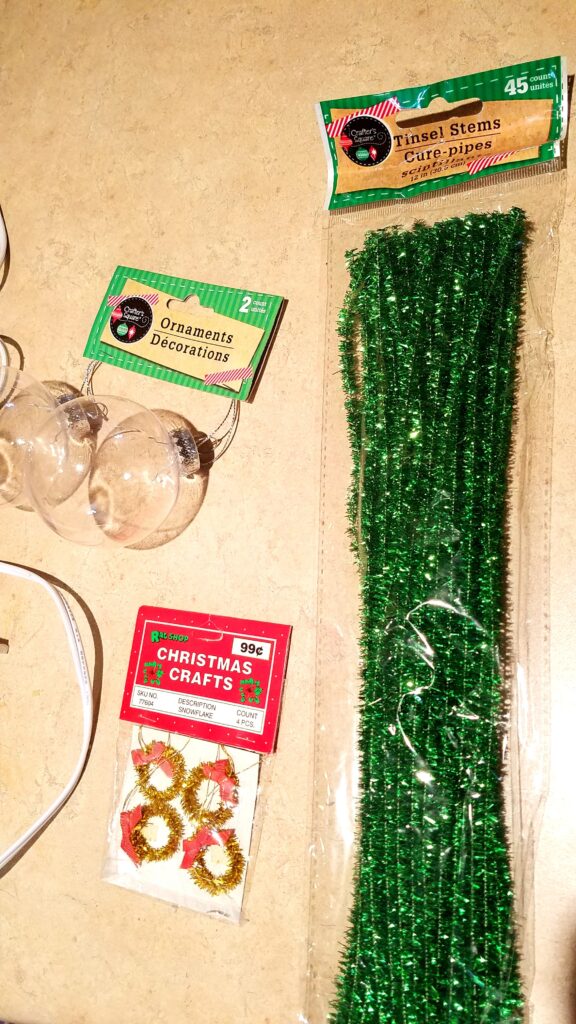
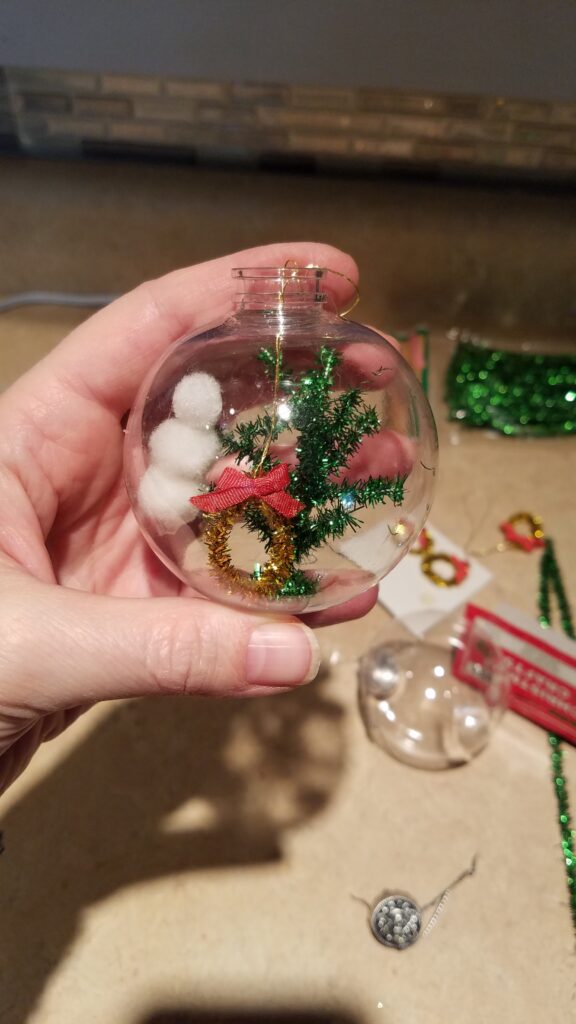
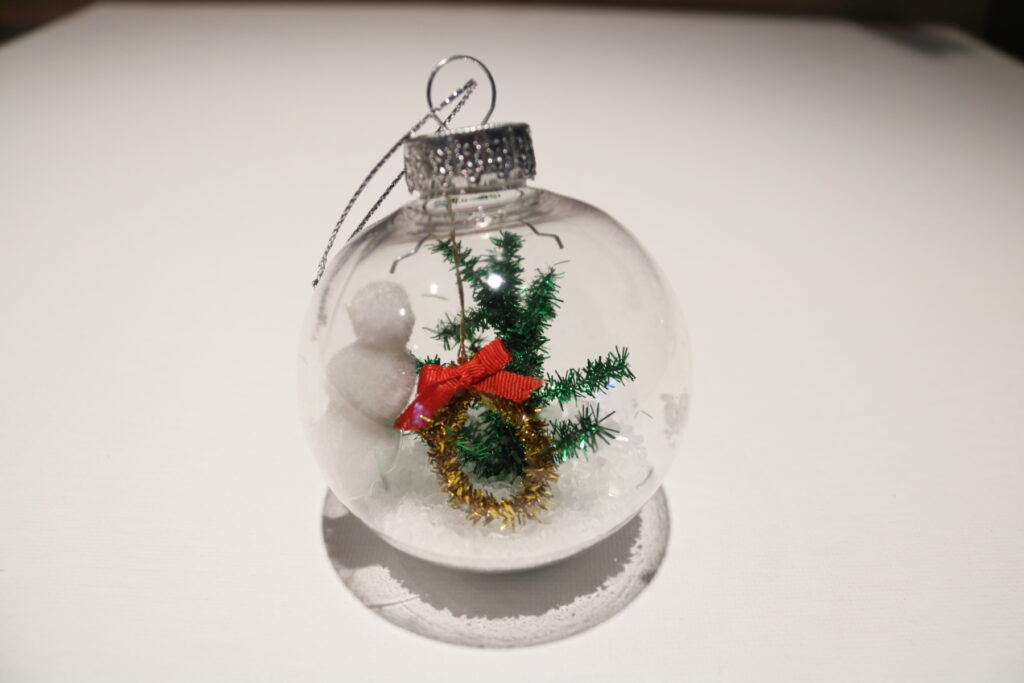
Clear Ornament Mini Diorama
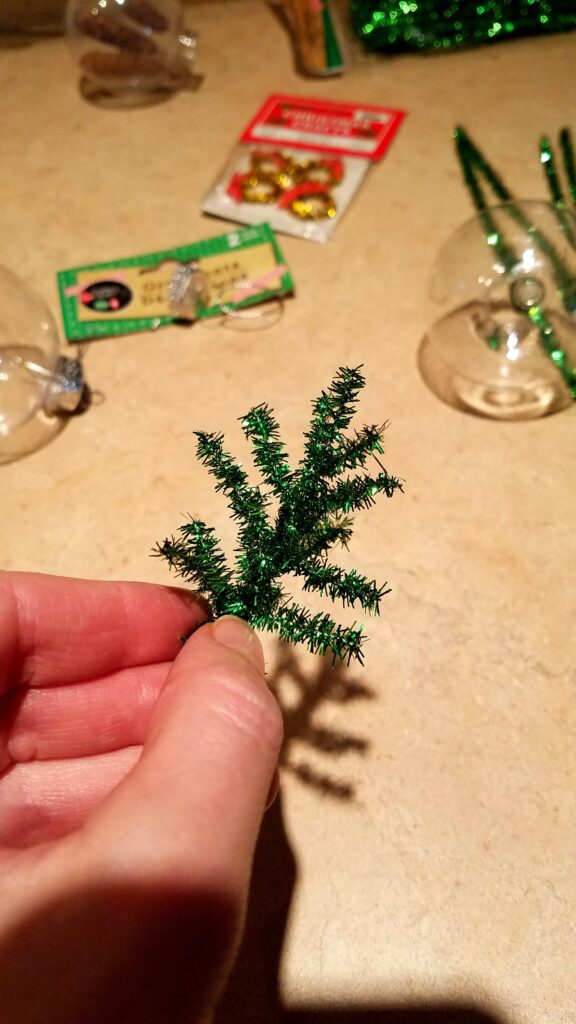
This last clear ornament idea is my second favorite. Have you seen those vintage tinsel trees? Well, I got an idea that I could make a miniature version using metallic chenille stems. I used about 2 and a half stems to make my miniature tree, cutting pieces randomly and twisting them together to make a tree shaped figure. I trimmed the branches again. Then I used hot glue and my pliers to insert the tree into the clear ornament.
I thought it needed something more so I found some white pom poms and glued together a little mini snowman. Then I hot glued him next to the tree. Lastly, I squeezed the miniature wreath so it would fit through the top of the ornament. Once inside, I used a Q-tip to push it back into a circle shape. I did not glue the wreath, just let it hang.
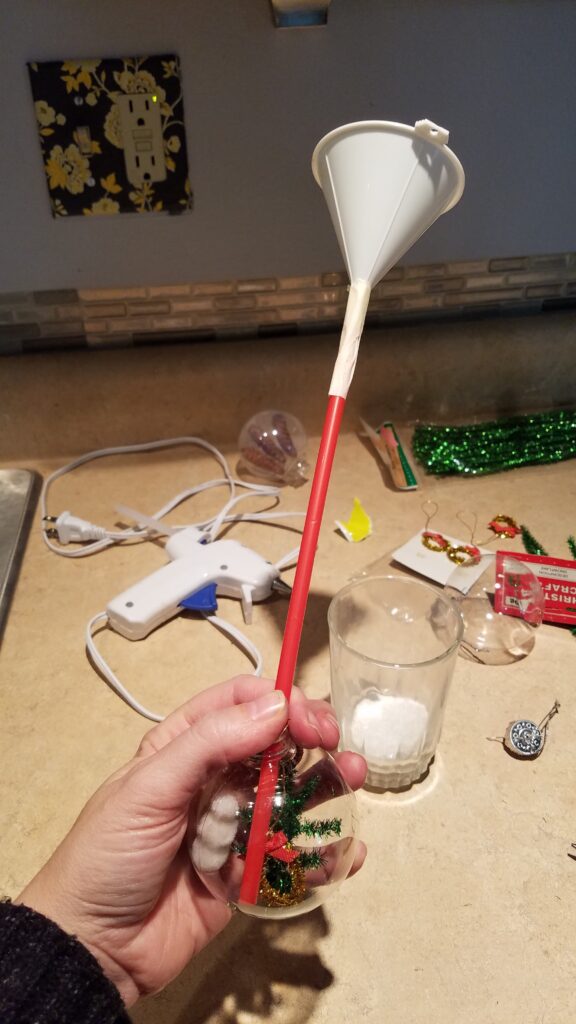
After that, I thought it would look even nicer with some snow, so I added Epsom salt by taping a mini funnel to a straw. I used the same straw funnel to put the snow-salt into the pine cone ornament, too.
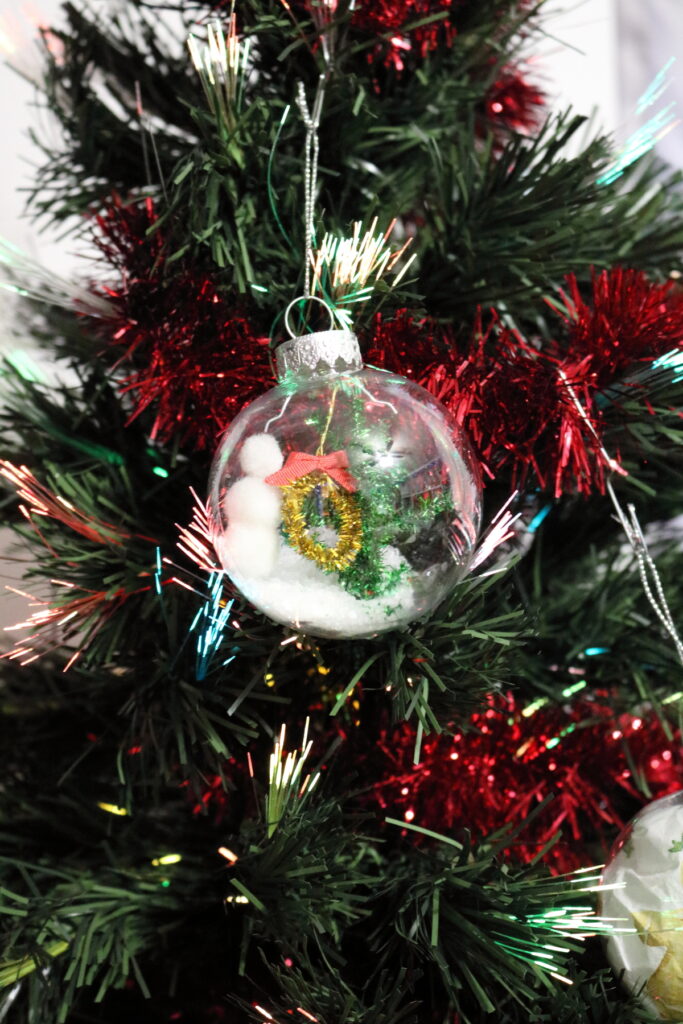
And there you have it! The last of my 5 clear ornament ideas! These would make such cute gifts, or projects to do together with your kids or a ladies group.
I do hope that you have enjoyed seeing my 5 Creative Ways to Fill Clear Ornaments!


These are adorable ideas. My favorite is the pinecones it’s rustic and the snow adds whimsy.
Cindy
Wow, Liberty! All of your ideas for decorating clear ornaments are quite lovely. Each one is adorable, but I love how you put the closed pine cones inside and let them open – I love it! So creative and unique and looks pretty with the faux snow, too!
Thanks for sharing these crafty ideas. So many different things a person can do with the clear ornaments, right?
All of your ideas are wonderful! I think my favorite is the pine cone ornament. The balloon idea is really neat! I’ve never seen that before.
Oh my gosh!!! So many cute ideas here. Great job. I love them all.
Super cute and fun ideas for your ornaments! The pine cone one is definitely my favorite!
Great ideas Liberty! I am going to give the balloon and glitter a try. I love some pretty confetti or glitter! Thanks for the Inspo!