
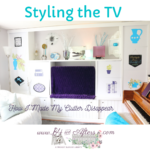
How I Styled My TV (or How I Made My Clutter Disappear)
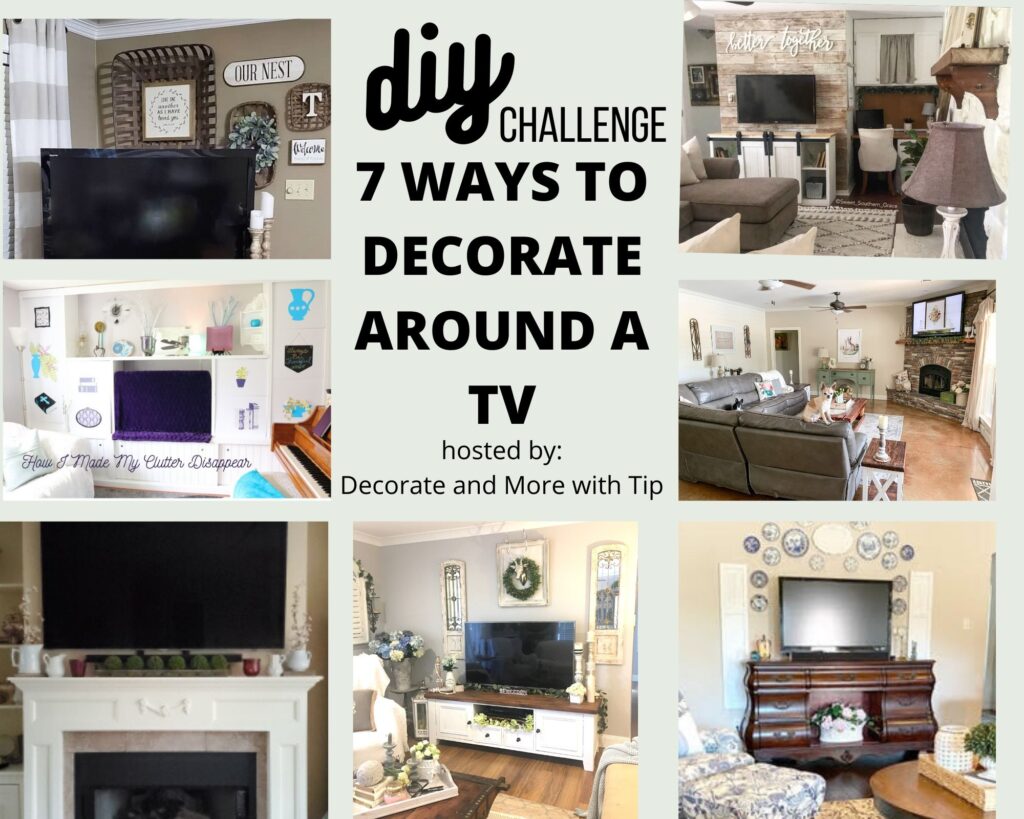
Today I am joining a group of bloggers for a DIY Challenge: How to Style Around Your TV, hosted by Terrie at Decorate and More with Tip. If you are here from Through a Vintage Door, Welcome! To see How I Hid My Clutter, keep reading. –Or to go to the end of this post and see all the rest of their fabulous ideas, Click Here.
To Watch a Quick Video instead of reading my post, Go Here.
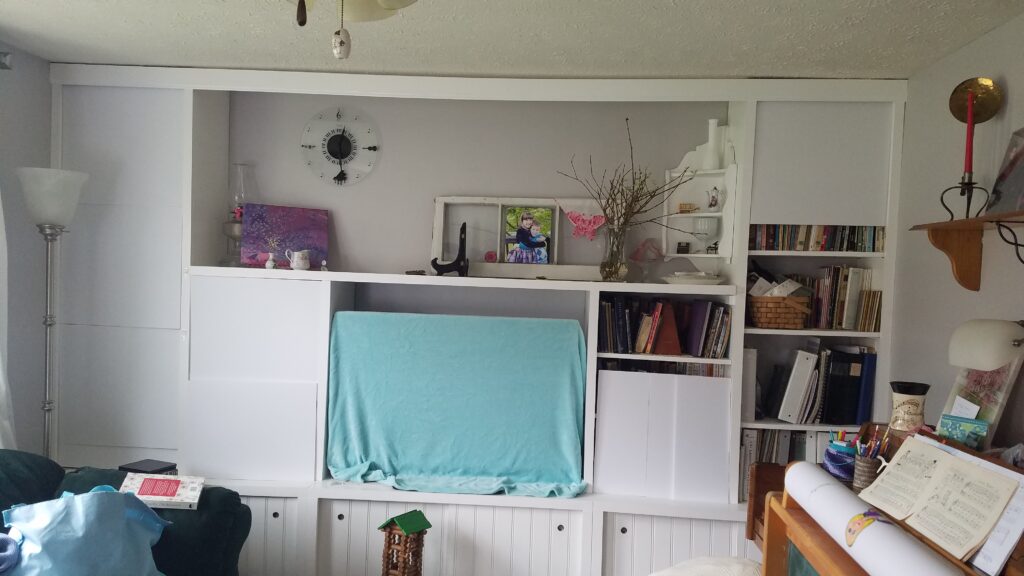
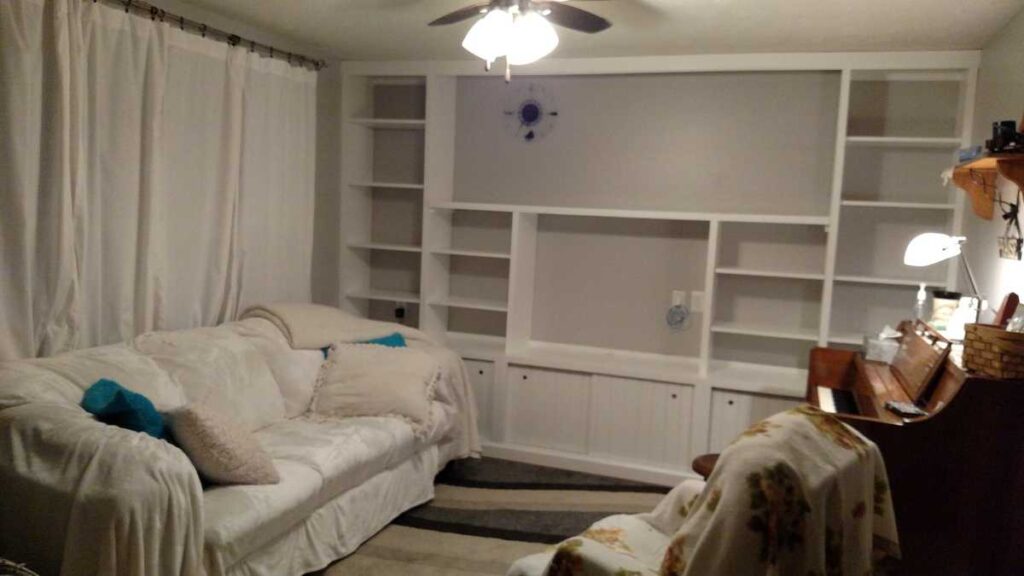
About five years ago we had these built ins put in. I designed it to go around our television. I needed to have a place for all of our books, especially after closing my piano studio.
Over time, I added more books from other parts of the house. My piano teaching supplies and lesson books were also stored here. The area around the television began to be verrrry cluttered.
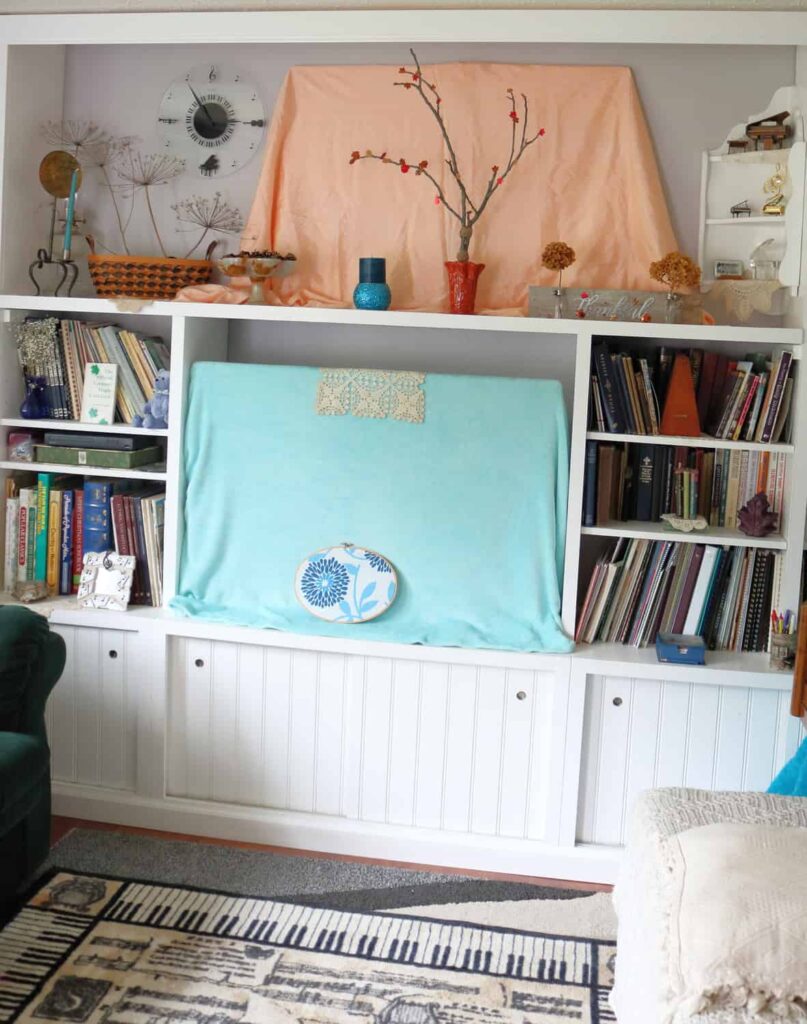
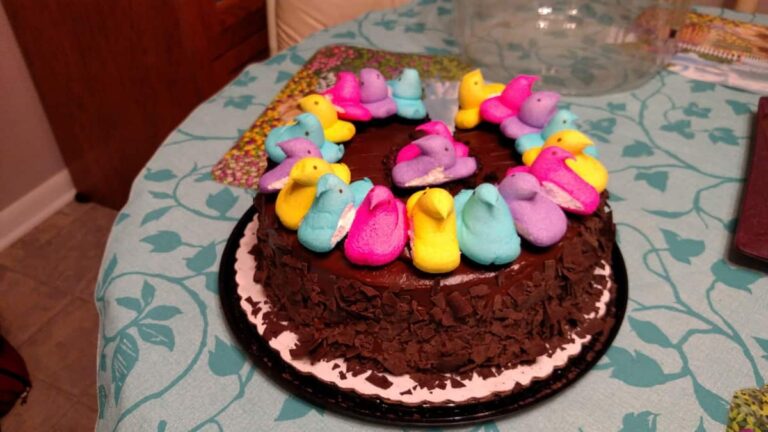
TV Area Before
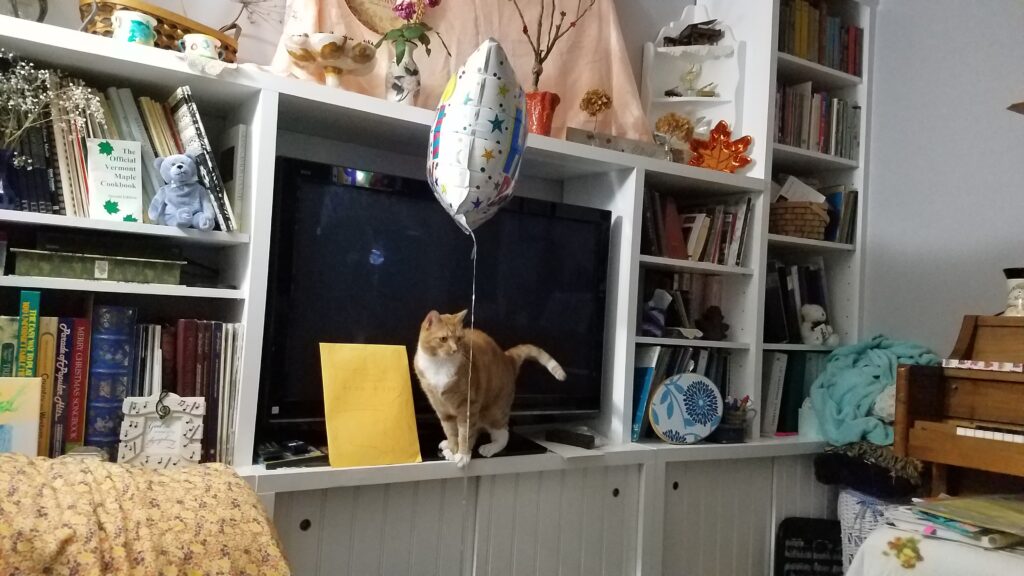
Even at its best, it was still a very messy sight. But what else could I do? This is what it looked like last year for the Fourth of July.
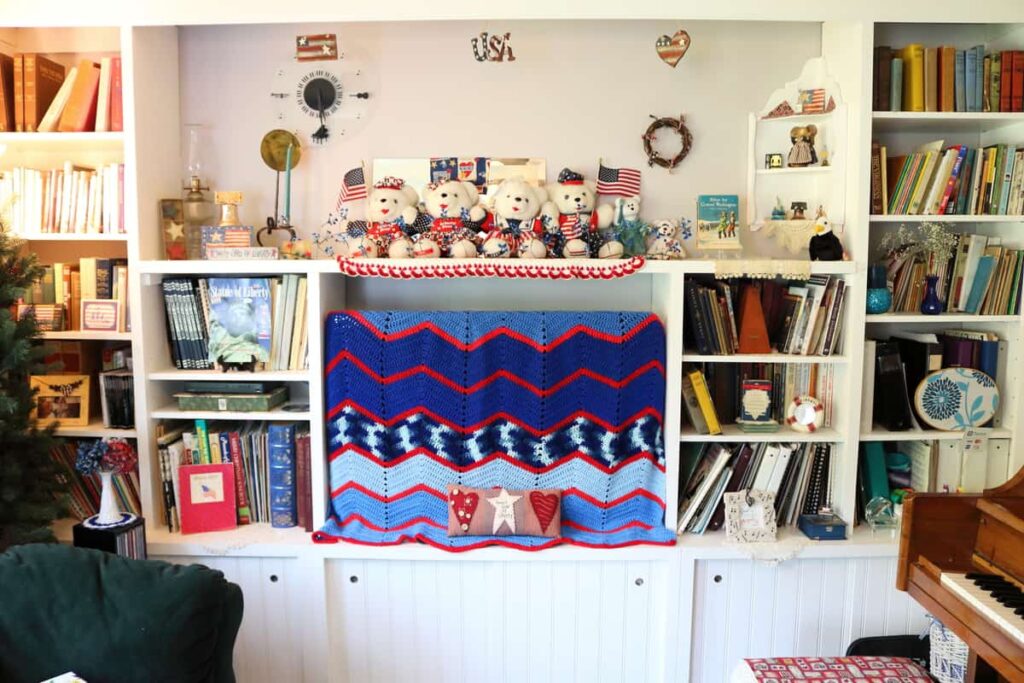
By the time Thanksgiving rolled around just 6 months ago, I didn’t even want to photograph the entire area!!
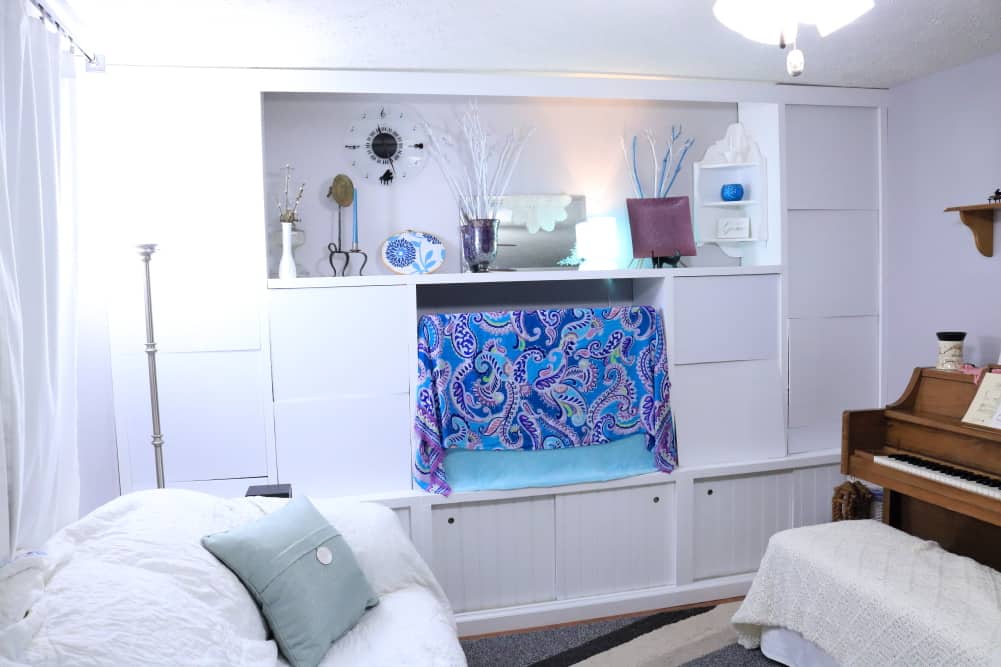
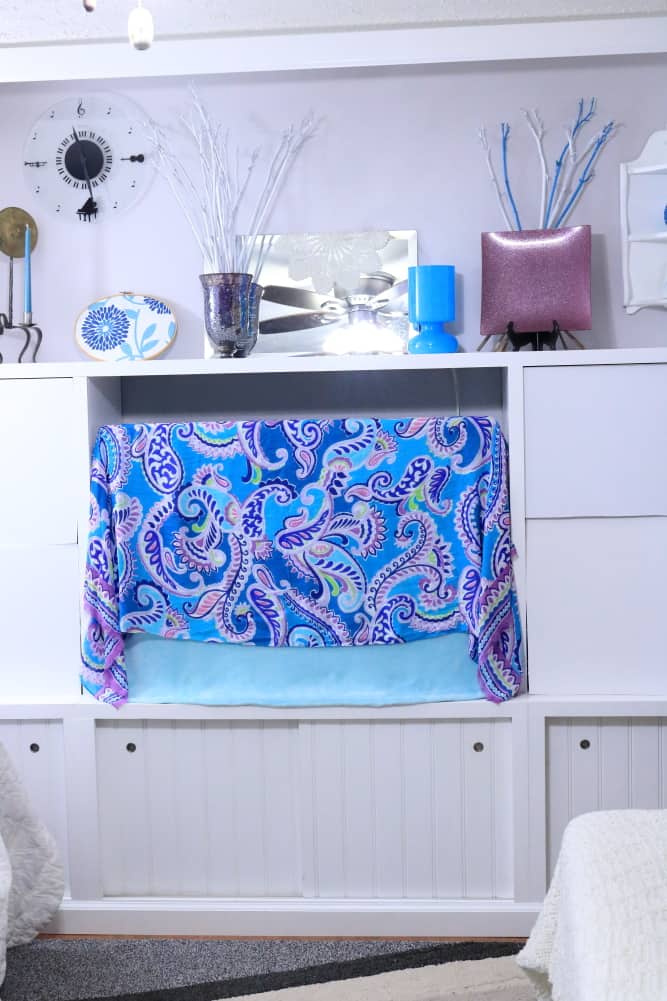
TV Dust Cover
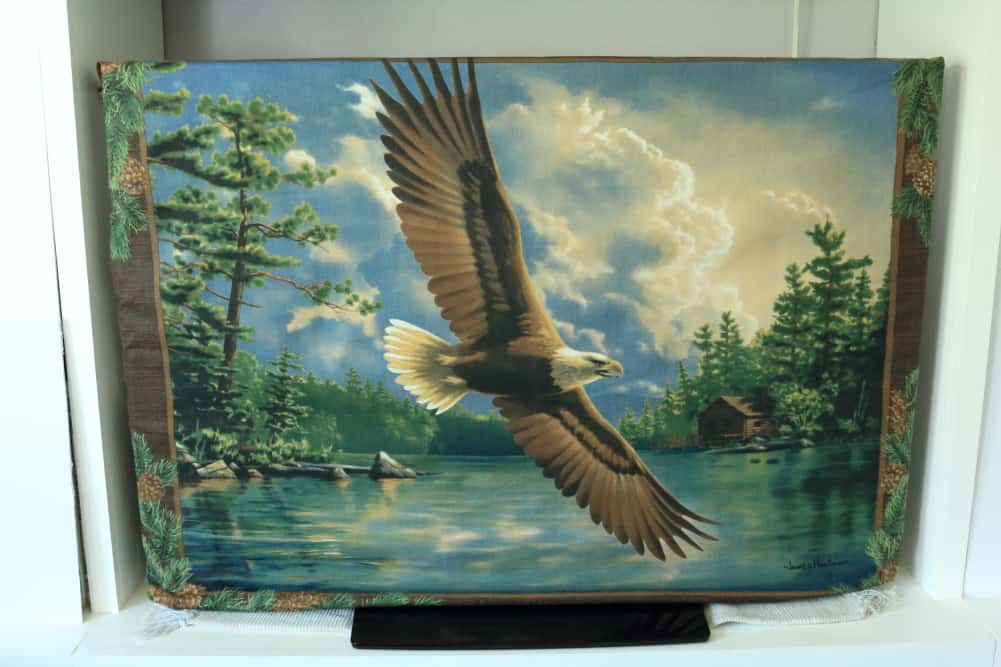
You can see that I like to cover my TV with a small afghan or blanket. I first began that tradition because of the eagle wall hanging, below. I had bought several panels and given one away as a wall hanging. But for this one, I sewed fabric to it on 3 edges– the top and the two sides. I left the bottom open, and started slipping it over the television as a dust cover. I liked it so much better than a plain sterile black screen. After awhile, I began experimenting using other small blankets, throws, and fabrics to cover the TV for different seasons. (By the way, we’ve had this TV for almost as long as we have been married, which is 11 years this coming July!)
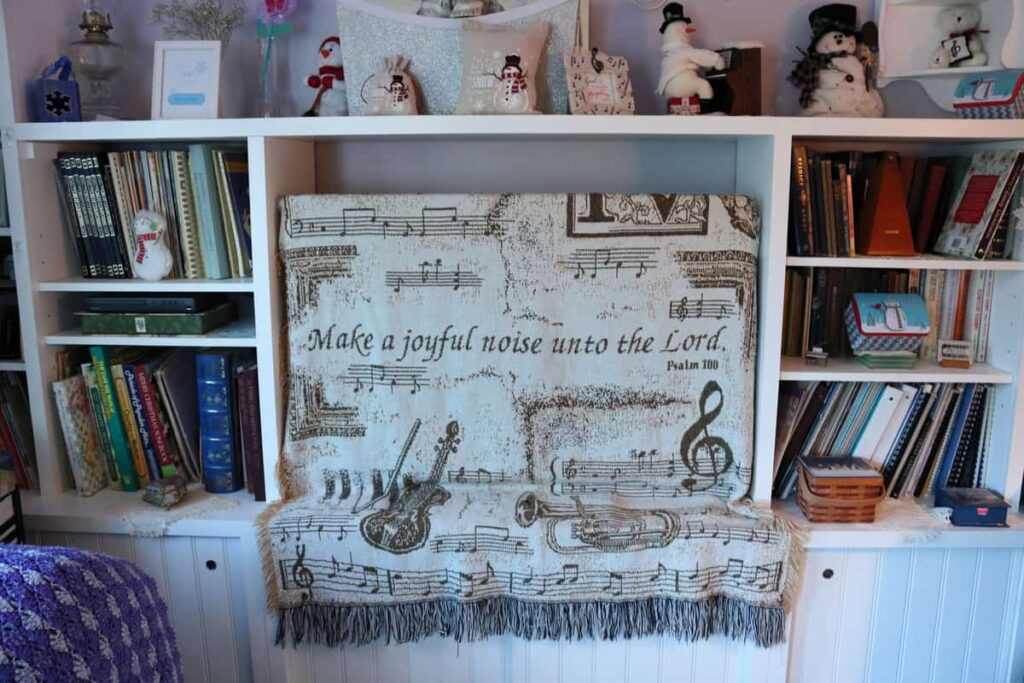
This music themed afghan is a favorite throw I like to use when I am expecting piano students for their lessons.
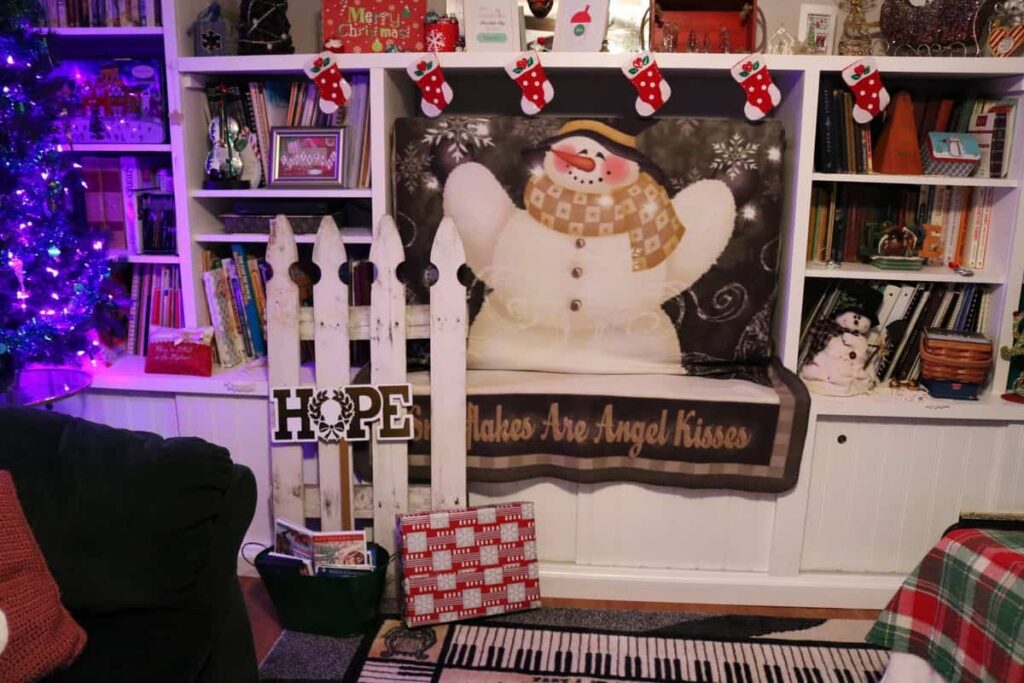
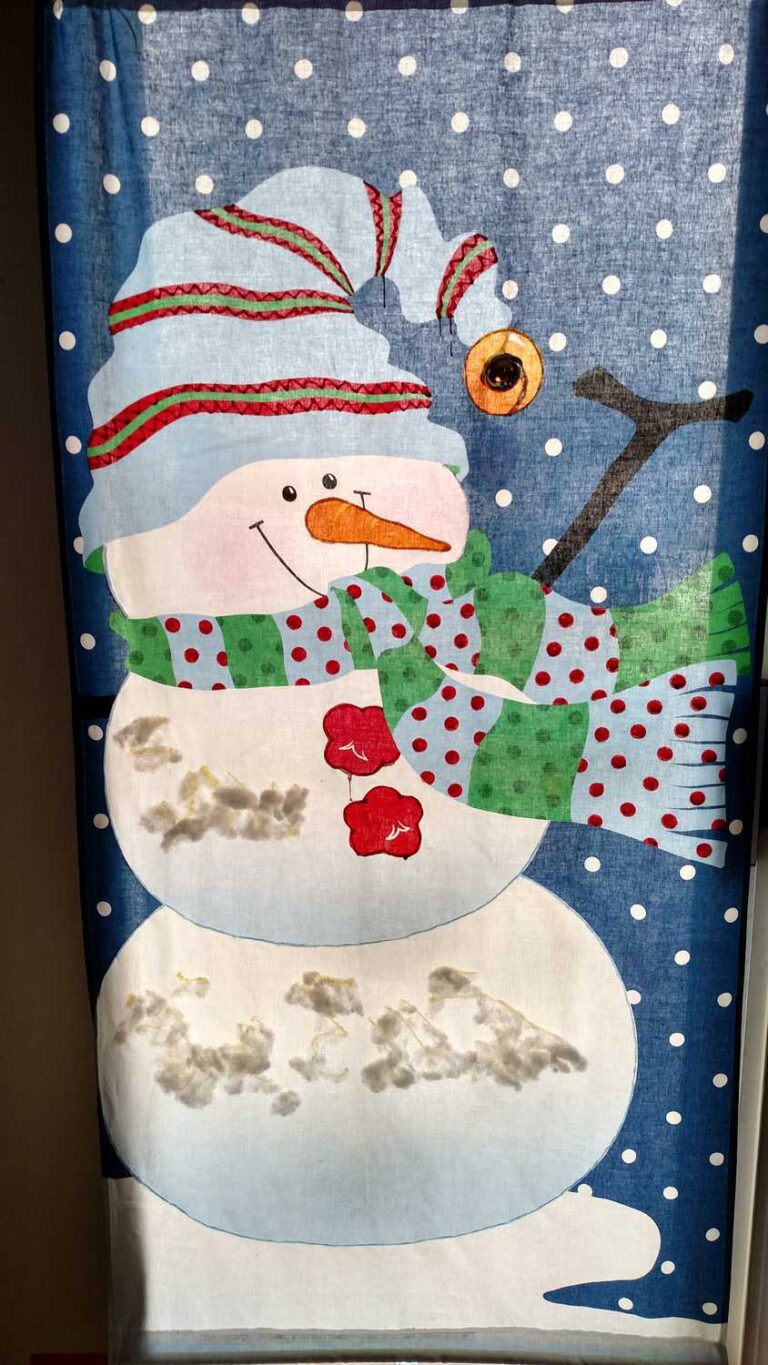
I love using this Snowman blanket at Christmas time. Can you even tell there is a TV under there?!
Design Plans
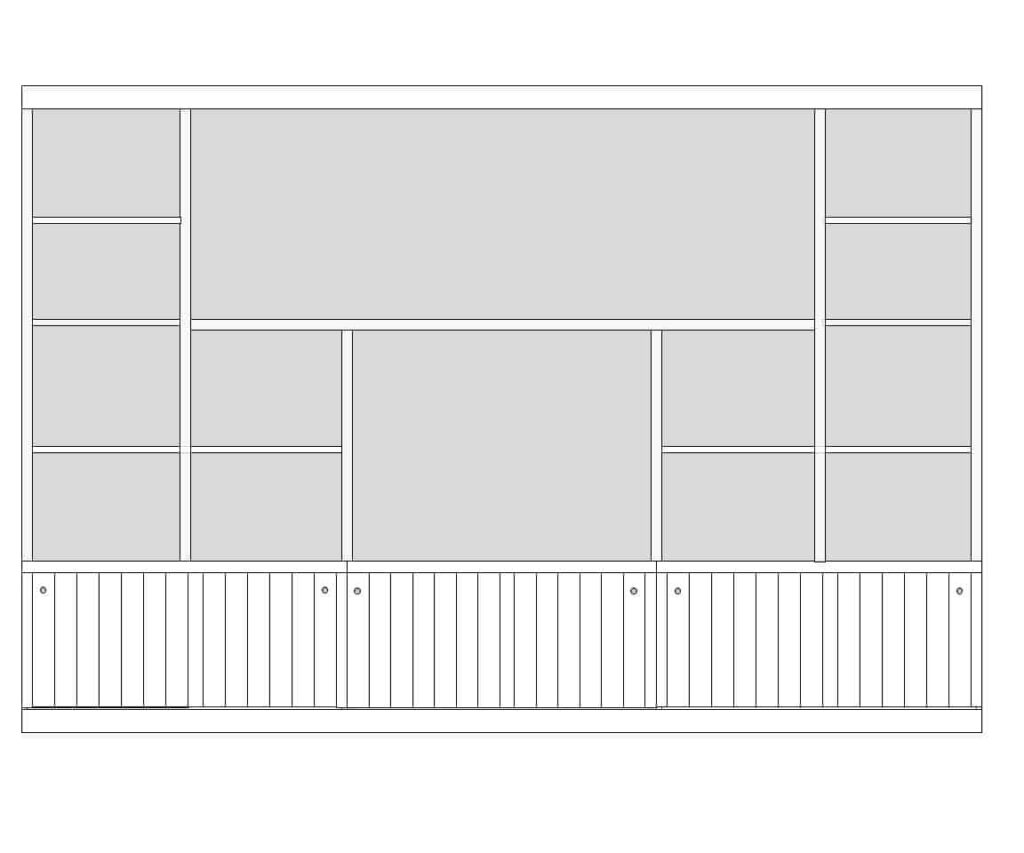
For this blogger DIY challenge I wanted to come up with something extra special. In fact, the idea had already been in my head when the topic came up– now I had a reason to put it into action! I started with plain white foam board. You can buy it at the Dollar Tree for $1, or you can get it at Walmart for 88 cents…. I used 10 sheets.
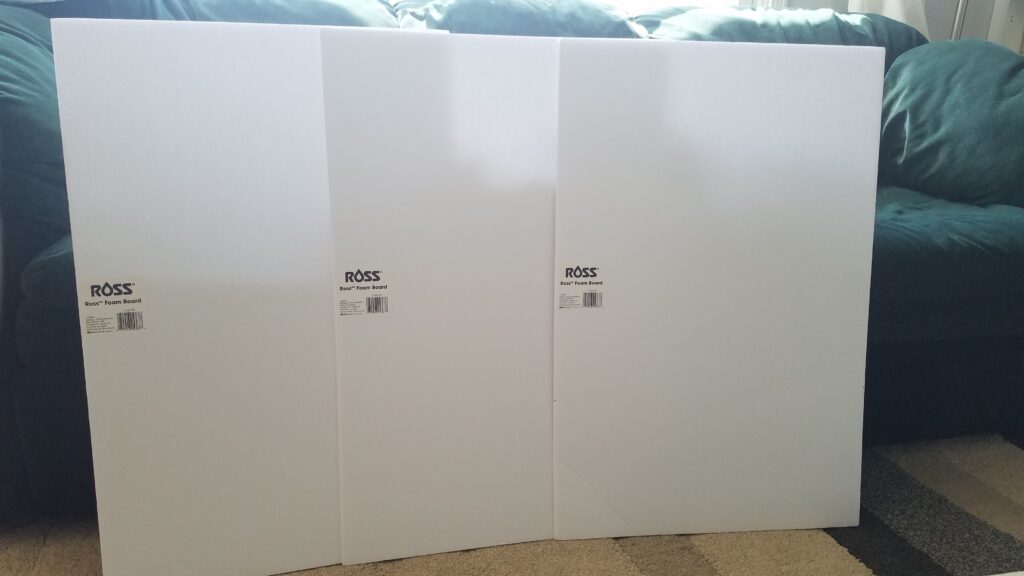
I used a craft knife to cut the foam board to size. If you try this, here is a tip: Not everything is square, so number or somehow mark which piece goes where. I thought of doing that, and didn’t– and when we moved some foam to get something on a shelf, the pieces got out of order. When I started putting everything back together, it was frustrating. So save yourself some frustration, and be sure to mark which foam board goes where– especially if you have ten pieces like I do!
When I had my foam boards cut, I knew that I had a certain number of faux shelves to work with– so I drew out my plan based on five “pretend” shelves on each side of the tv.
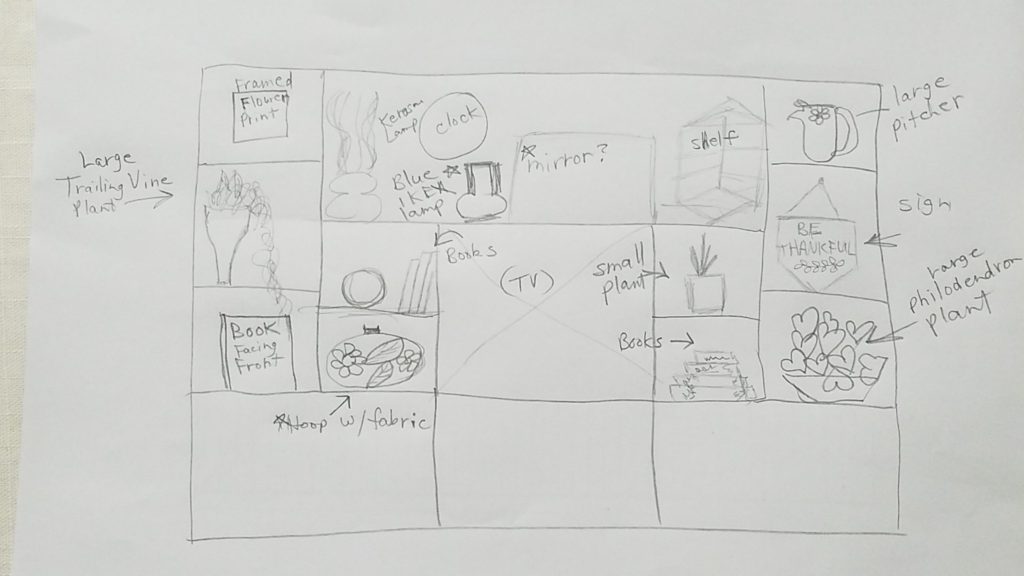
I knew that part of my success depended on how I decorated the main center area above the TV. If I styled the 10 shelves, and then couldn’t style the center area to coordinate, then it would look dumb. So I worked on styling the center area before completing the faux decor.
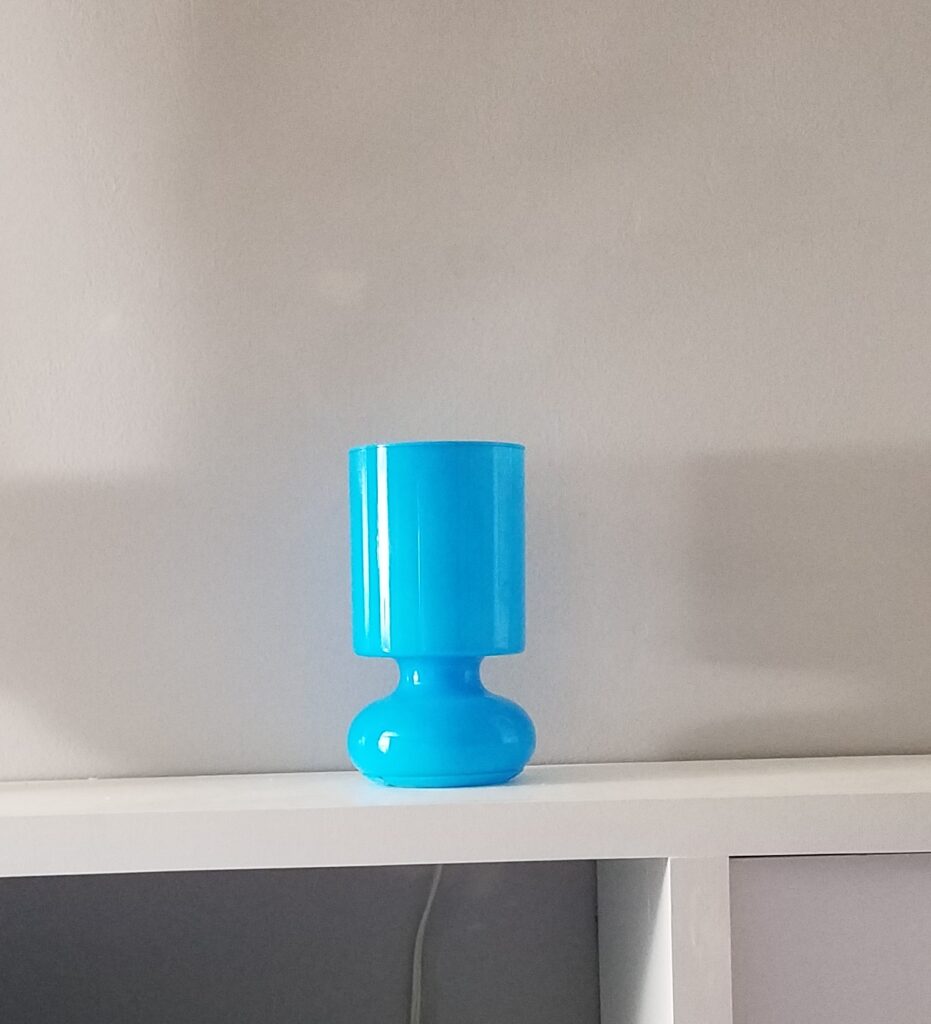
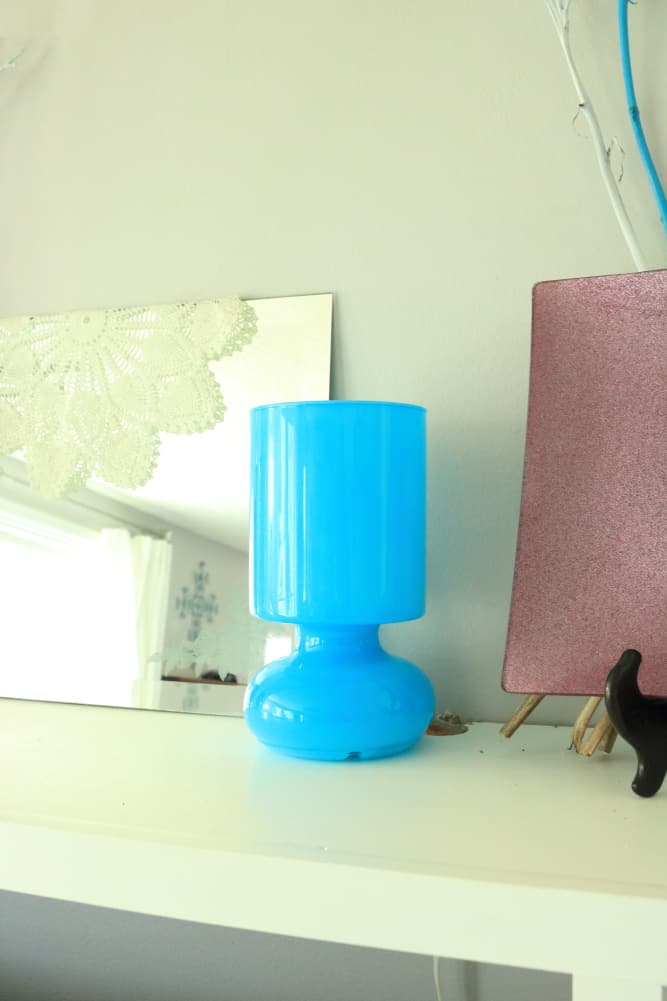
I wanted to used this aqua blue Ikea lamp that I purchased 11 years ago. You can see it in my pencil drawing. Well, after I set it on the shelf, I realized that if I drilled a hole, then I could plug it into the same outlet that the TV is plugged into. I did that, and am so happy I did! I’m looking forward to plugging in Christmas lights and other lamps in the future!
I sat down with my pencil drawing and Cricut Design Space. I started looking for images that would go with the images in my drawing. They were fairly easy to find and customize to my liking. I made a rectangle the size of my faux shelves to place behind the images, so I could size them properly.
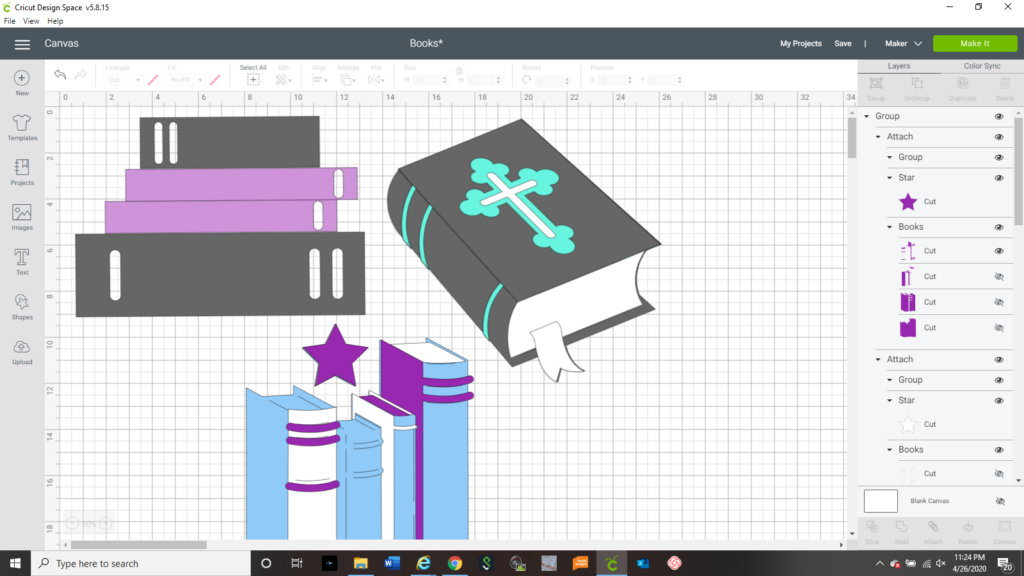
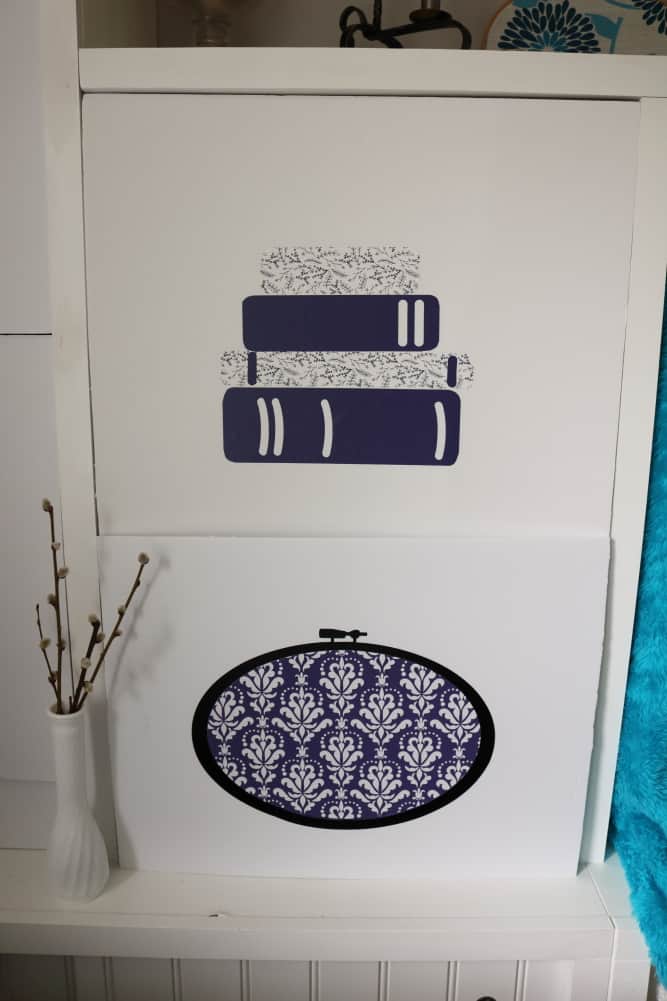
Faux Books
I am so glad that I had the Cricut Maker to help me. This would have been a lot harder project to do without it. I had not done layered vinyl projects before this, so this project forced me to try it. It is so fun to improve my skills! It was a little tricky to make this 3 layered set of 4 books. One of the hardest parts was deciding on 3 coordinating colors/ patterns! The damask pattern is cardstock; the other 2 are vinyl.
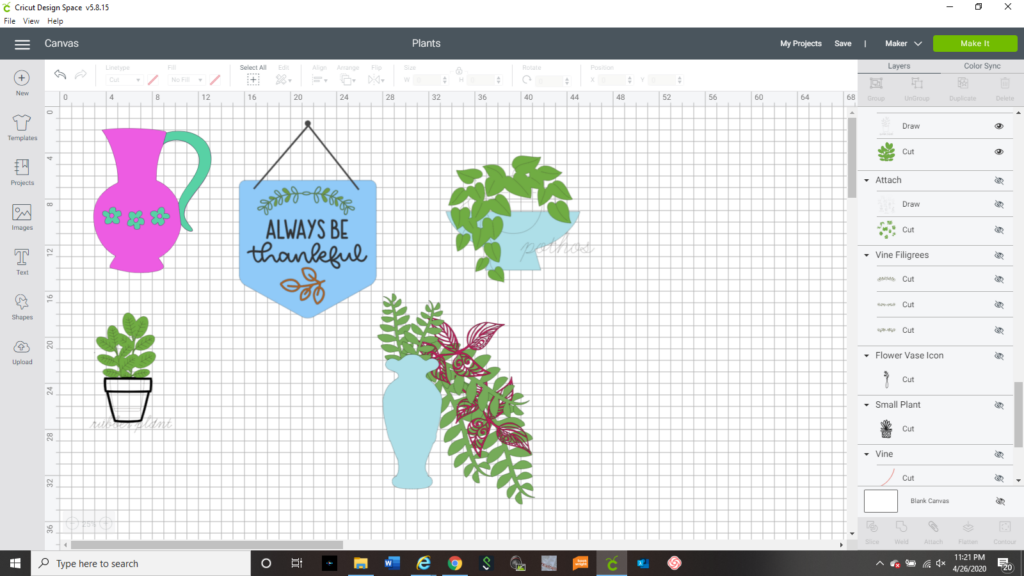
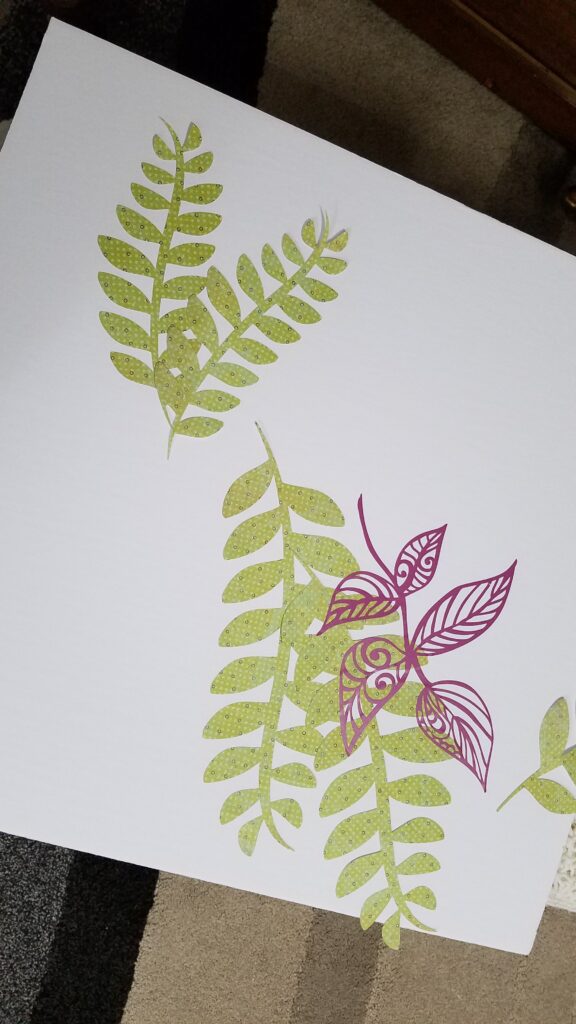
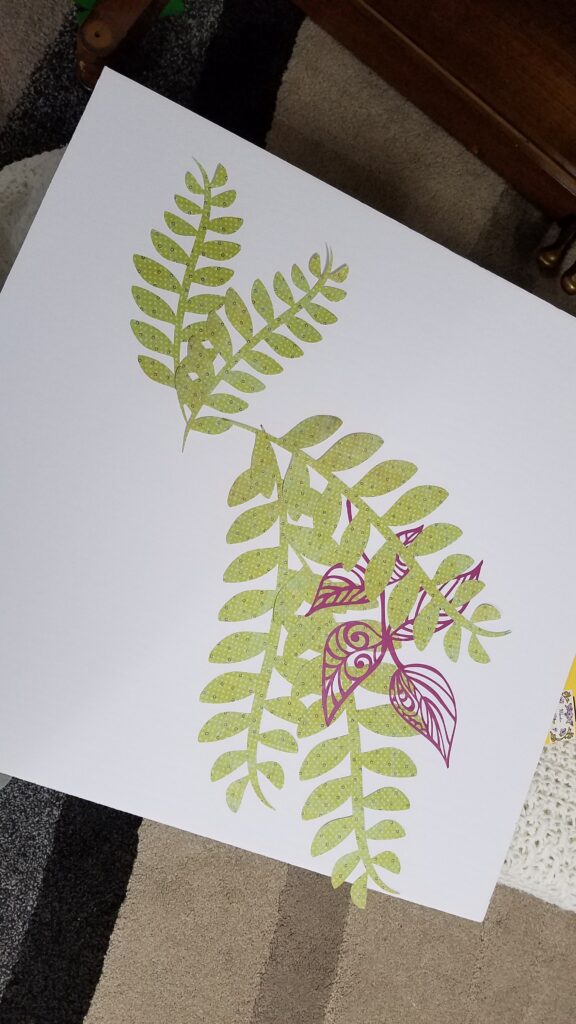
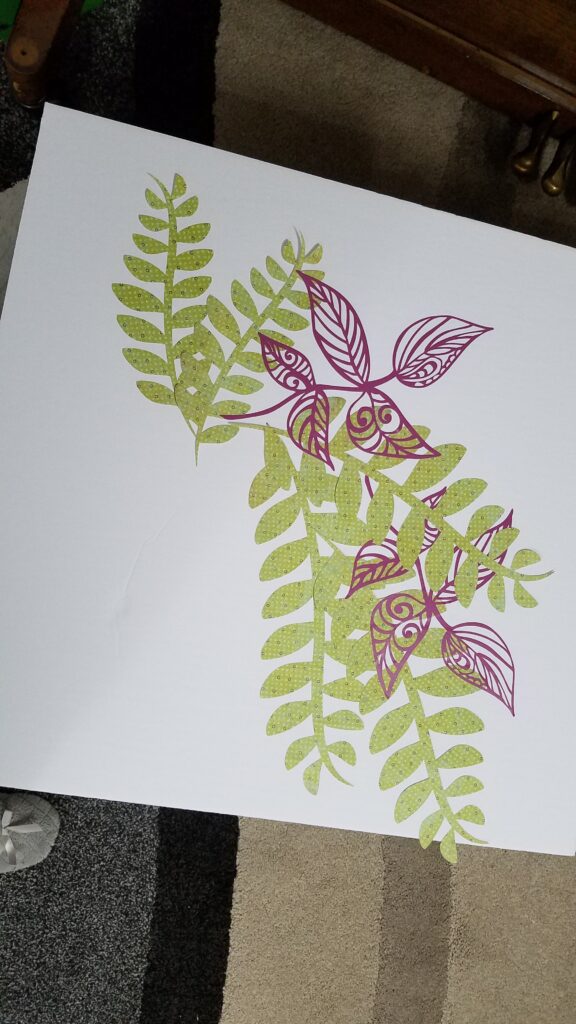
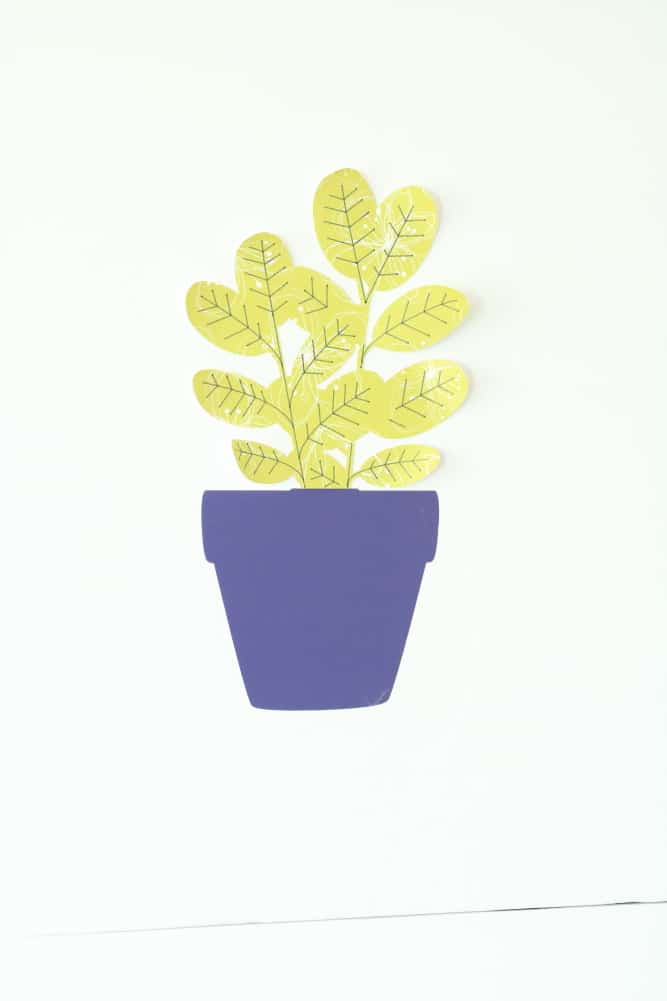
Here is another set of my designs in Cricut Design Space. The plants were tricky, because they had “drawing” parts to them. I wanted only the leaf markings drawn, and not the rest, and I don’t know how to turn only part of the drawing off. So what did I do? I simply kept the marker out of the Cricut holder, when I didn’t want it to draw! So it did the motions, but it didn’t draw anything, making both the machine and me happy. : ) (That doesn’t work for a cutter with the Cricut, as it checks to see if you have the cutter attached.)
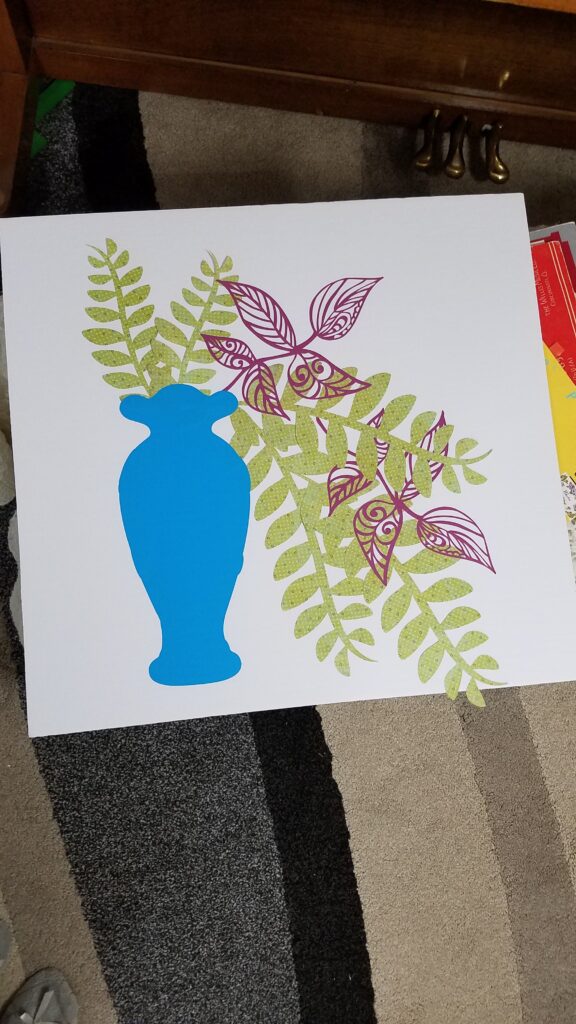
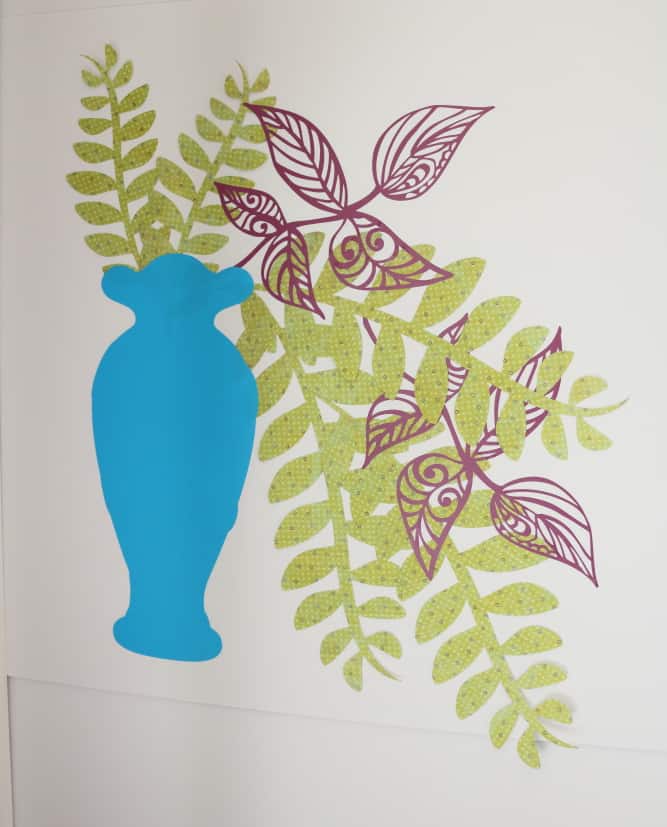
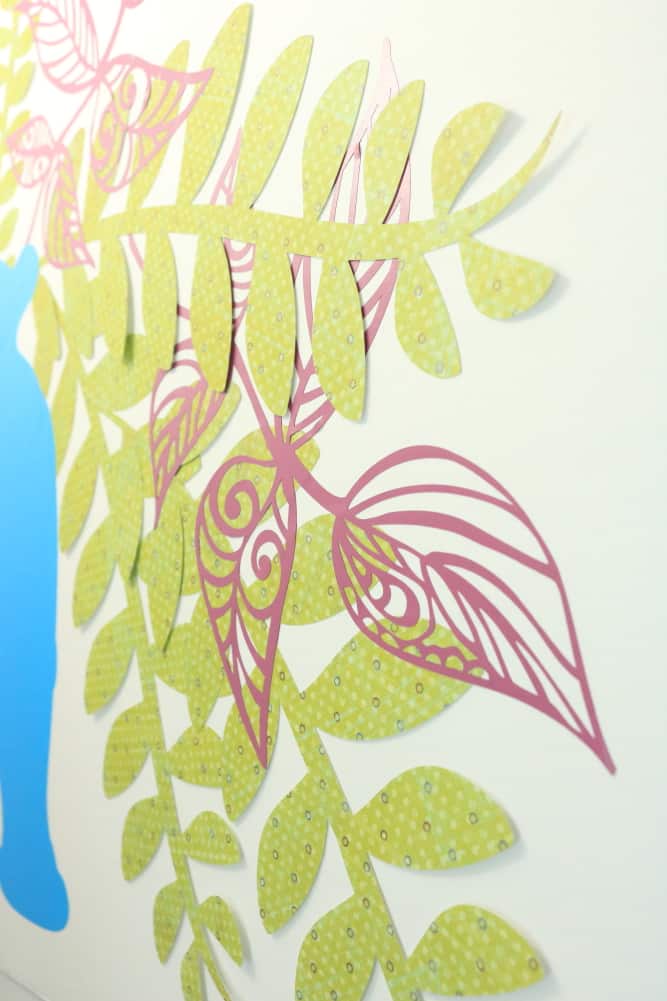
The vase with the flowing greenery is probably my favorite. Or maybe the chalkboard….
Faux Vase
To make the vase with the greenery, I first laid out the pieces how I wanted to layer them. The greens are scrapbook paper, and the fuschia is adhesive vinyl. The layering worked well because the vinyl worked like a sticker to hold the paper in place! Then the vase is also adhesive vinyl which helped hold it all together just like my design. I love it when a plan works out!
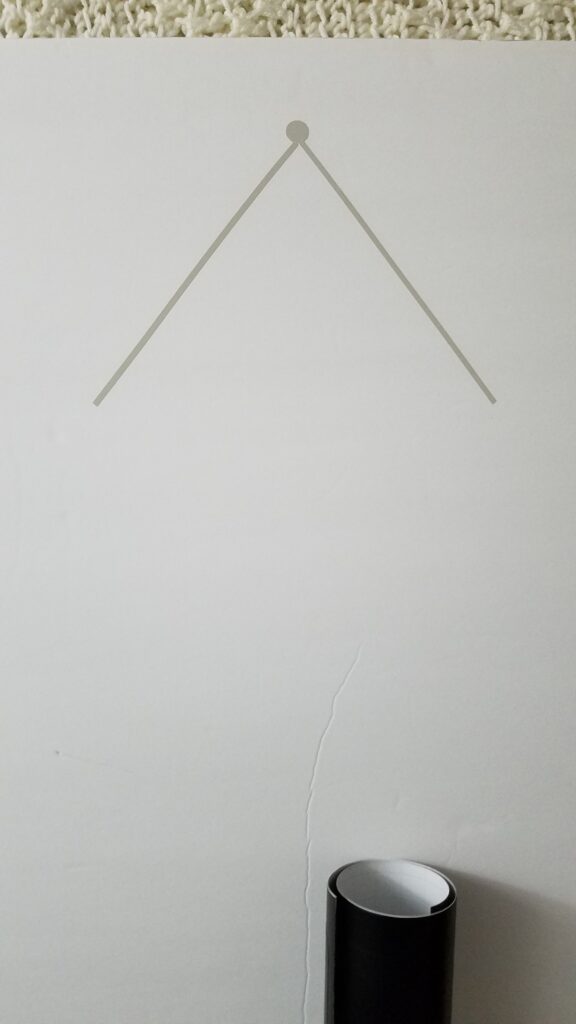
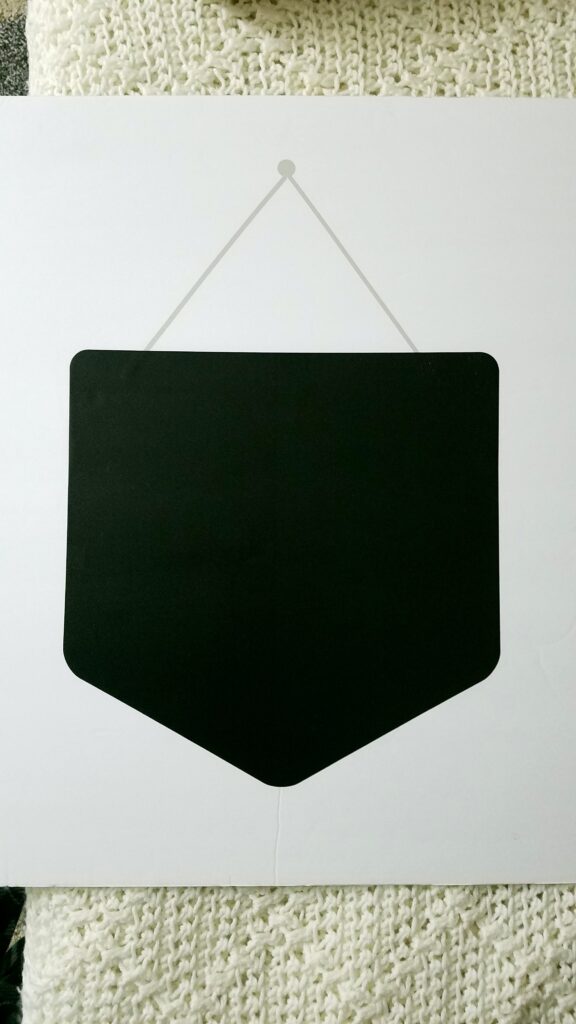
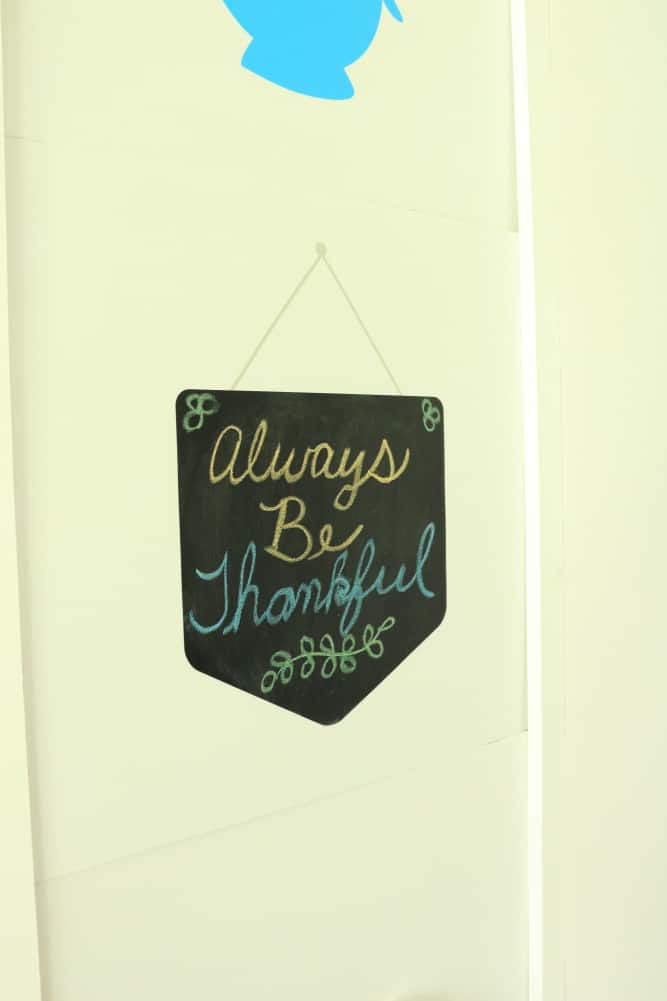
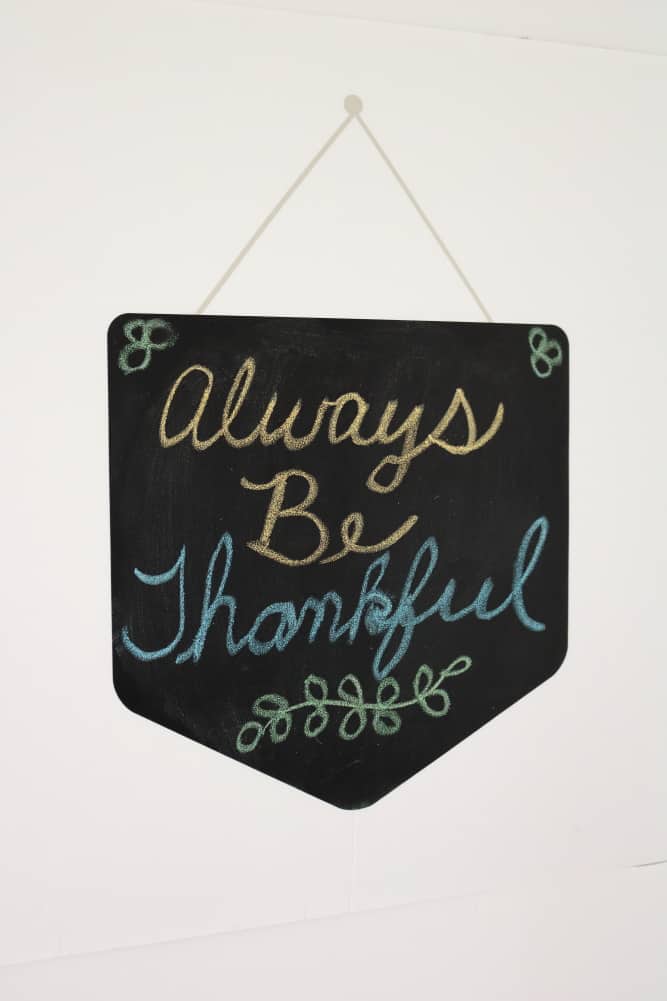
Faux Hanging Sign
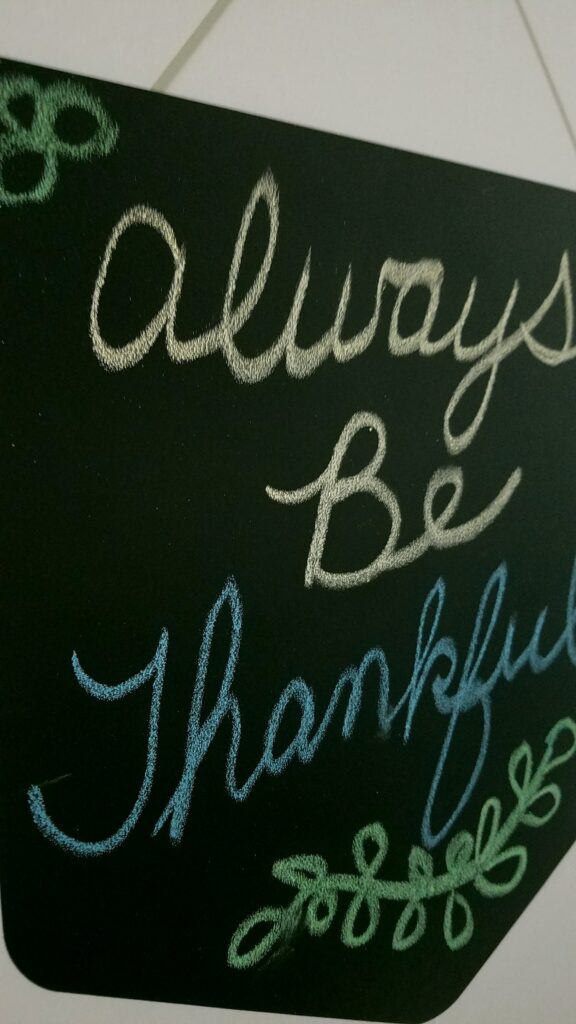
For the faux hanging sign, I used Cricut’s Design Space to connect a small circle with two lines to imitate a nail with a string hanging from it. Then I used Cricut Chalkboard Adhesive Vinyl for the black sign part, and adhered it over the string lines. Then I wrote on it with different colors of chalk. I can wash it off and write on it again every day if I want to! Guess what– you don’t need a Cricut machine to use their fabulous chalkboard vinyl– just use scissors to cut it into whatever shape you like!
This sign is so much fun! I think I will find a lot more places to use chalkboard vinyl. This was my first time using it.
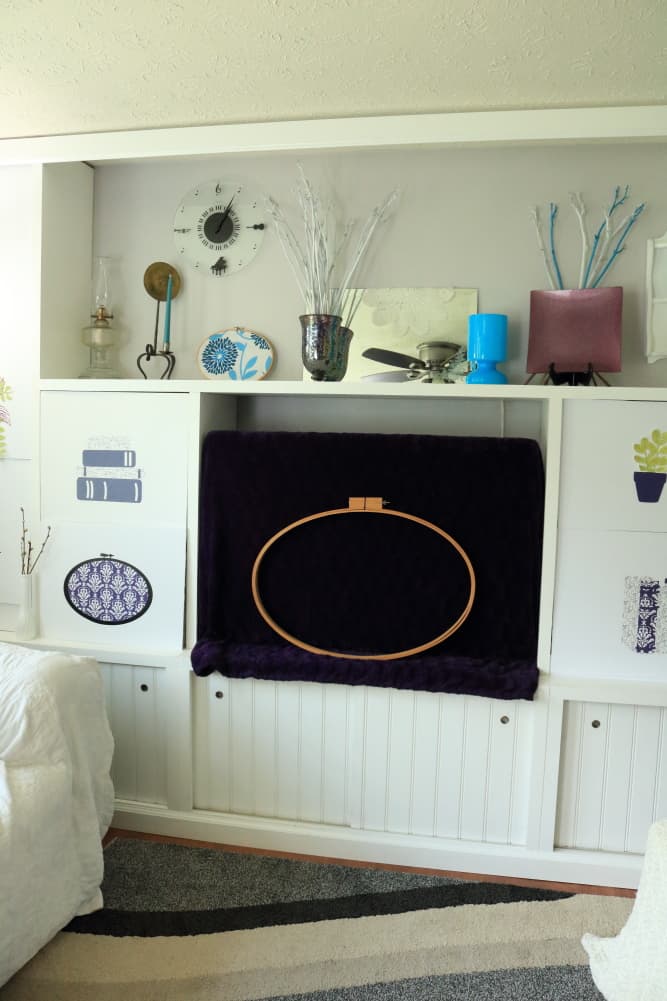
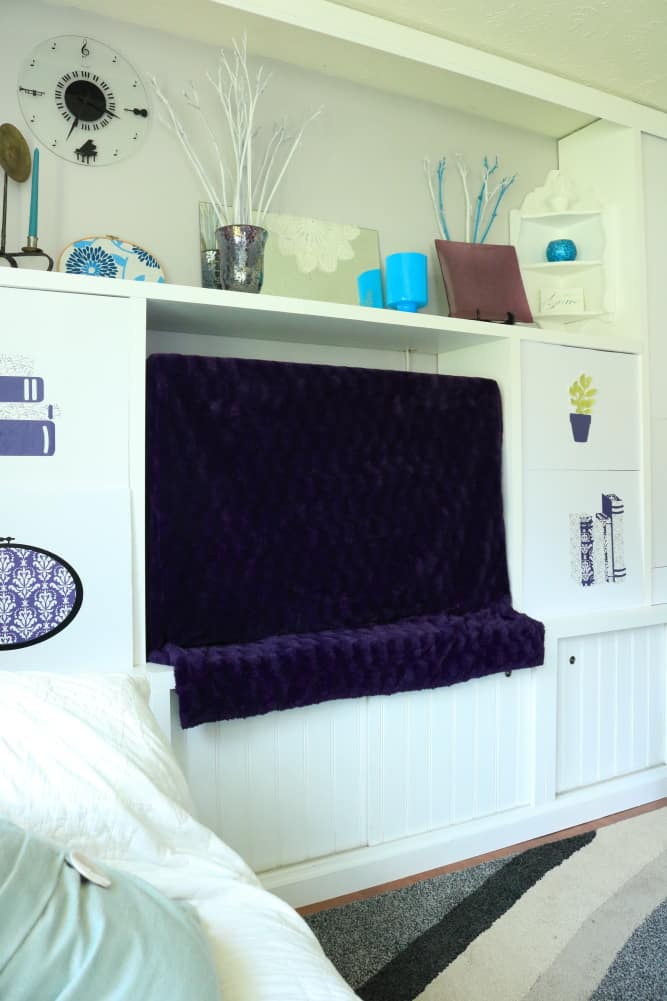
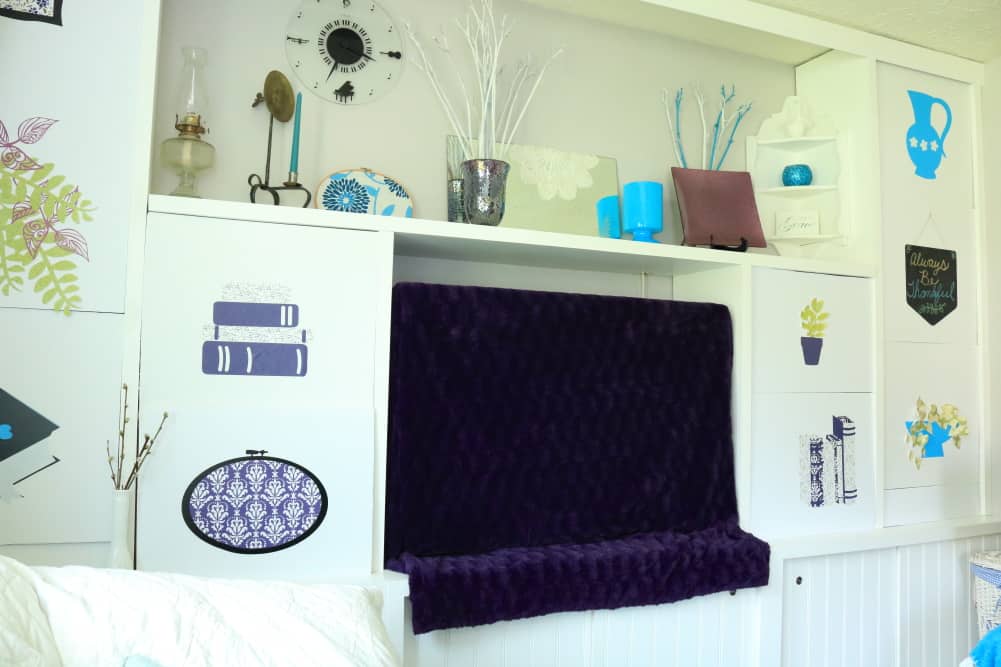
Here is an in progress picture. I have the center area how I like it– I used deep purple to go with my blue color scheme.
I tried layering this Vera Bradley paisley scarf over the television. I loved the colors– it has blue and purple– but it didn’t end up working well with the rest of the overall design.
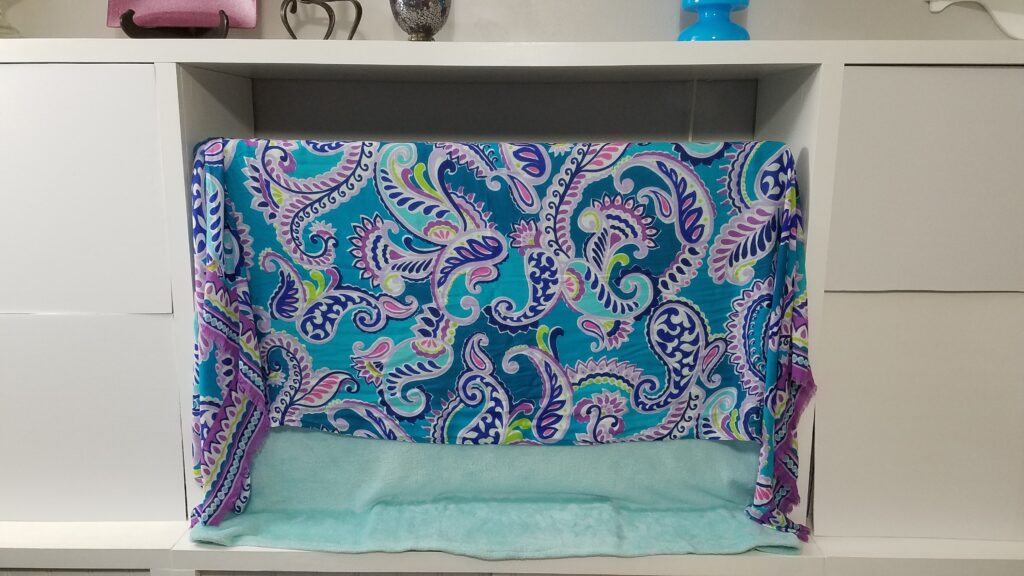
The scarf looked fine with the plain white “shelves” but it didn’t look right after I filled in the shelves.
The heavy purple glitter glass charger on the right was a gift from a friend years ago. I had told her I had seen a pair of them at a local thrift store, but that I really didn’t need them and didn’t need more stuff. She surprised me with them– so now they are a gift from a friend instead of “just more thrift store stuff.” : ) : ) I love using them in my decor, because I like purple!
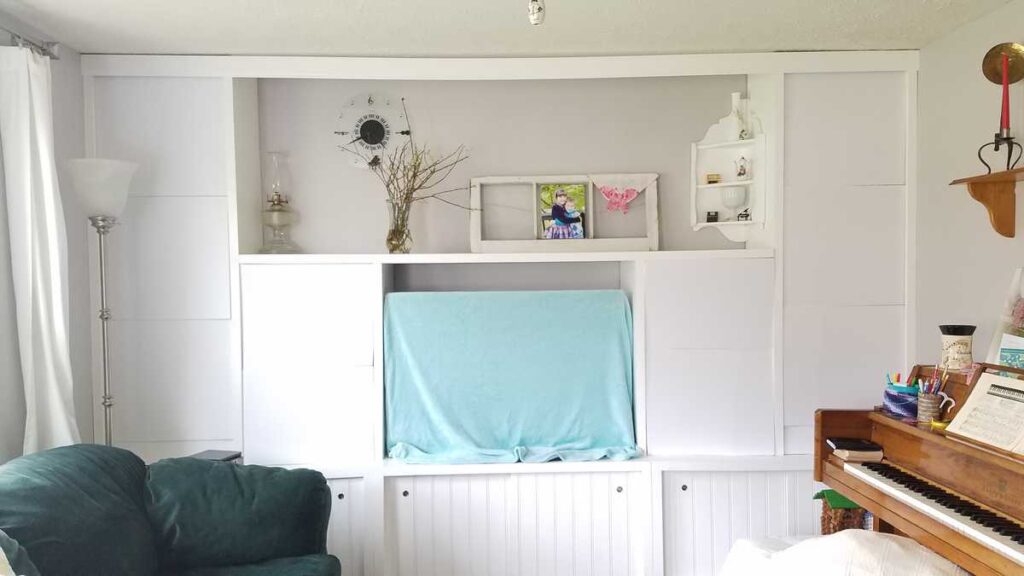
I suppose I’ve held you in suspense for long enough– are you ready to see how everything turned out??……. Here it is!
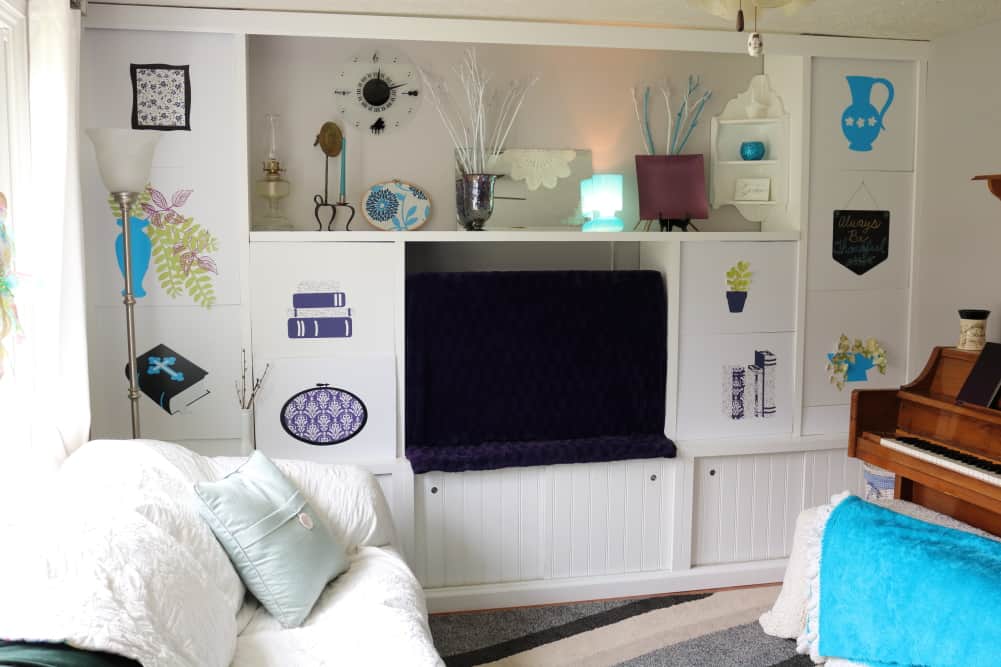
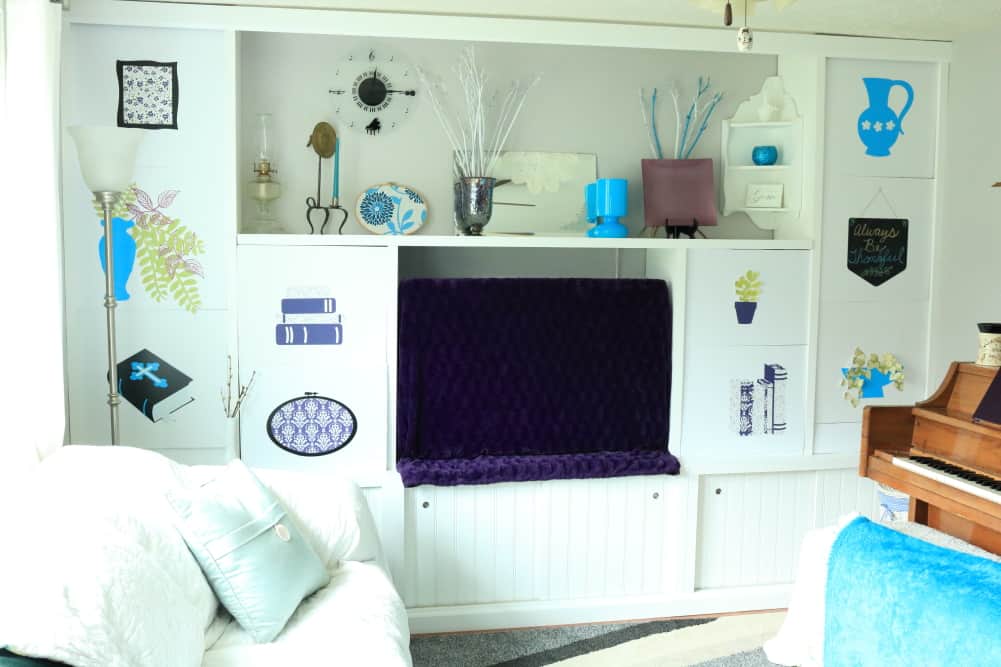
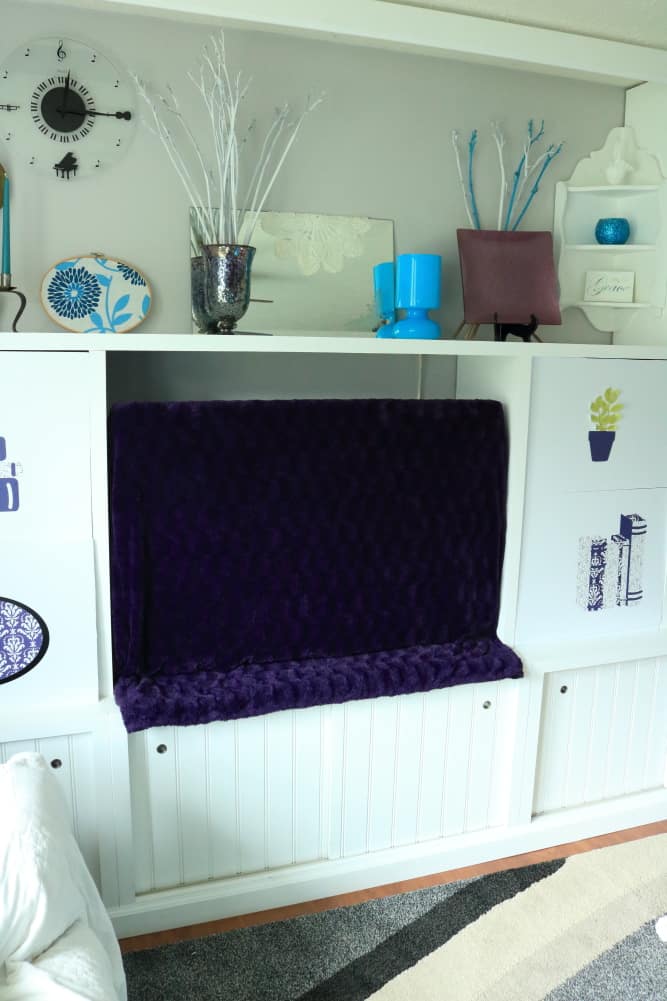
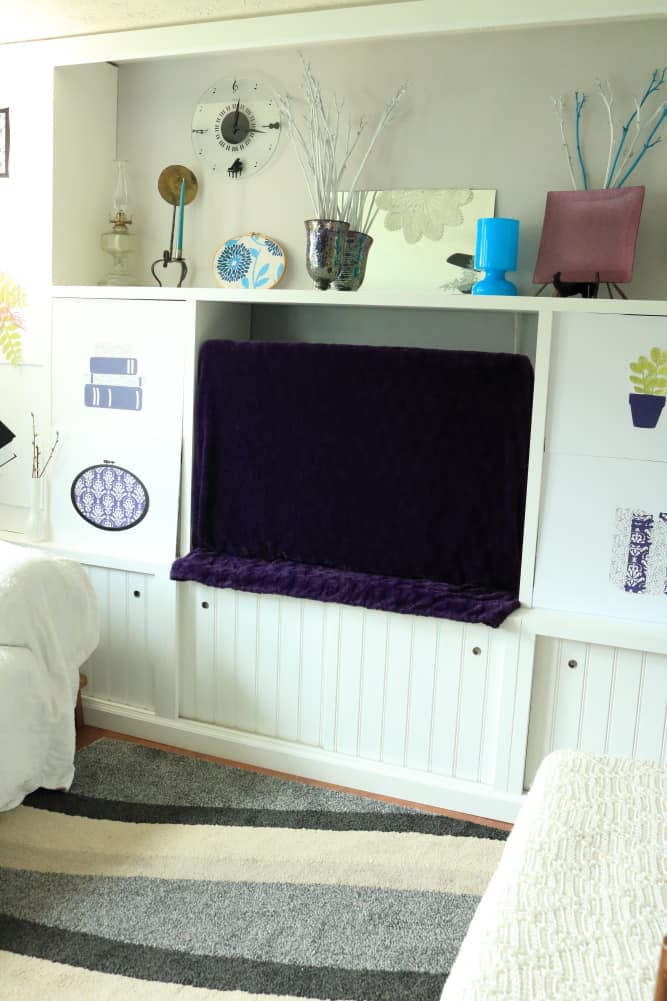
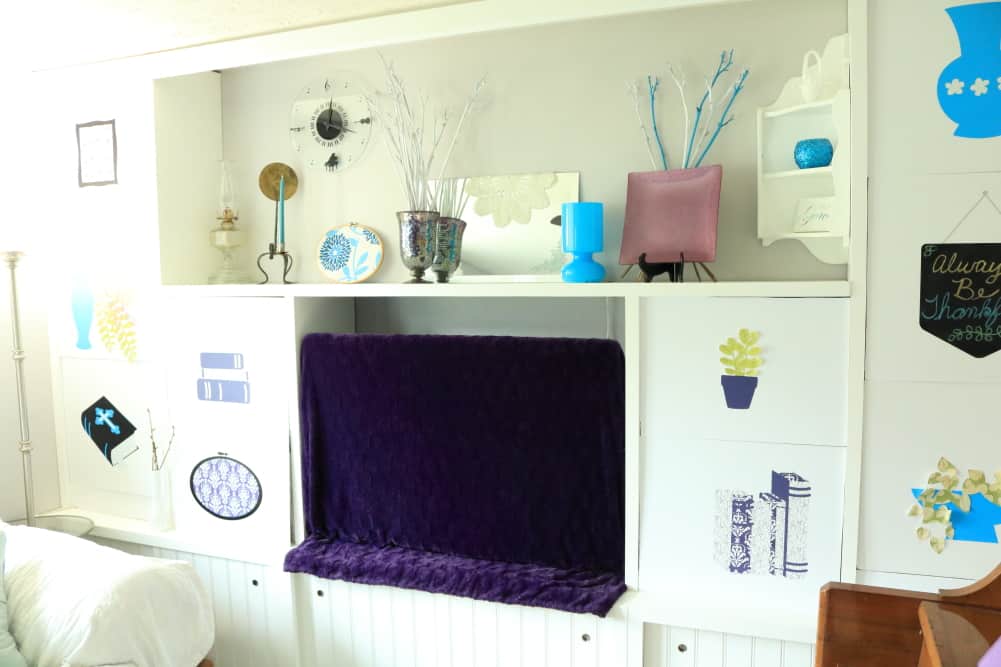
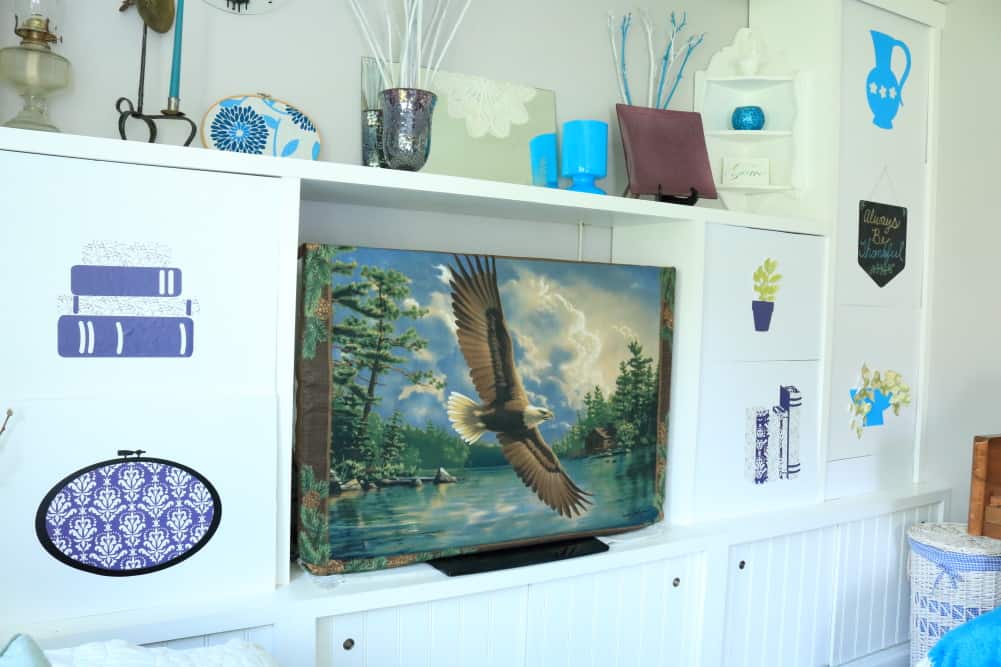
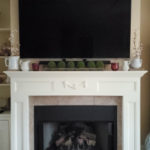
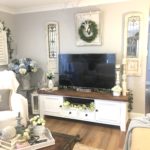
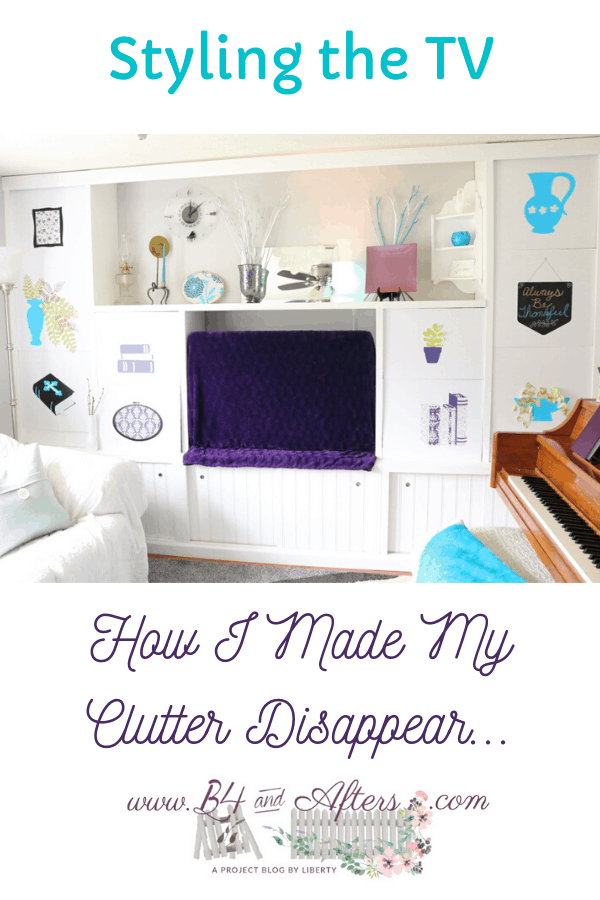
TV AREA AFTER!!
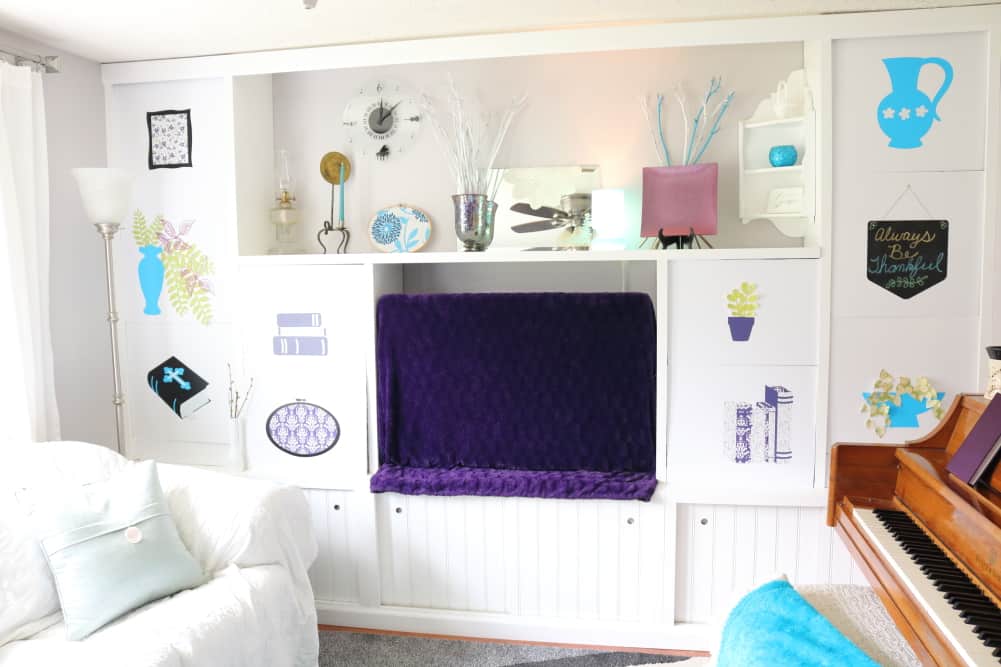
I chose a deep purple throw for the television, because the previous light blue one was the wrong shade of blue.
What do you think? Better?
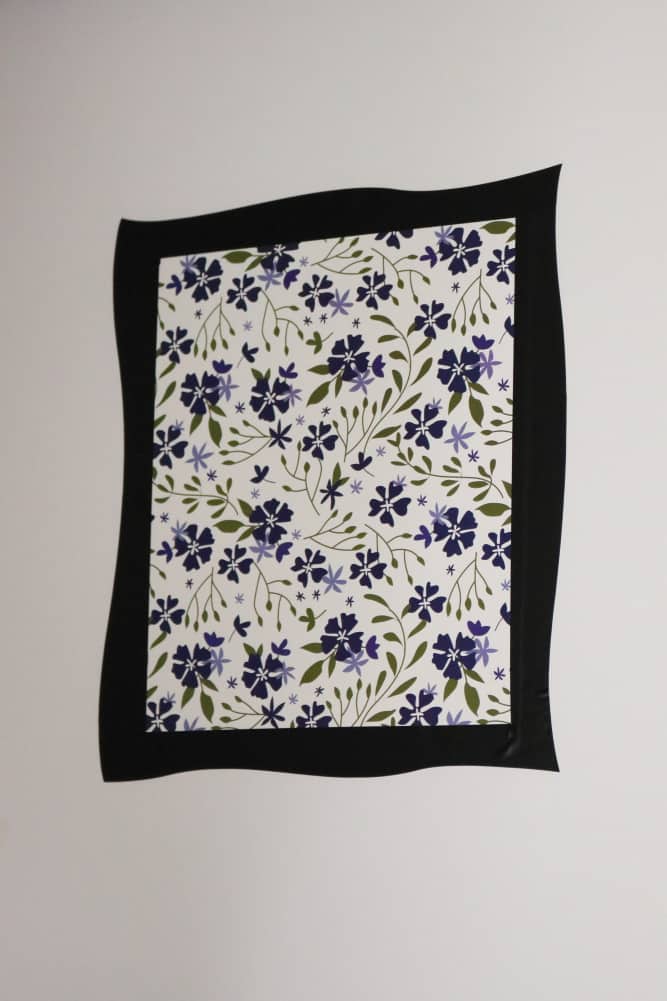
Here are some closeups of the shelf elements. First up, in the upper left corner is a framed floral print.
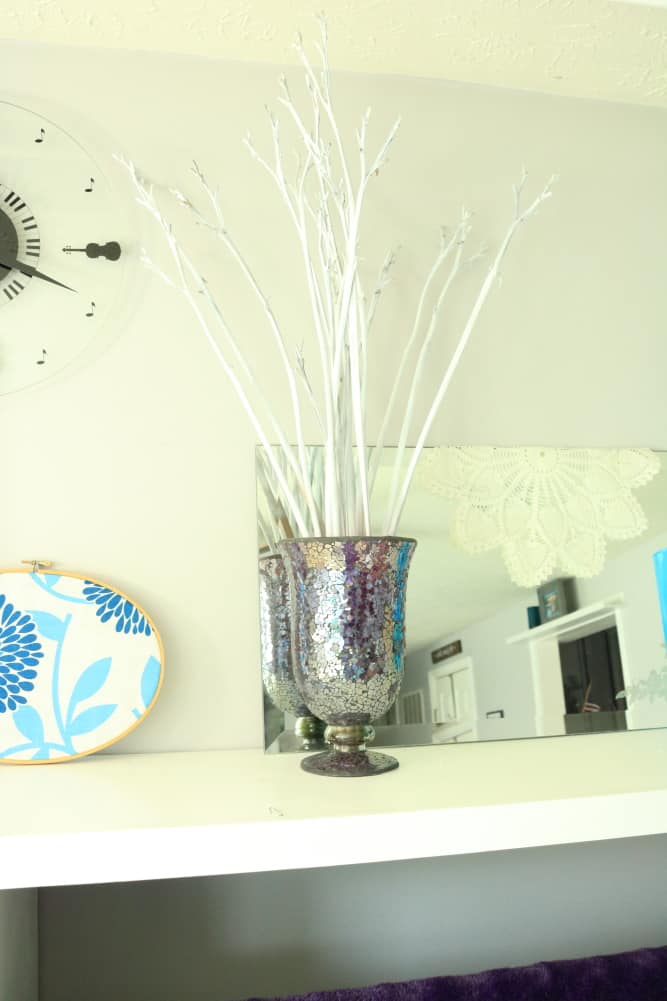
Here is the tall blue vase with greenery.
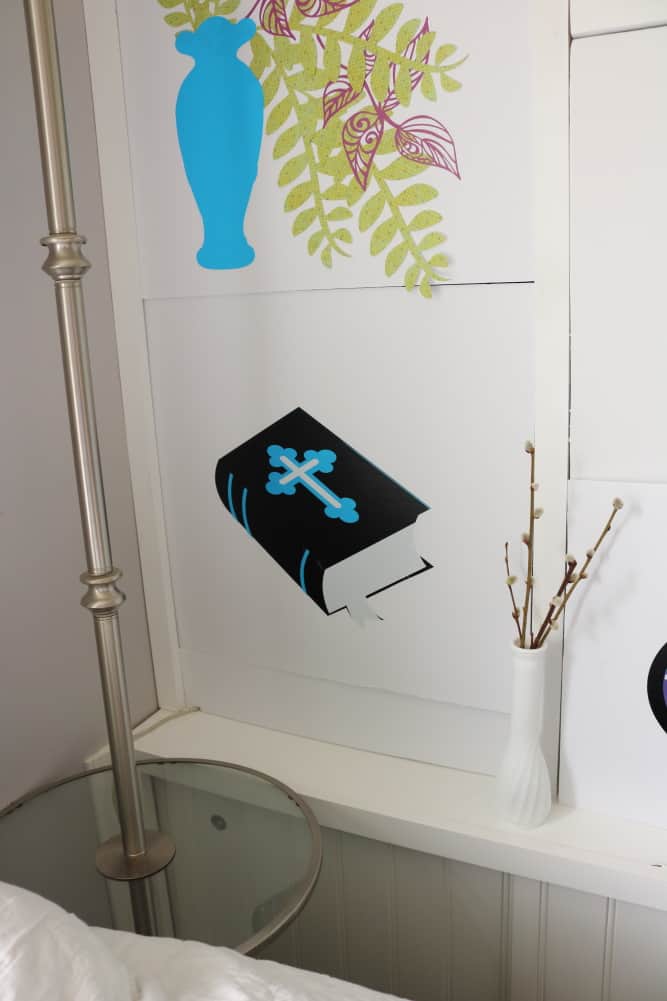
The Bible is layered vinyl to get the three colors– my 2nd layered vinyl project.
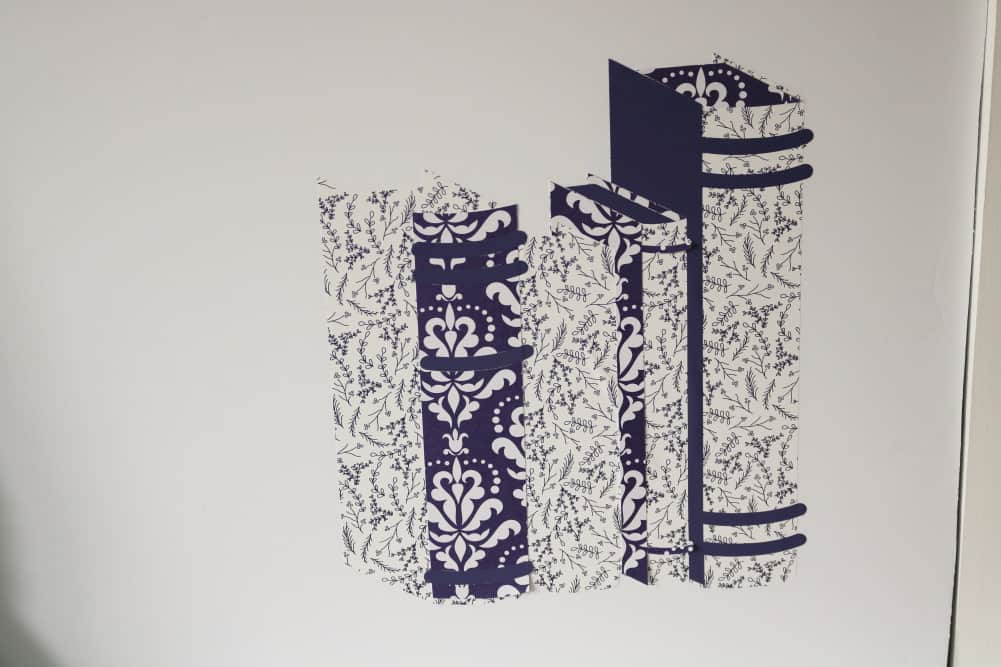
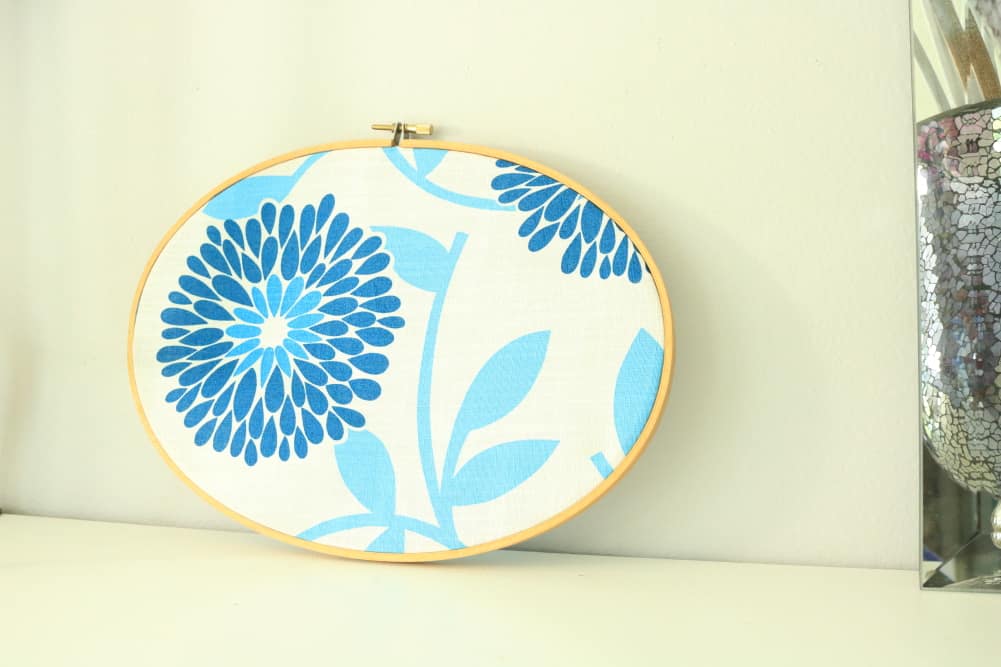
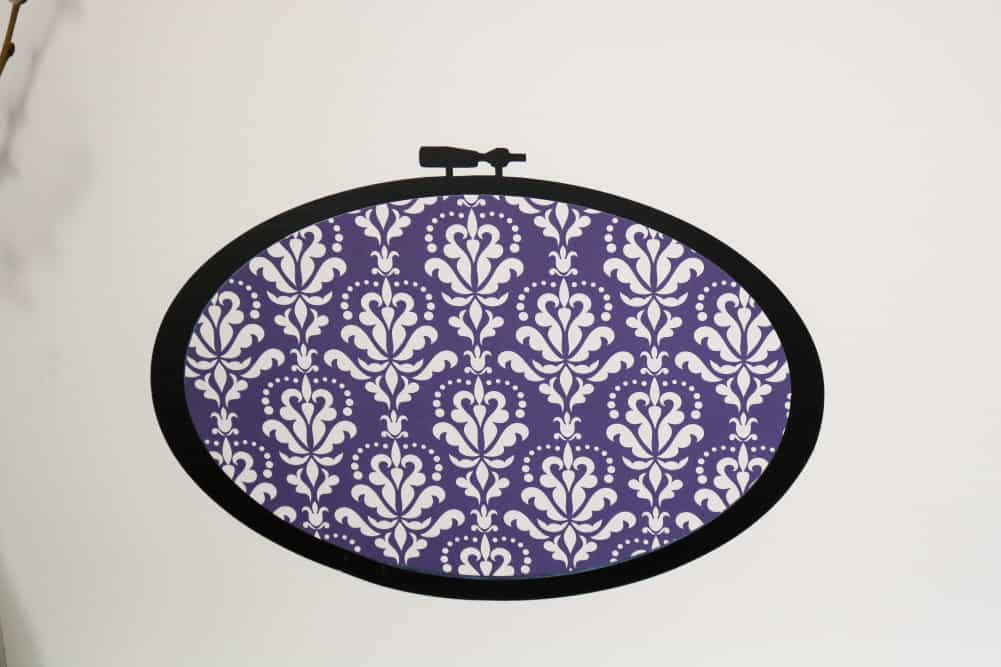
Here are books stacked up, and a sewing hoop with a damask print.
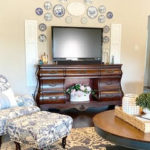
Moving on to the right side of the TV entertainment center, here is a small potted plant that was drawn and cut with the Cricut maker.
Underneath the potted plant are the layered books I showed you earlier, above.
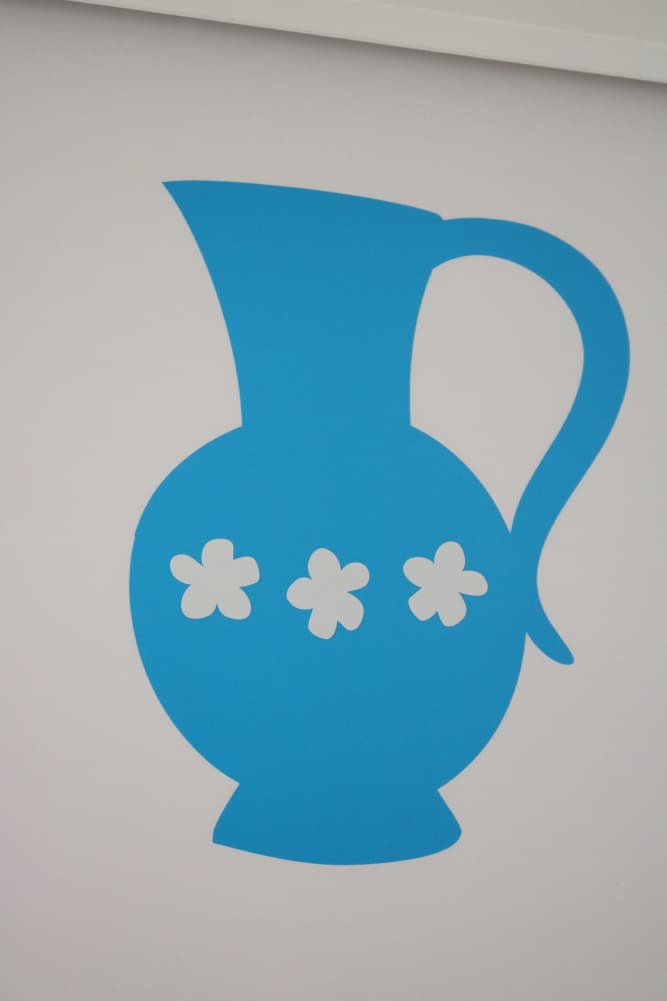
To the far right is this a simple pitcher.
Underneath the pitcher is the faux chalkboard sign.
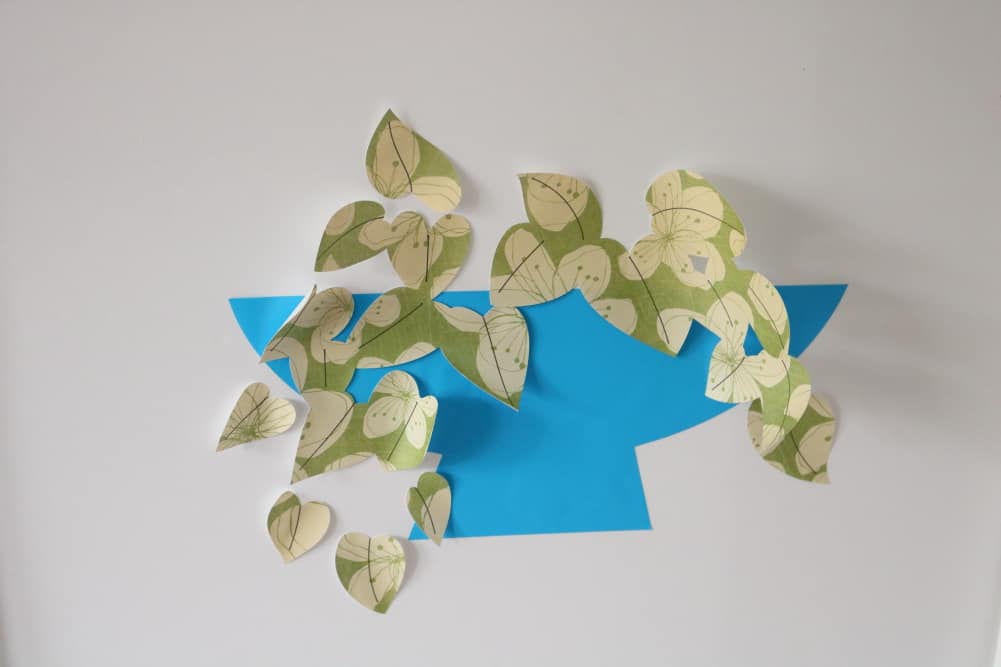
Underneath that is a bowl with overflowing leaves made of scrapbook paper, cut out and drawn with the Cricut Maker.
And now you know How I Made My Clutter Disappear!!! Do you like it? Here is a picture with the lamp turned on.
I had tried using this blue throw. While it was the right shade of blue, I liked the purple one better.
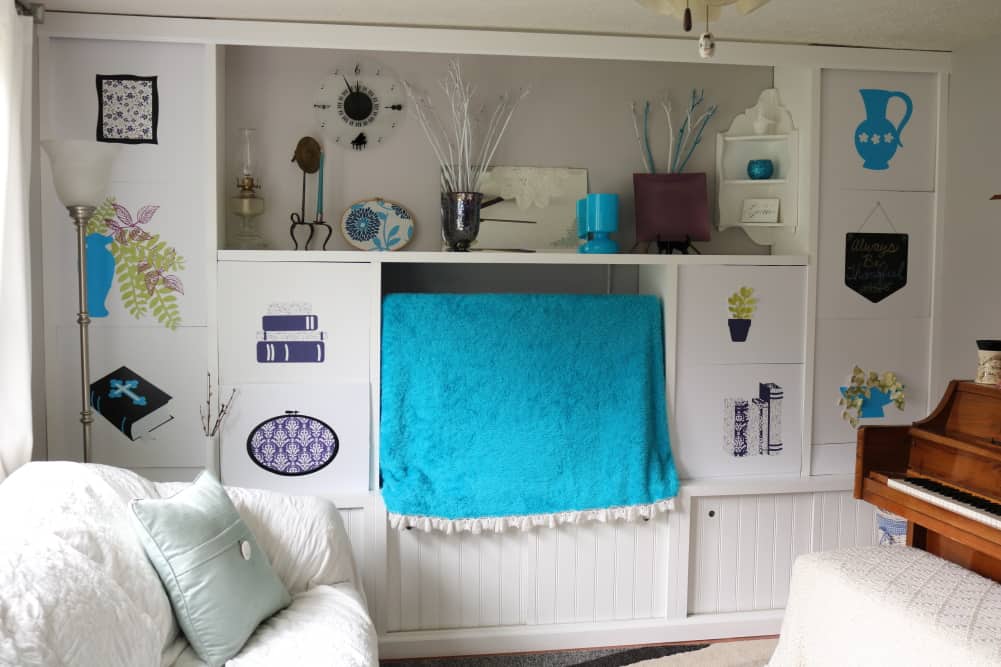
Here is another view of the blue tv dust cover.
Would you agree that the purple one looks better? It was difficult choosing colors for my faux pieces because I couldn’t use white–white would have blended right in with the foam board. I also had to work with the adhesive vinyl that I had collected– and while I have a variety of colors, there are many colors that I don’t have.

Now I will show you closeups of the “mantel area.” I guess it is sort of a faux mantel?
The kerosene lamp was my husband’s grandmother’s. The candlestick was made by my blacksmith grandfather.
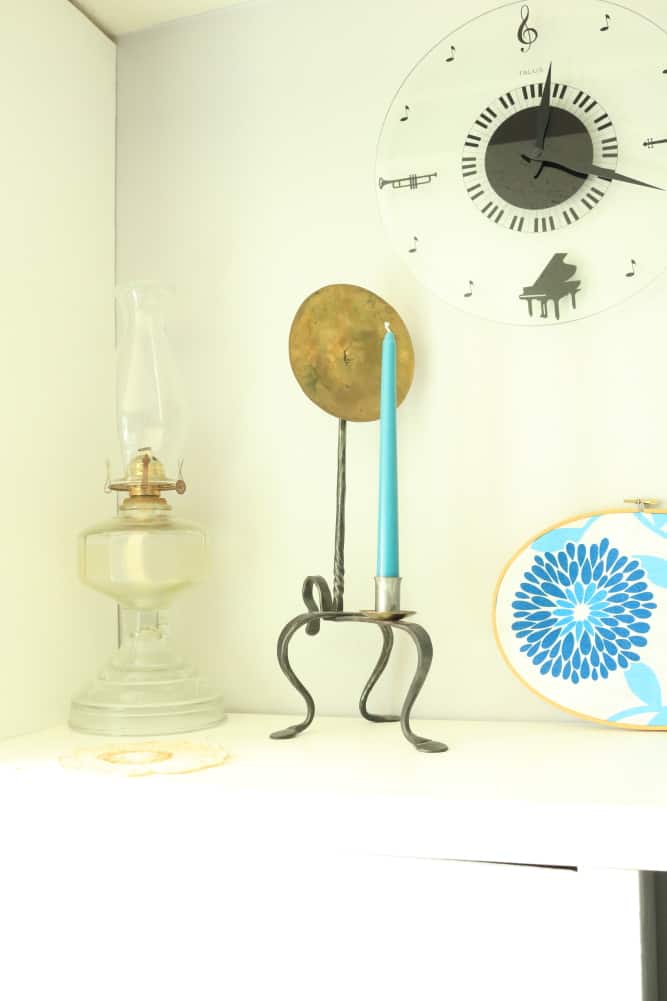
I made this hoop years ago with floral fabric leftover from a project. It was one of the few times I bought fabric because I was looking for a bold, colorful pattern, and not because it was on sale!! It was part of the inspiration for this project, not only for its colors, but for another reason which I will show you below.
When I was choosing what to put on this faux-tel area, I wanted some white daylily stems. I had saved extras, so I spray painted these white right then and there! I’m glad it was a nice day outside! I also painted a few of them blue for the other side.
Here is the blue Ikea lamp.
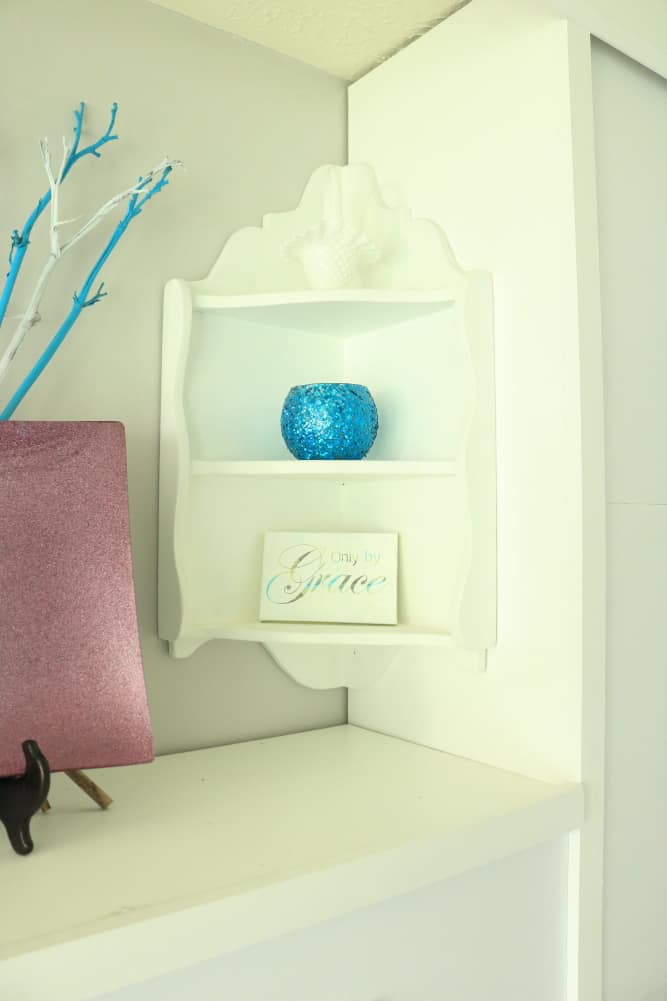
The “Only by Grace” sign is a little reverse stencil canvas that I did. I will share how I did it in another post.
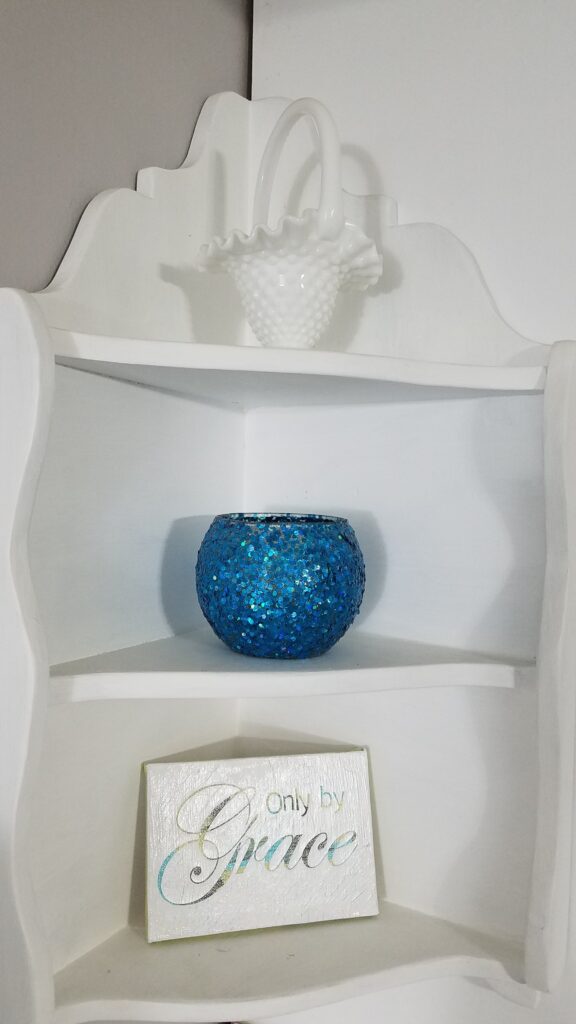
I found this giant oval hoop at a thrift store several years ago for $5. I haven’t decided how to use it yet. Do you see the three hoops in the picture?
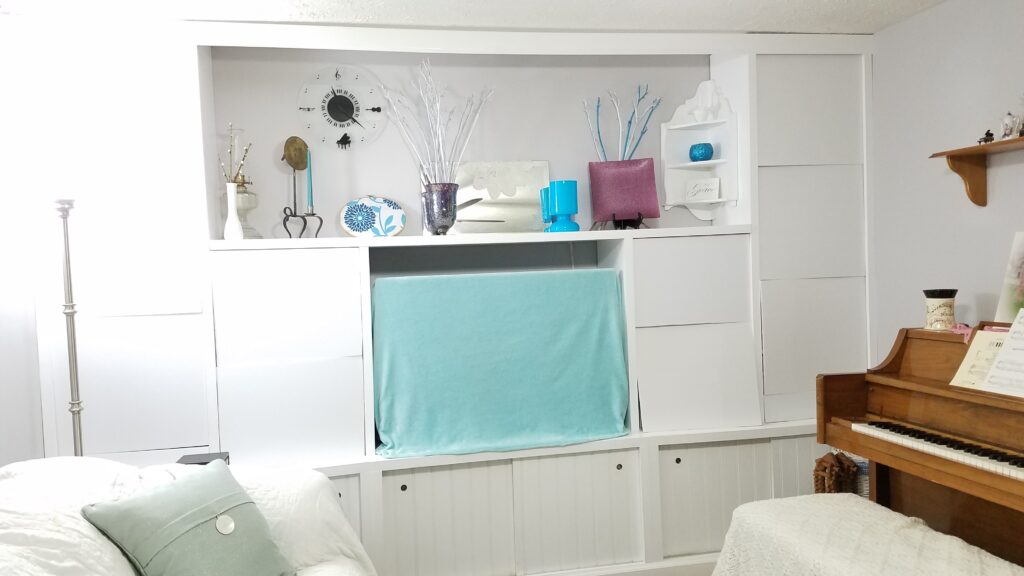
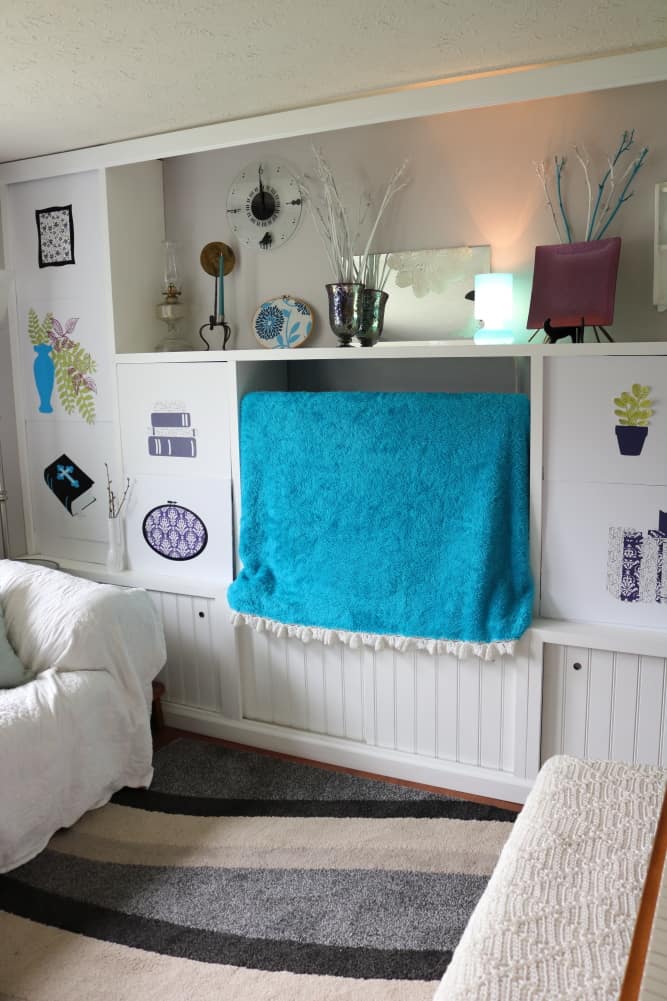
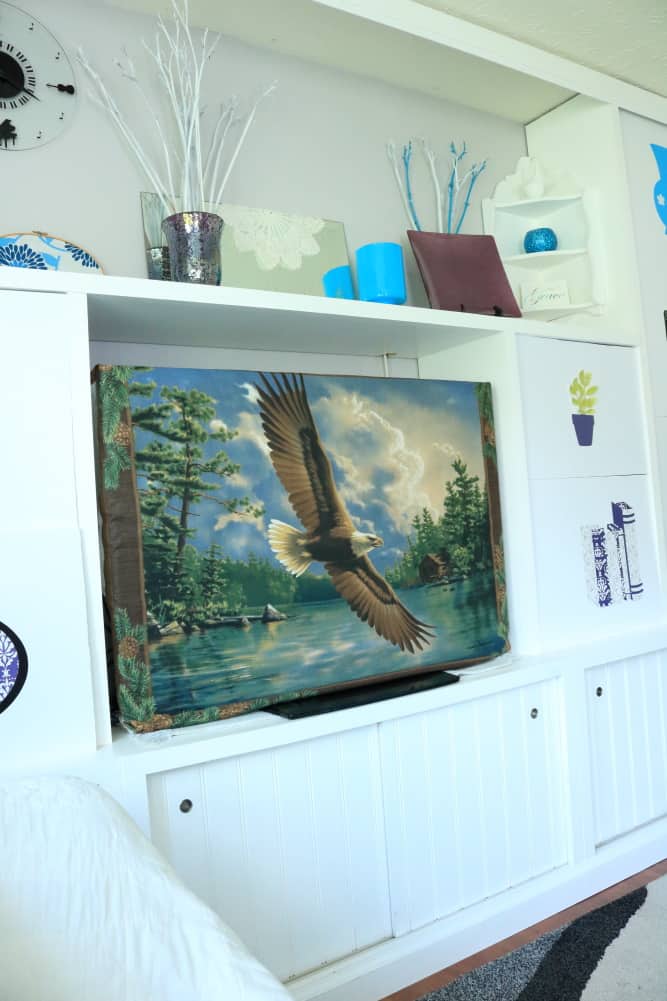
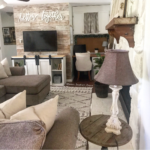
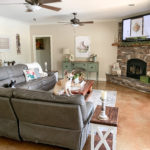
This is my view when I am sitting on my couch and looking to the left.
I know that this color scheme wouldn’t work for everyone. But it suits me and that is what matters! It is wonderful to have all of my clutter hidden for awhile! And if I should tire of these colors, all I have to do is cut more foam boards and change the colors. (Actually, doing this project has made more shelf-covering ideas come to my mind— so don’t be surprised if you see more ways to hide your shelf clutter in the future!)
While everything looked so nice, I decided to try out the eagle dust cover again. Wow! What do you think?
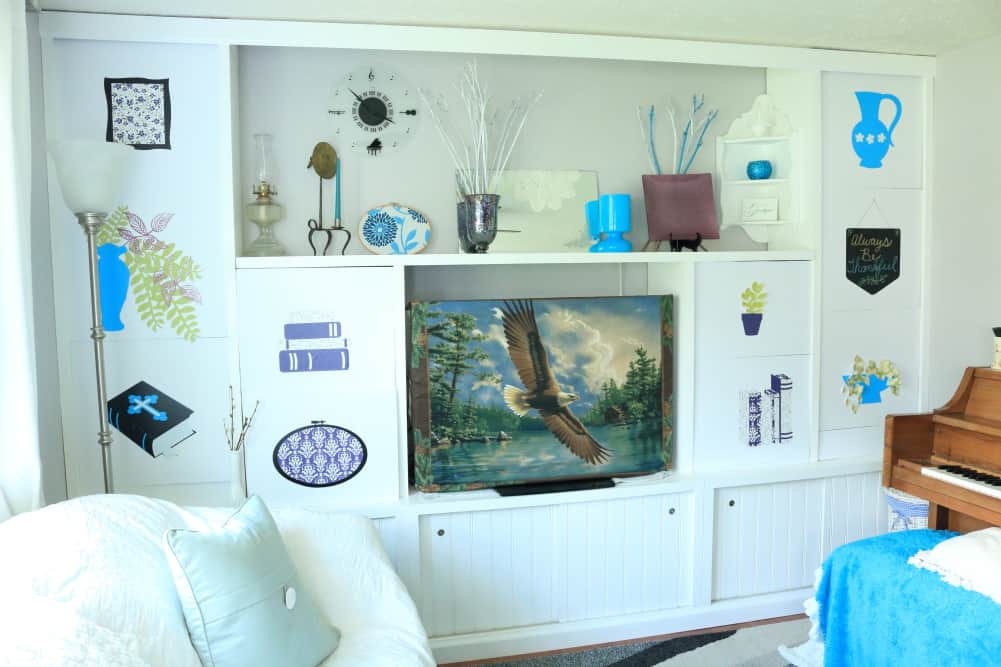
I think it actually works very well– almost as if I had planned it this way! But I didn’t.
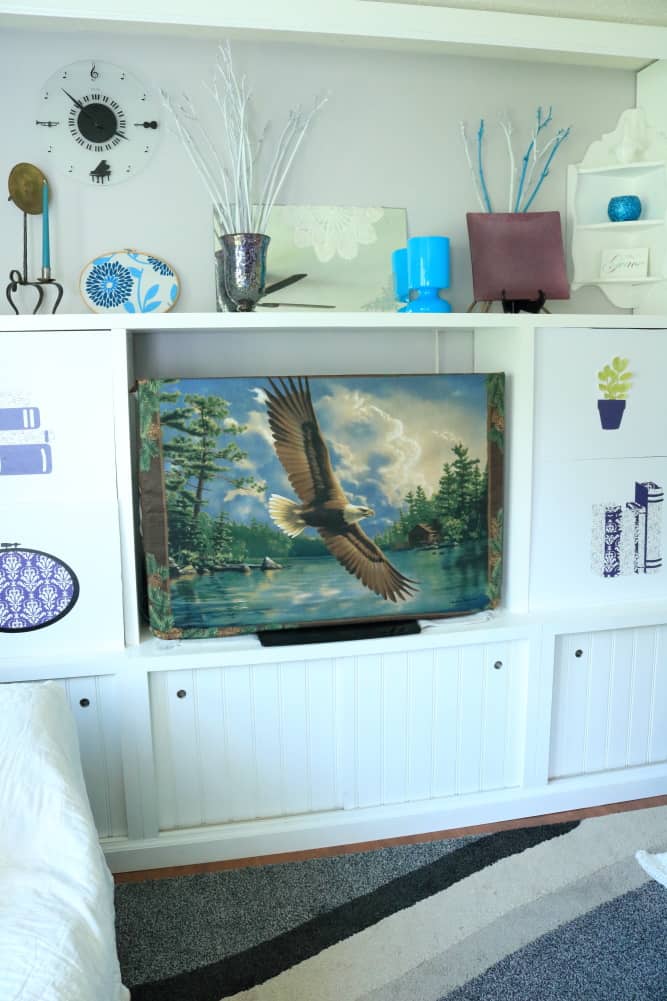
Here is my pleasant view from the couch again.
I hope I’ve given you some ideas of how to decorate around your TV. My ideas are not conventional decorating advice…. My advice is– be you! Try different things, different colors– then let whatever you think looks nice be part of your decor.
Seven Ways to Style Your TV
Please stop by and visit my fellow bloggers who have some more great ideas for styling their TV areas, by clicking on their pictures below! Next up after me since I am last, is Decorate and More with Tip (unless you started there first).
For More Details on my Living Room, Check Out the Links Below!


Your are so talented!!!
Fun colors! Looks so tidy now. Creative way to hide the clutter!
Thank you, Pamela!
I love the Eagle throw best! Looks wonderful!
Why thank you, Janine! I think it might be my favorite, too.
I love the way you eliminated the clutter and made the space seem bigger and brighter! It looks amazing!
Thank you so much, Michelle!
Wow! This all turned out fantastic Liberty!! So much inspiration here ! I haven’t used my Cricut even once since getting grit at Christmas but you’ve definitely inspired me !
Great job here …
Teresa!
Liberty, when I first saw your photo I had no idea this was faux decor. Wow….how creative you are great job! Love the purple throw too.
Thanks for joining in on the challenge. It’s always a great way to share our inspiration.
Thanks, Terrie. I wondered how noticeable it would be. I’m glad you like it!
Liberty
Wow I’m amazed at everything you can do with your circuit machine. I can’t seem to figure mine out. This all turned out fantastic. And I love your “be you” advice! Styling is so personal and we each have so much to add 🙂
I would love to help you with your Cricut machine, Danya. Let’s connect through email. I’m so glad you liked this post!
Liberty
Great job of getting rid of the clutter. You’re very good with your circuit machine too!
Cindy
Wow! What a difference! You definitely eliminated the clutter. Love the nice clean lines of the room now! Great job.
Thank you, Tammy!