
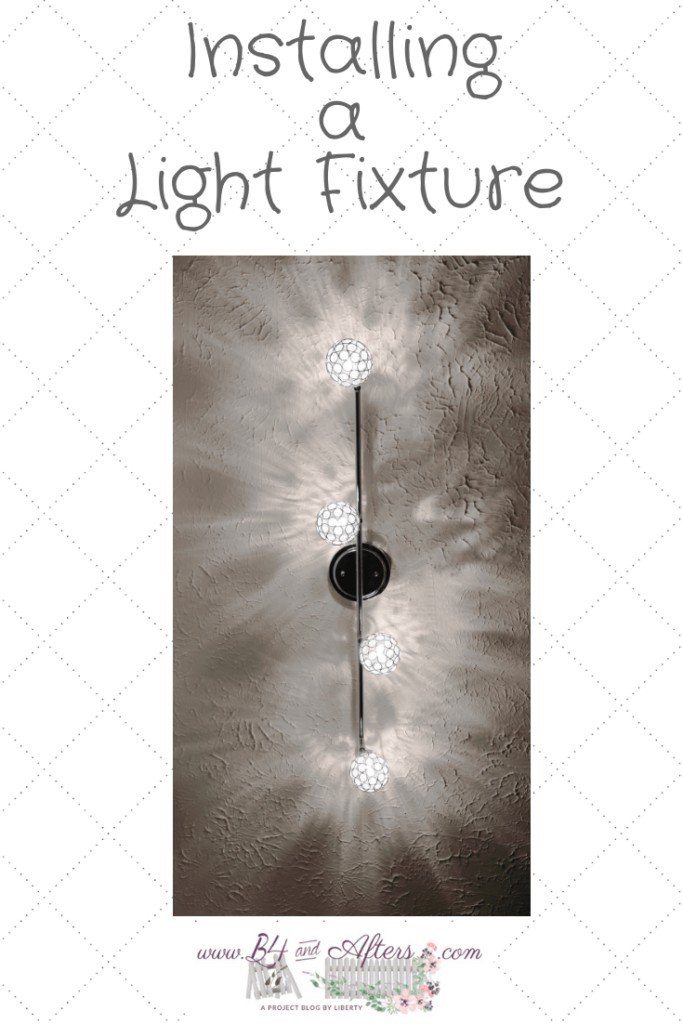
Installing a Light Fixture: Master Closet Part 3
I am excited to tell you that I installed my very first light fixture!! It was not very hard at all! I even MOVED it from where the original one had been in the ceiling. I had just a tiny bit of help from my husband that was greatly appreciated. He went up into the attic for me and stayed there so neither one of us had to go up and down multiple times. So here is how I did it!!
I posted about my Master Closet Makeover in Part 1 and Part 2. Feel free to go read them first and come back. (Also, after this there will be one more last post showing how I finished my closet completely– those last few touches.)
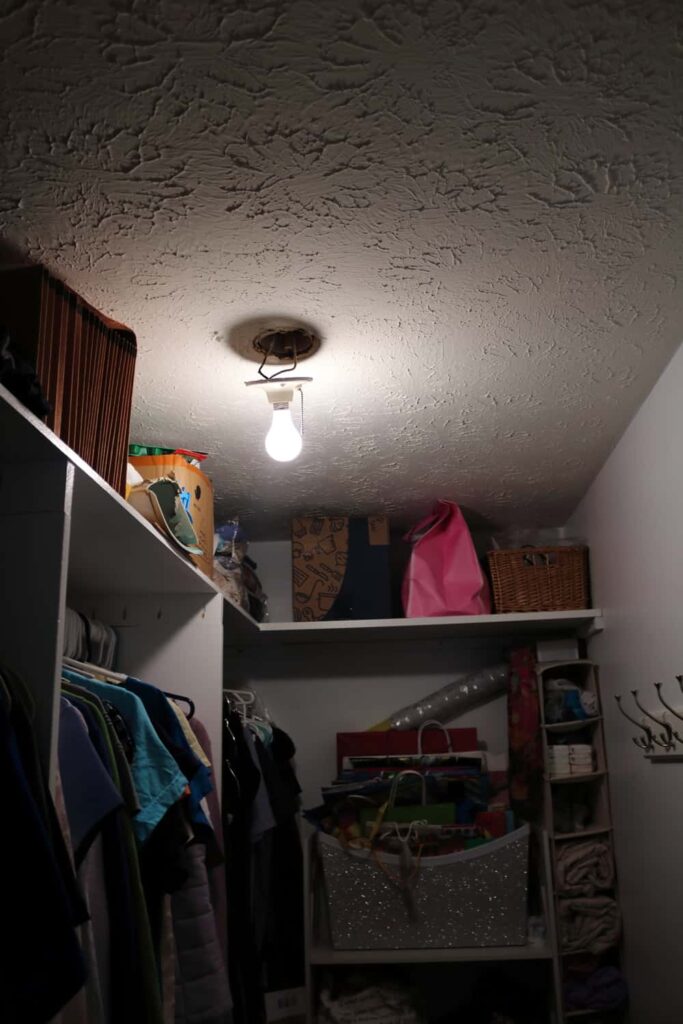
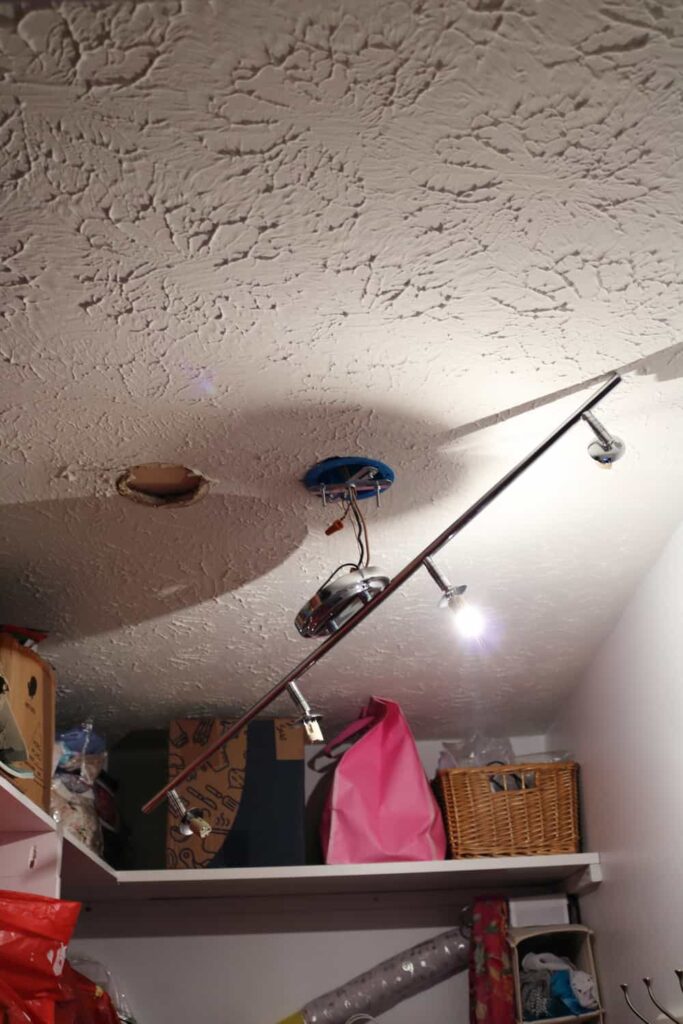
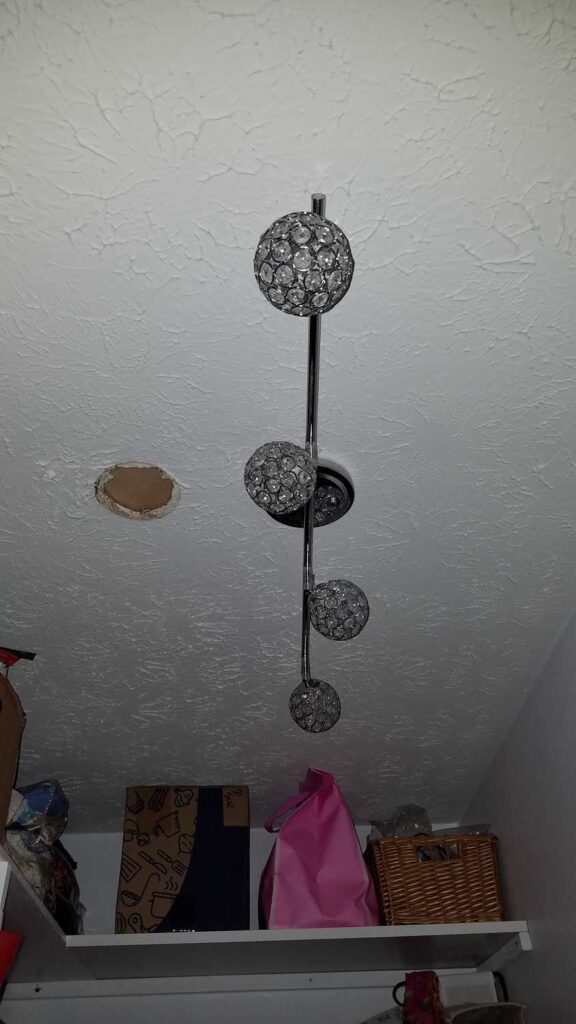
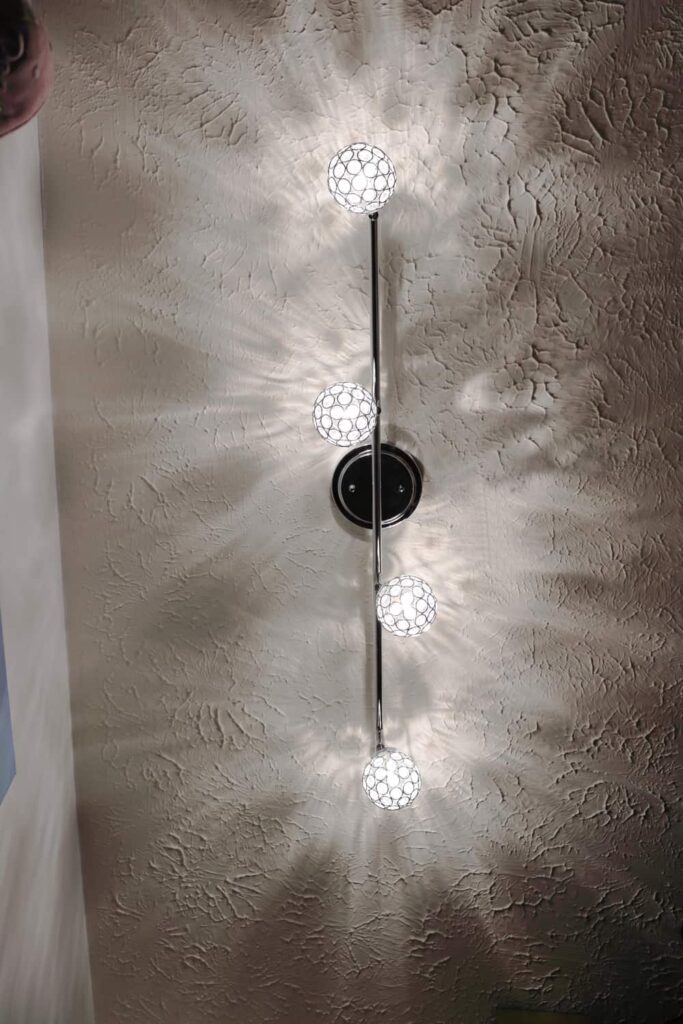
Here is where we left off at the end of Part 2. I had this light fixture that I needed to put in my closet. It is a feminine looking light fixture and I knew my husband would not like this style in other rooms in the house. But I thought I could get away with it for the closet. : )

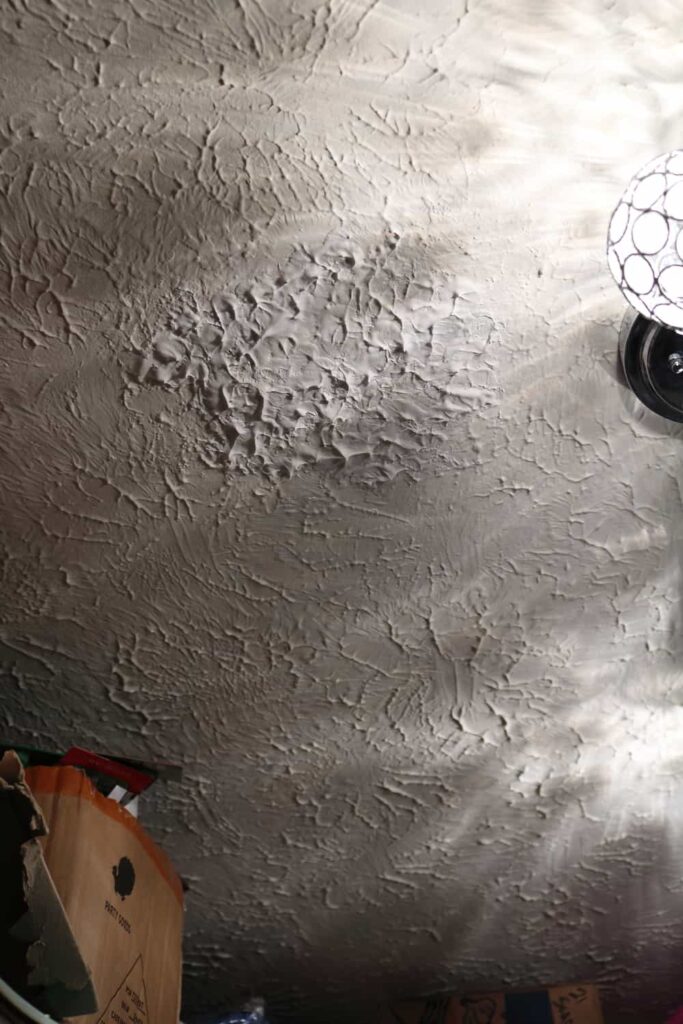
But I had a small problem. It was not as simple as switching out the old light fixture and putting in the new one. You can see in the picture below that now that I had installed the shelving, the existing light fixture was way off center. That meant that I needed to make a new hole and repair the old hole. Which part do you think was easier??
Before

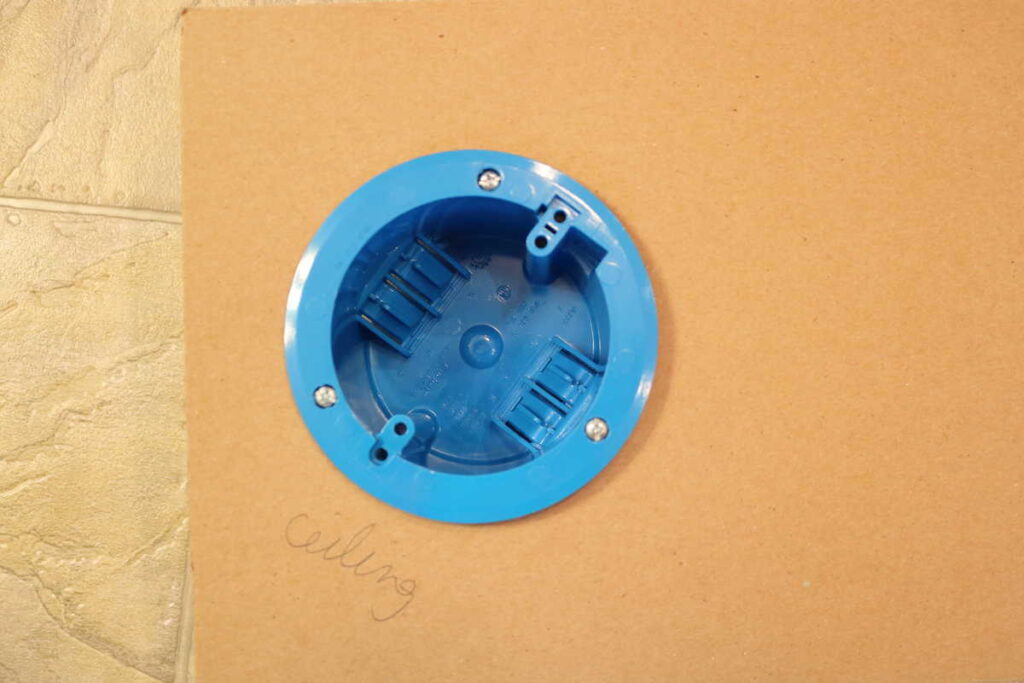
Electrical Box
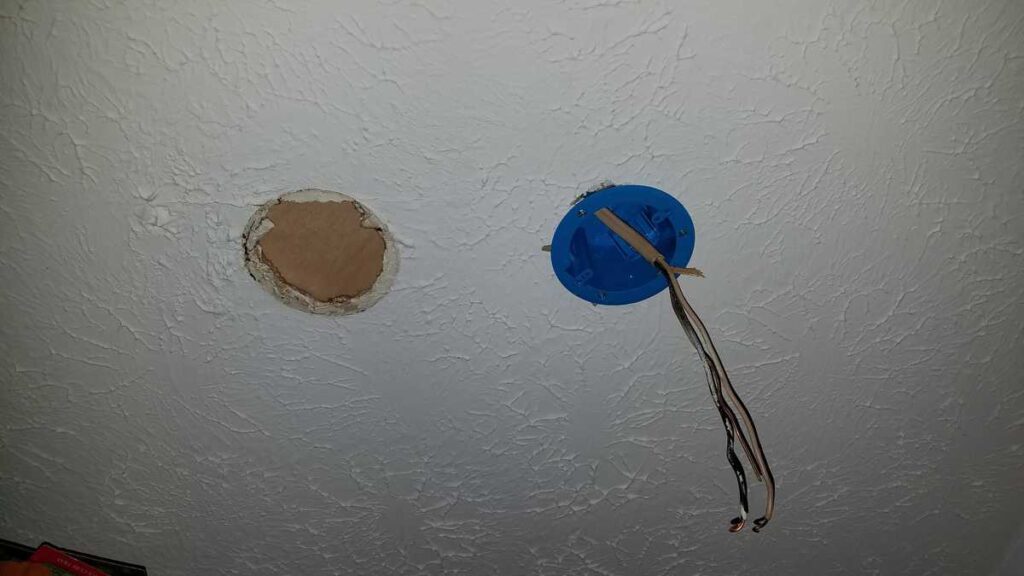
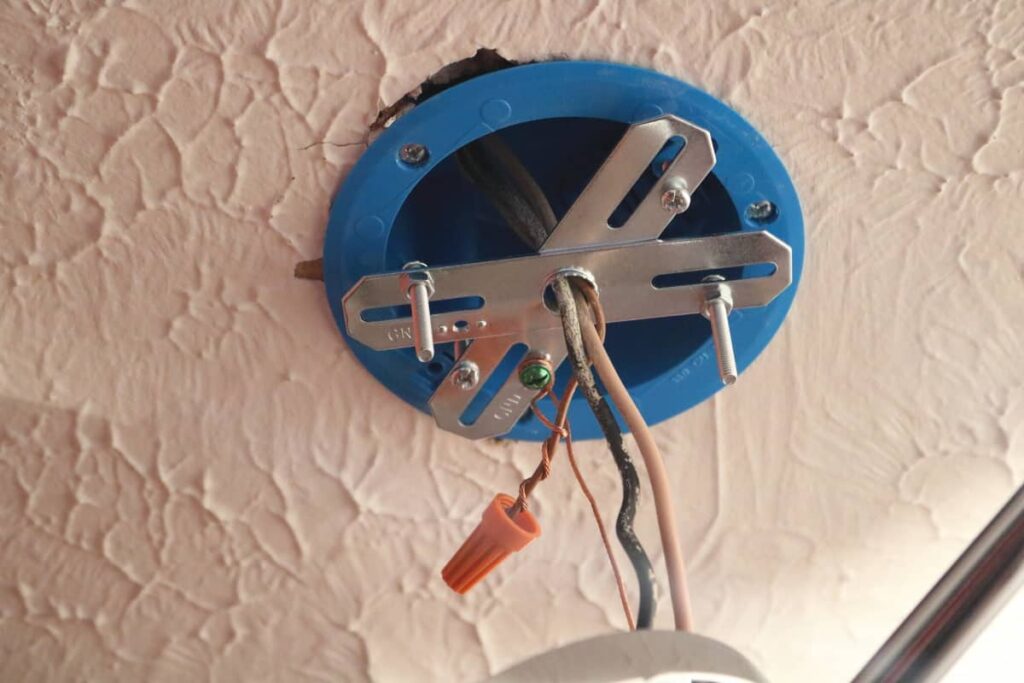
A friend of ours knew just what I needed for this project. It was this little blue plastic electrical box. It has 3 plastic wings on it to hold it in the ceiling. As you screw up into it, the wings tighten down from the top side of the ceiling to hold it into place.


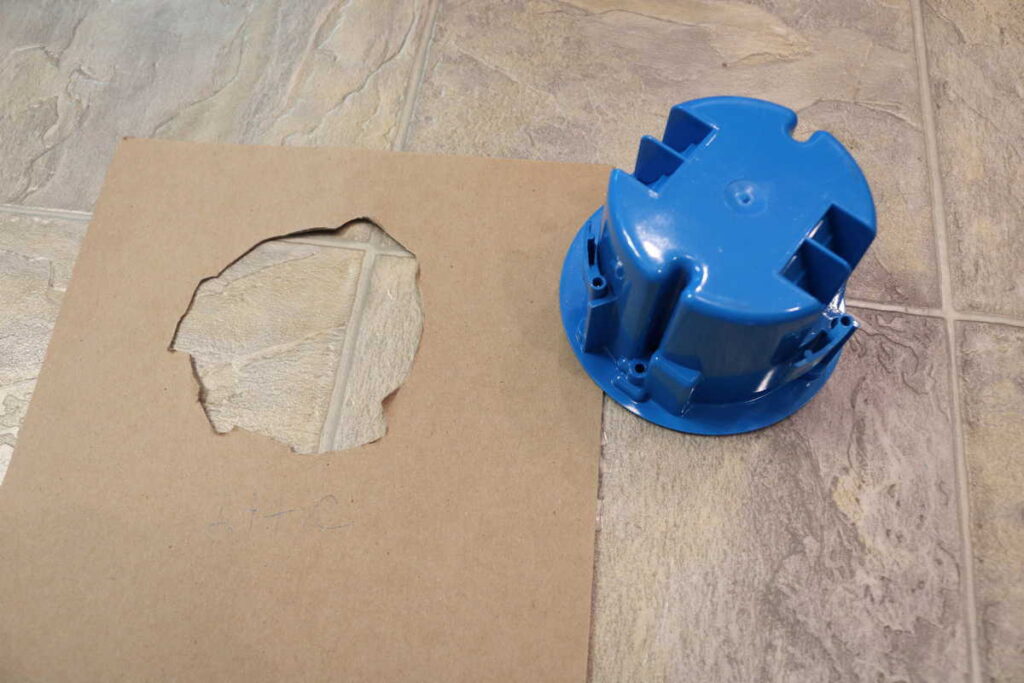
I used a thin piece of cardboard to cut a template. Then I traced the template onto the ceiling where I needed to put my new hole.
Turn Off the Electricity
So yes, I had turned off the electric breaker in the fuse box. I knew I had the right one, since my closet light would not turn on. You will see that it is off in the next few pictures.
Cut a New Hole
After I traced the shape onto the ceiling, I cut through with a box cutter, or a craft knife, before using the drywall saw.
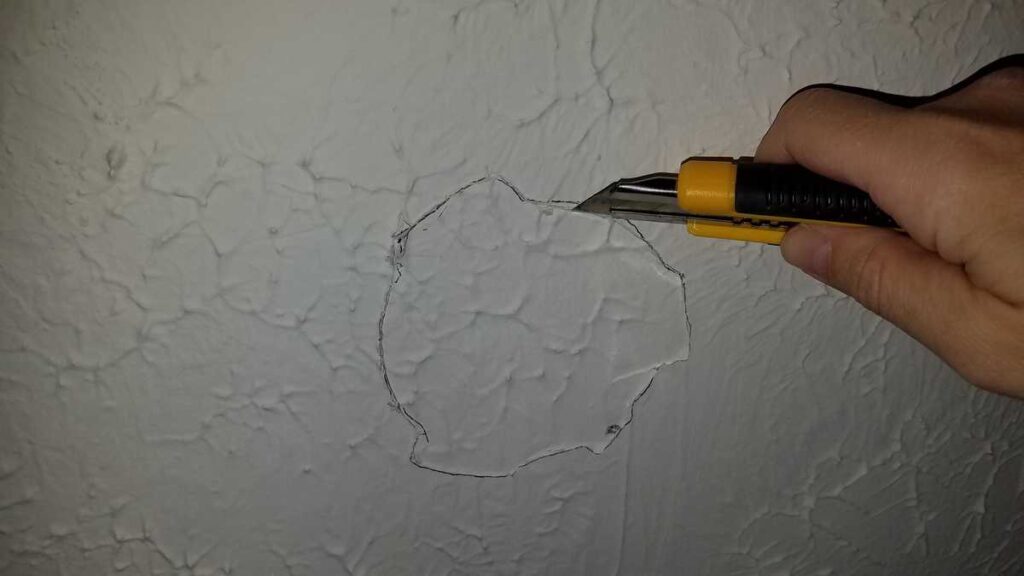
The drywall saw that I had borrowed was very easy to use; much easier than I expected. I used my hammer to tap it up into the ceiling.
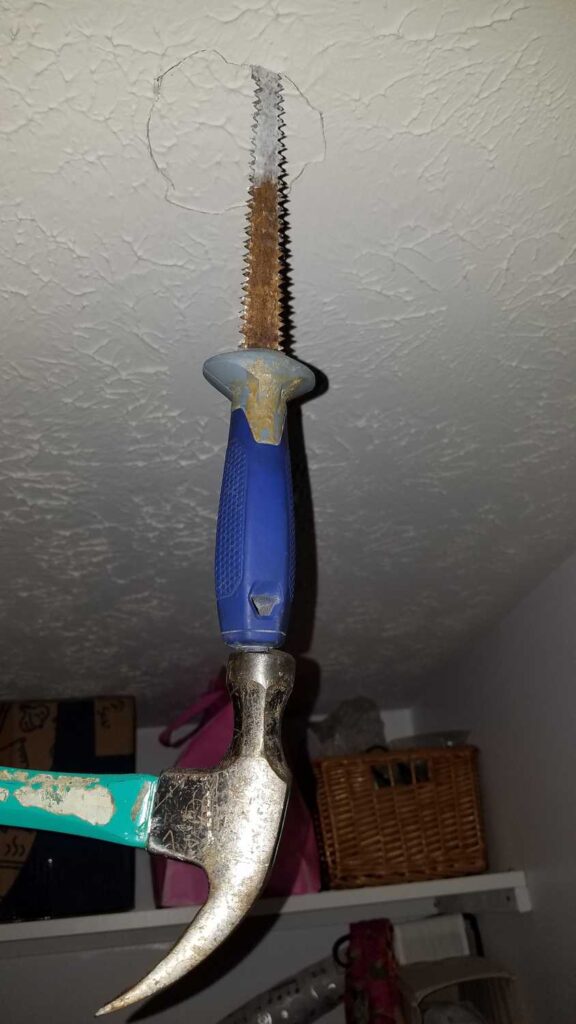
But while I was using it I ran into a problem. By this point my husband was already up in the attic. He was concerned whether there would be enough electrical wire to reach where I wanted to put the new light fixture. There was plenty of wire, but I ran into a different problem! The drywall saw hit a rafter board!!
Thankfully, it was right on the edge of the board, and I was able to shift my hole just a smidge so that it would fit, and still be where I needed it to be! Whew! What a relief!
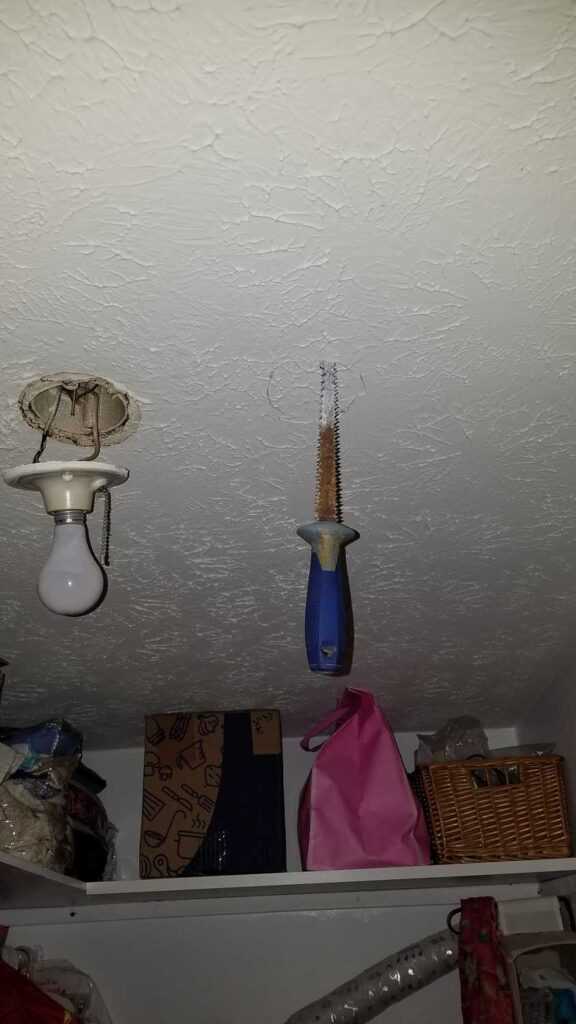
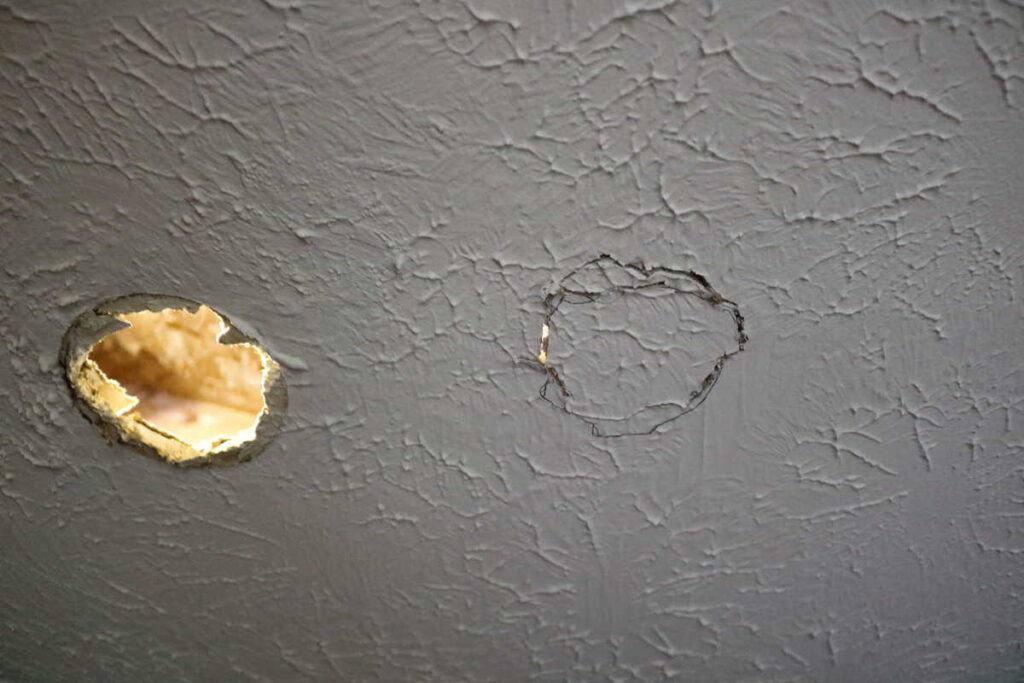
Here you can see the old hole on the left, and the new place on the right. You can also see my original cut, and then how I had to turn and shift it to make it fit. I had thought it was going to be so simple and look great, but problems like this happen a lot with projects around the house. I am glad I did not have to make an entirely new hole!
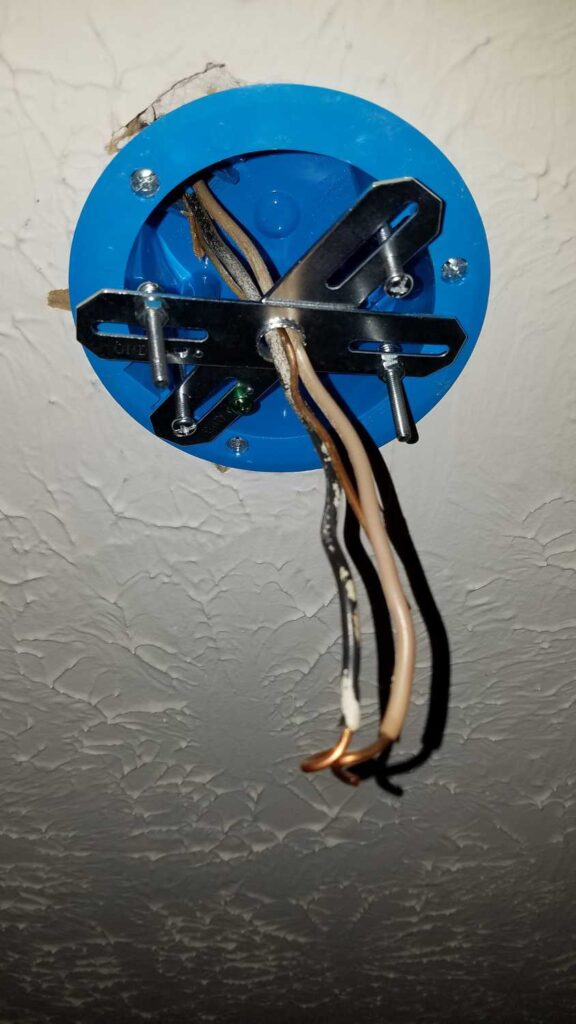
Install the Blue Box
The next step after getting the hole cut was to insert the blue box and tighten the wing nuts with the screws. It was very tight and secure. This is where my husband being in the attic helped greatly. I had unhooked the wires from the old fixture. Then he shoved the wires back through the new blue box. He also nailed a piece of scrap wood over the old hole.
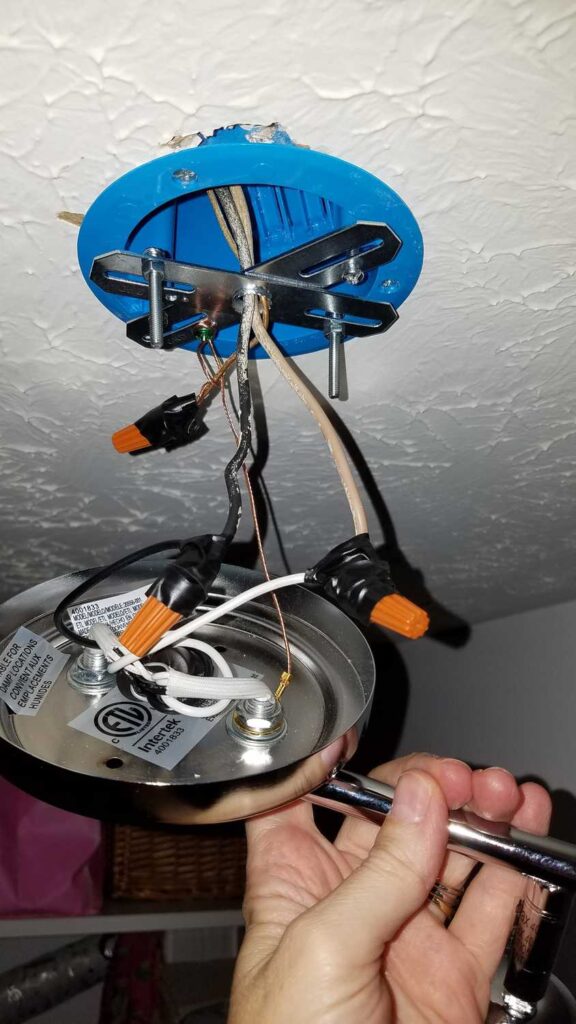
The light fixture directions were clear. The next step was to thread the wires through the hole in this metal piece, and then screw this metal piece to the blue box.
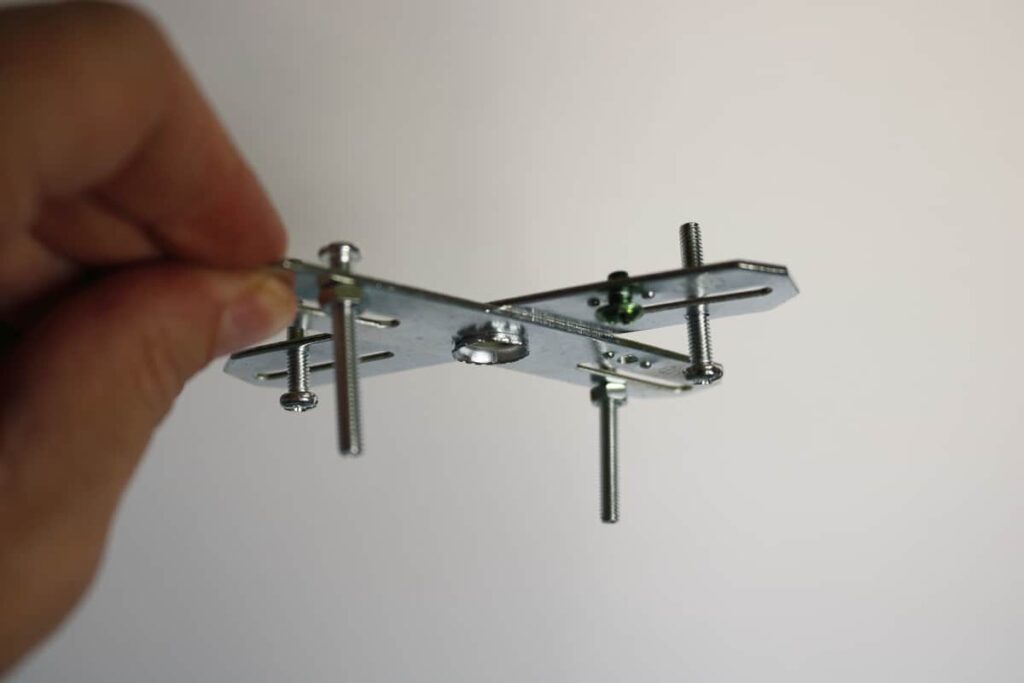
Just like this.
Connect the Wires
Next came the fun part– connecting the wires of the new fixture to the wires in the ceiling! I had never done any of this before, but again, the directions were clear. Twist the black wires to each other, then screw on the orange cap.
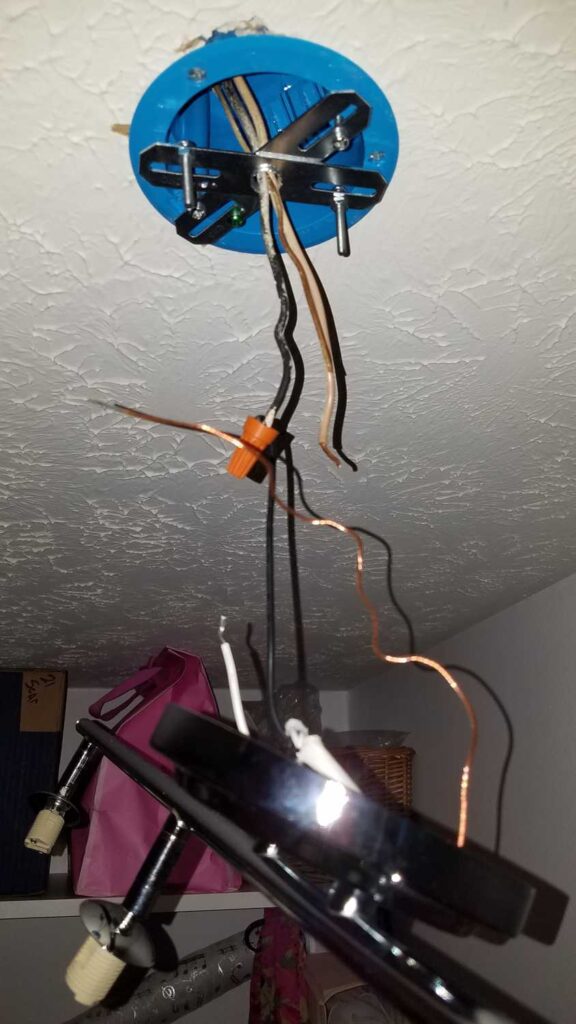
Twist the white wires to each other, then attach another cap. Wrap the bare grounding wire around the green screw, and around the other bare wire; attach another orange cap.
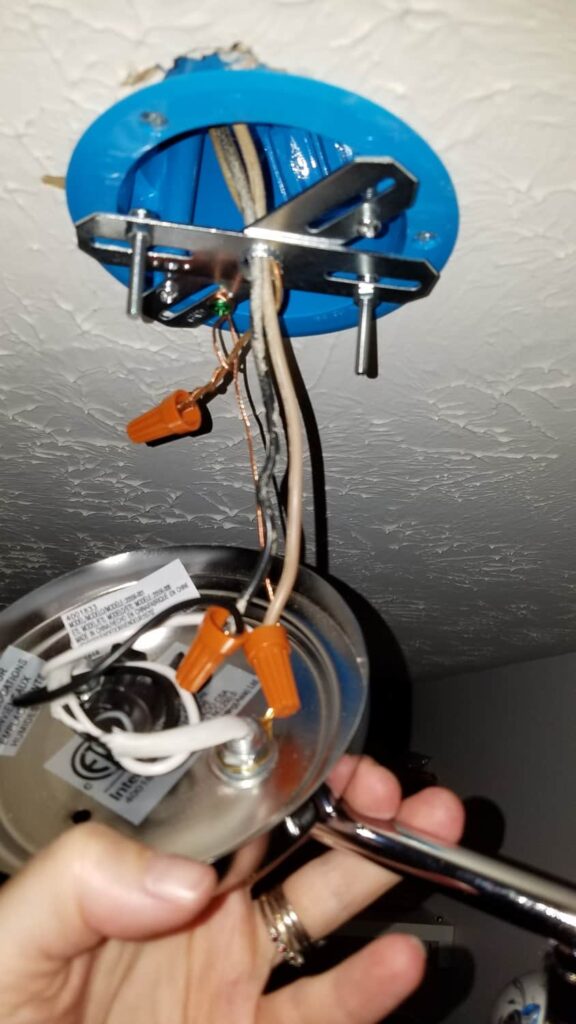
Before taping it up and finishing, go ahead and test the electricity to make sure you did it right. Yes! It works!!
Turn the electricity back off to finish up. Then tape the caps on. Looking back, I realize I should have wrapped the black electrical tape tighter, stretching it as I went.
Lastly, Close the Cap
Then push all of those wires up there and attached the metal cap to the two bolts facing downwards, securing them with the exterior nuts. Thankfully, that exterior cap would cover the small adjustment I had been forced to make when placing my hole in the ceiling.
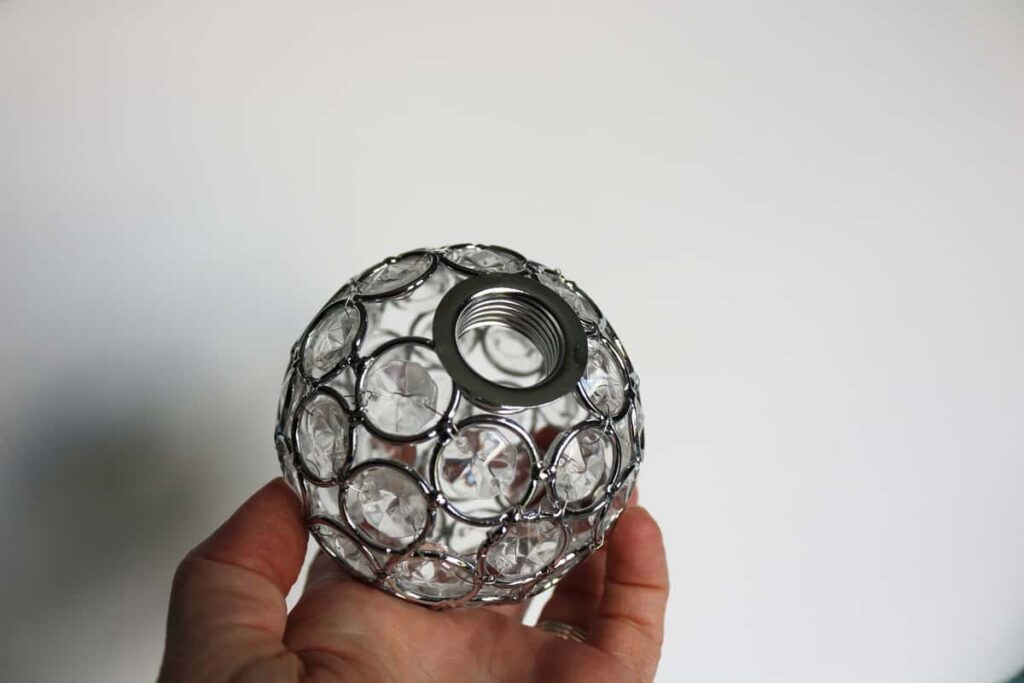
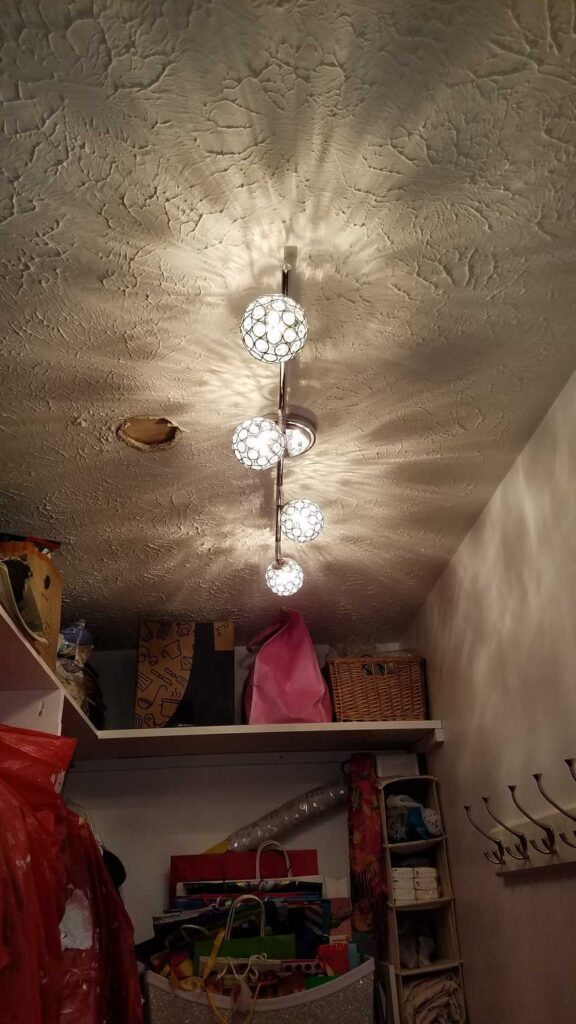
Then I put in all of the light bulbs and attached the decorative covers.
Then turn the breaker back on in the fuse box. Hurray!! Project accomplished! Well…. except for that other hole in the ceiling….
Fix the Old Hole
To fix the old hole, I first screwed in the piece of drywall that I had cut for the new hole. Then I put drywall mesh repair tape over it all.

Then I smeared drywall compound over it. It stayed like this for awhile, while I tried to figure out how to get it to blend in with the textured “butter” ceiling.
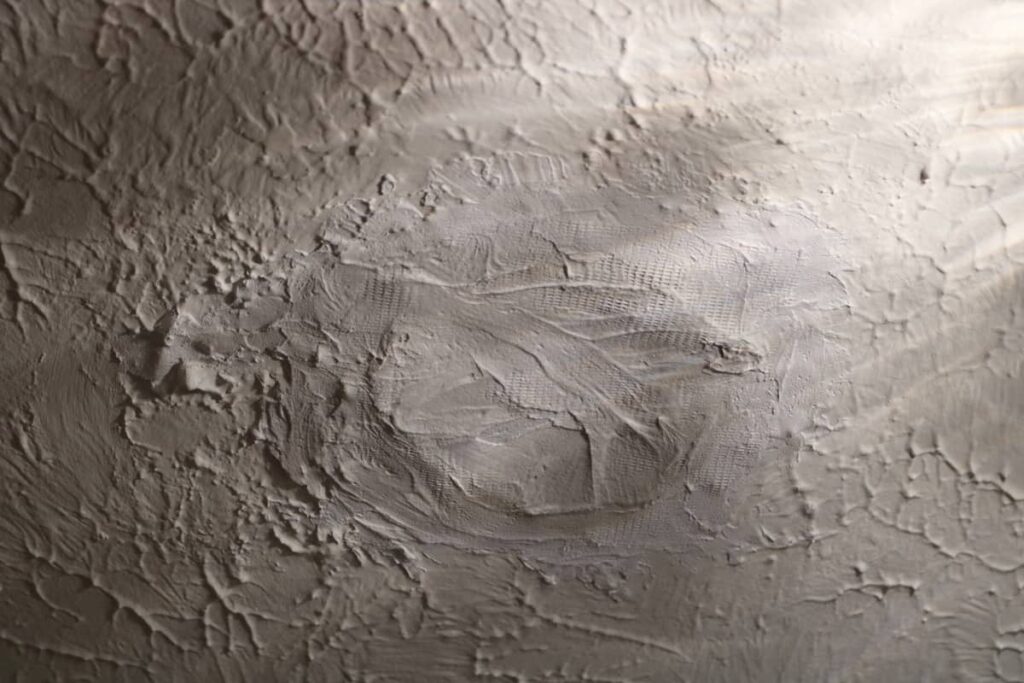
Trying to pretend it wasn’t there did not work….
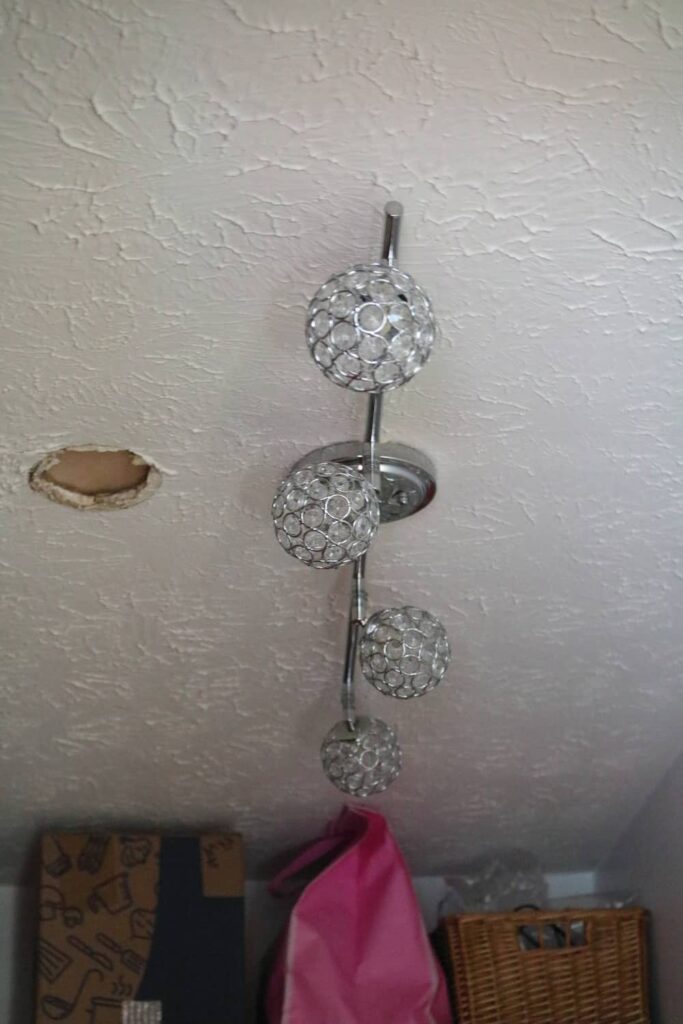
I finally was able to get a similar look by putting up a lot of drywall mud, and lifting off of it downward with a metal spatula thing. It was a little similar to lifting beaters out of whipped cream peaks, and resisting the urge to smooth it out. I did my best to disguise the old hole, but could not quite match the pattern on the ceiling.
(I will admit though, that to get my “After” picture below, I did photoshop it. The color of the drywall mud does not match the old ceiling color. I would have to paint the ceiling to fix that, and it is not that bad enough to make me want to paint the ceiling! Ugh!)
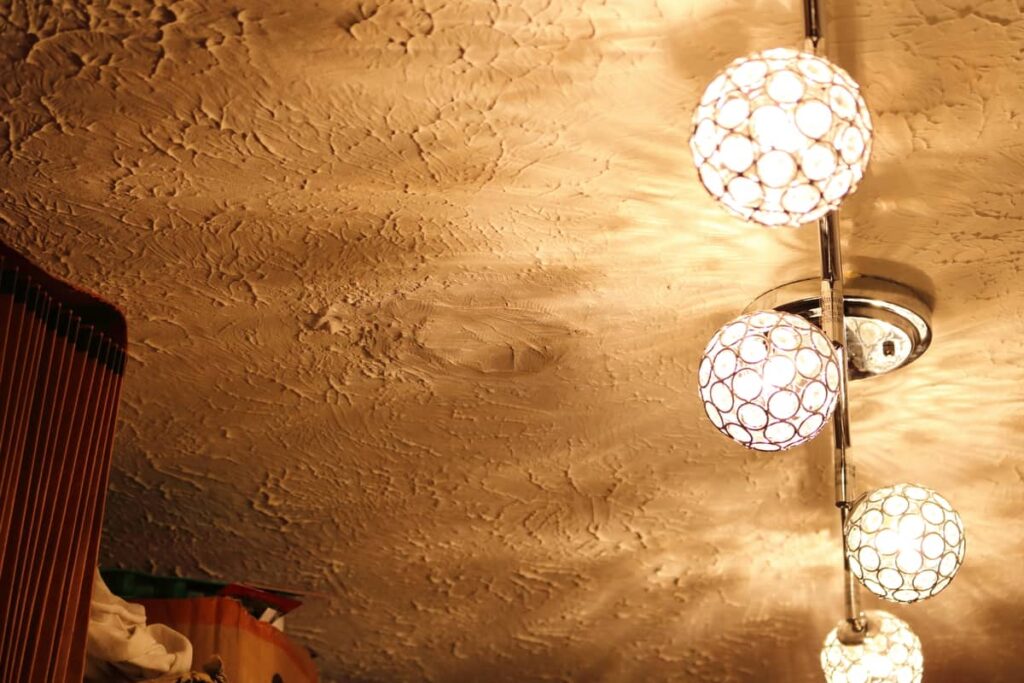
AFTER!
And that is how I installed my first light fixture! Now that I know how easy it is, you might see me doing this again somewhere. All that is left to finish the closet are those last few details — which I will share with you in the next and last post in this series!


Thank you for sharing at #ThursdayFavoriteThings. Pinned and shared. Have a lovely week. I hope to see you at next week’s party too!
Thank you, Marilyn. Can you let me know if you get an email saying that I’ve replied to your comment?