
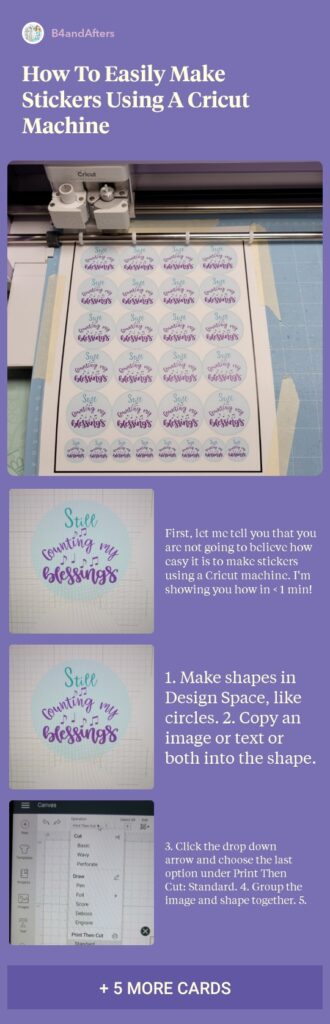
How to Easily Make Stickers Using a Cricut Machine
Let me tell you that you are not going to believe how easy it is to make stickers using a Cricut machine. I’m going to show you how in about one minute!
First of all, What kind of stickers are you making? What do you want to do?
Do you want to:
- Learn how to make stickers on a Cricut in just One Minute?
- Use a Cricut to make laminated stickers ?
- Make laminated stickers using just a printer ?
- Make laminated stickers without a printer or any other gadget ?
- Use a Xyron Creative Station to make laminated stickers ?
Are you looking for:
- Sticker templates ?
- Self laminating Sticker Supplies ?
- How to Design your own stickers with Cricut Design Space ?
- How to Design stickers on your computer?
- Ways to use Vinyl Stickers around your home?
Or something else? Let me know in the comments so I can create a tutorial for you!
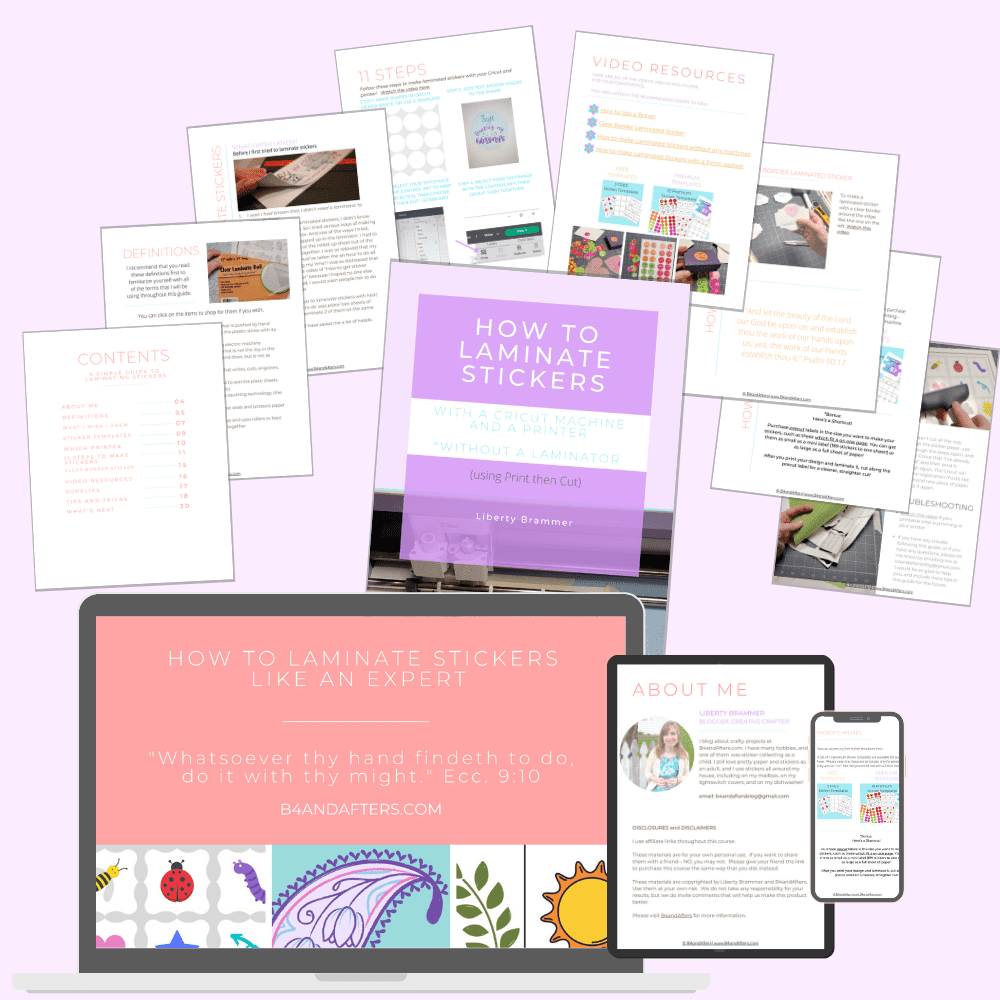
How to Laminate Stickers- A Simple Guide- Get it HERE!
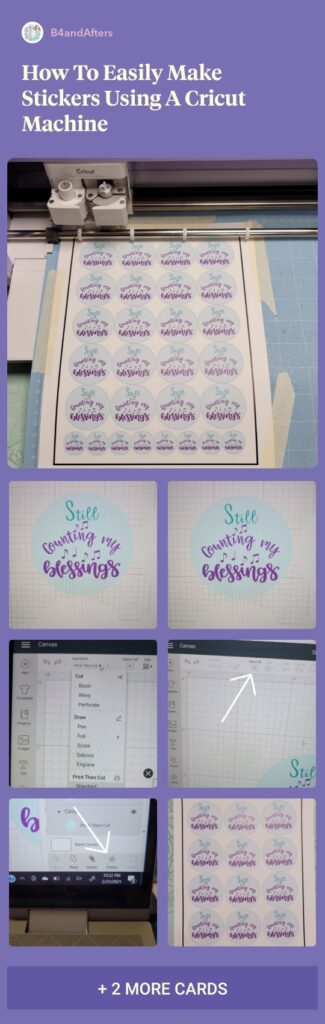
Keep reading to learn how to easily make stickers using a Cricut Machine!
- Make shapes in Design Space, like circles.
- Copy an image or text or both into the shape.
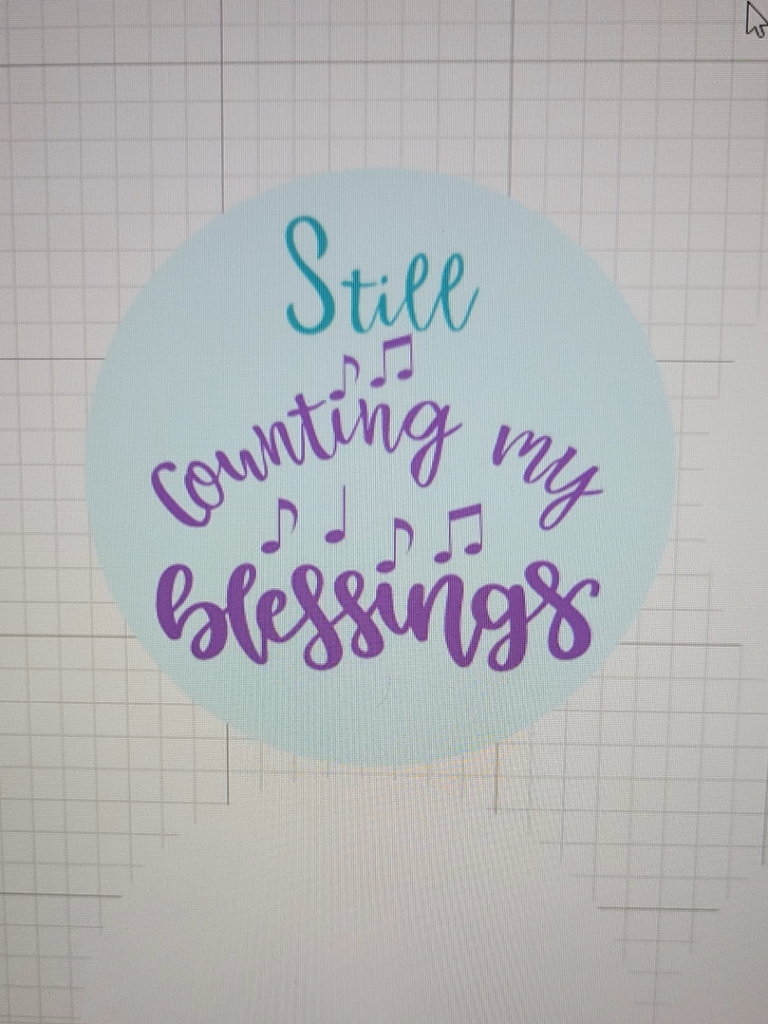
3. Group the image and shape together.
4. Duplicate it as many times as you need to.
5. When you have finished your design, Choose Select All.
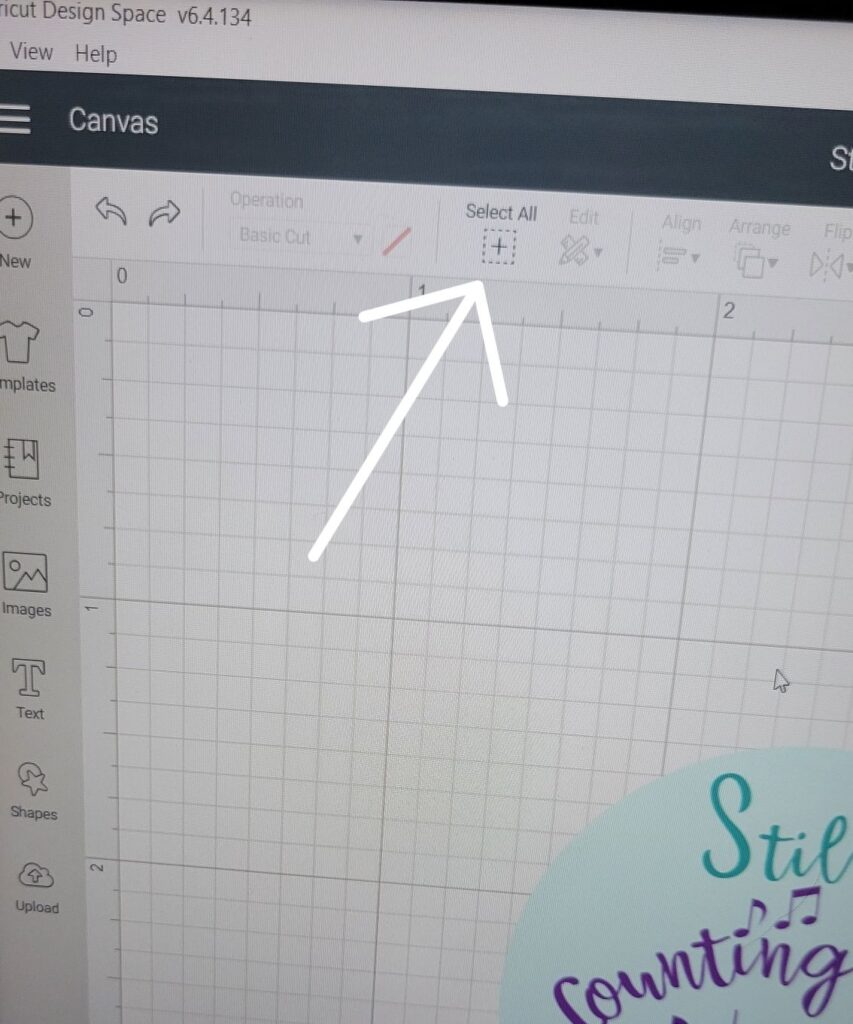
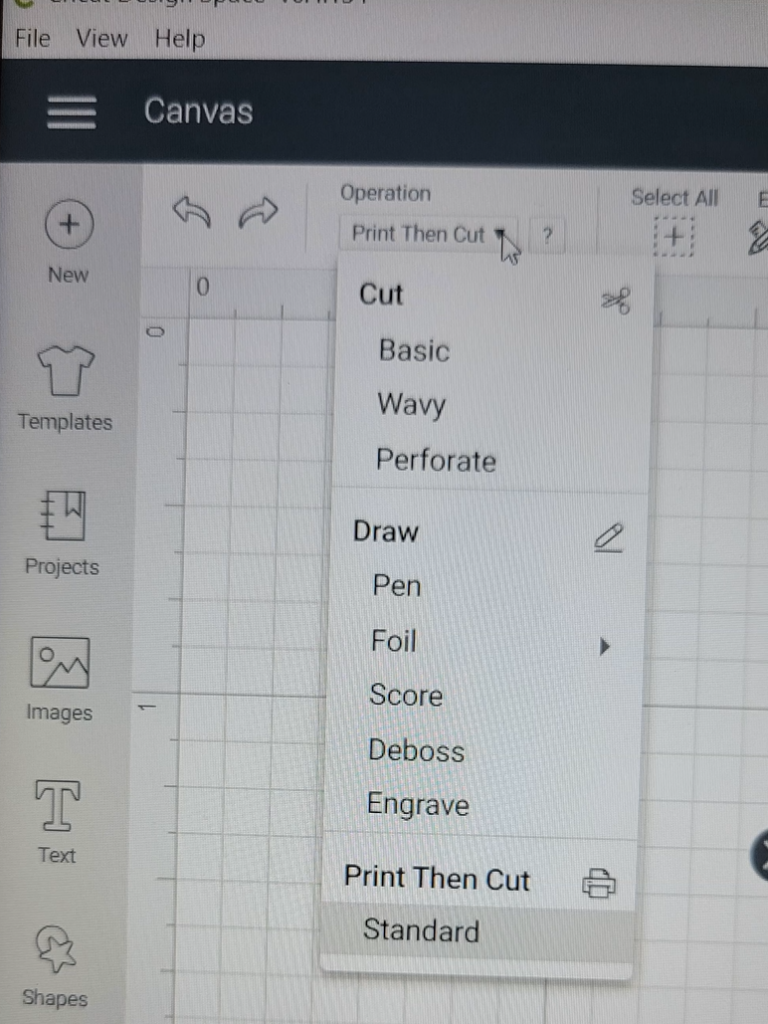
6. Click the drop down arrow and choose the last option under Print Then Cut: Standard.
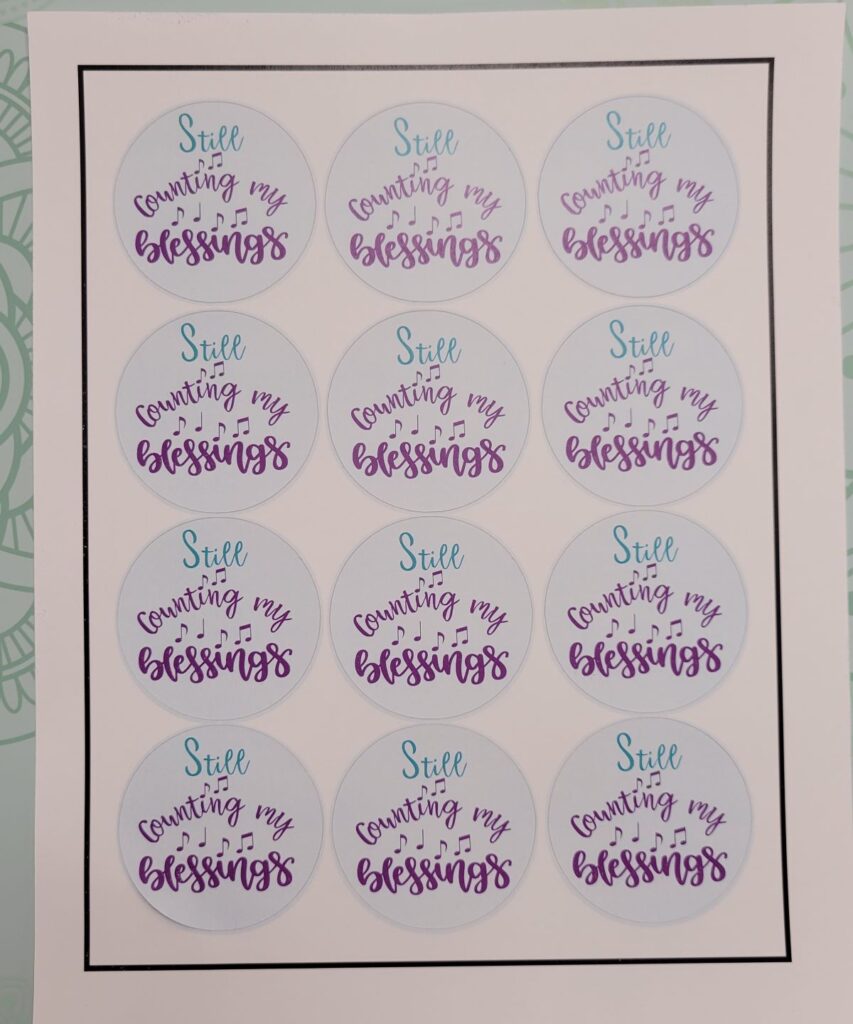
7. Then Choose Flatten. You are ready to make your stickers!
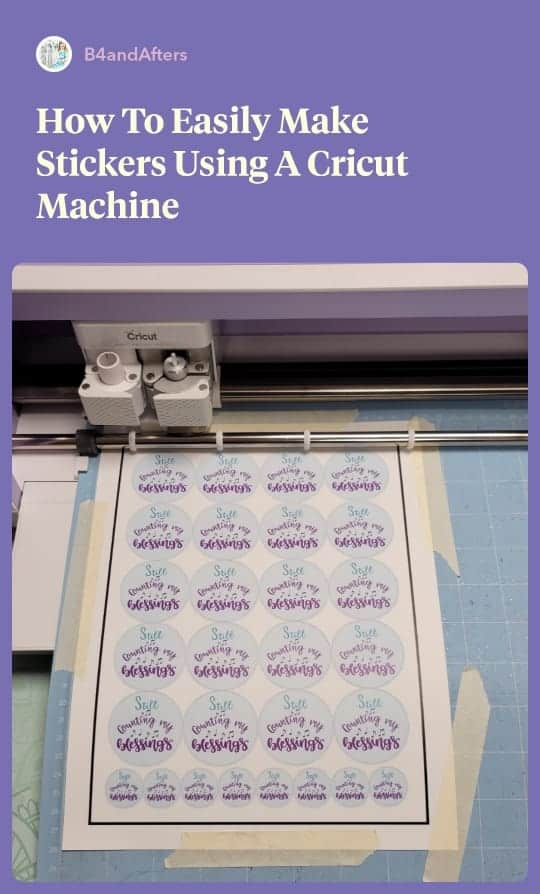
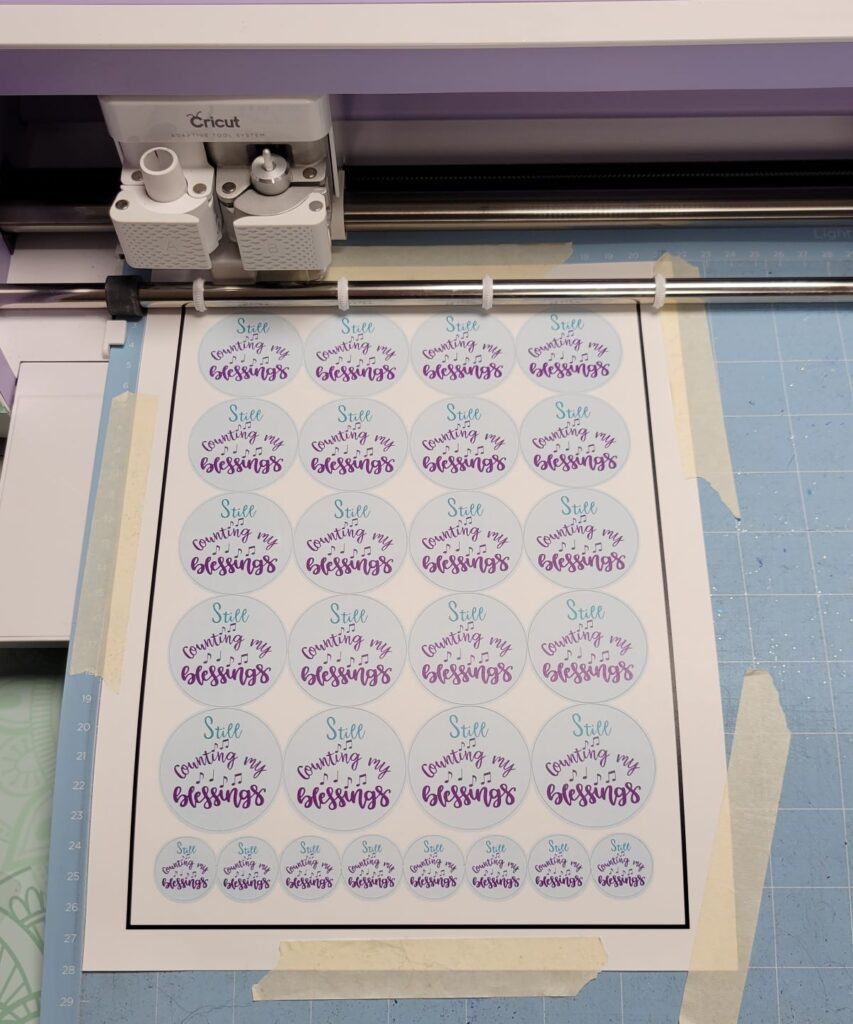
8. Print your design on sticker paper by sending it to the printer.
9. Then put it in the Cricut Maker (choose white sticker paper for the Cut setting) and tell it to Make It.
10. (If you want, laminate the stickers before cutting them!)
I hope you have enjoyed seeing how easy it is to make stickers with a Cricut machine! If you have any questions, please do watch the one minute video above because it should help. Then if you still need assistance, please ask me a question in the comments and I will do my best to answer it for you!
*As a reminder, for Print then Cut it is best to be sure that your image or images fit into a 6.75″ by 9.25″ rectangle. This is so that Cricut can print that bold, black registration mark and still be able to cut out your design. Some people worry that this wastes paper– but it doesn’t waste paper when you use an 8×11 piece of sticker paper, as you can see in the picture.
“O come, let us worship and bow down: let us kneel before the Lord our maker.” Psalm 95:6 As I craft and create things, I want to remember the One who made me and all things!


I don’t have a Cricut machine, but it does look easy to make these!