
How to DIY Drop Ceiling Tiles with Black Dog Salvage Furniture Paint
Do you want to know how to make a drop ceiling look better? Read on to see exactly how I made my ceilings look 10 ten times better than before with one of my creative drop ceiling ideas!!
Drop Ceiling Ideas
I hope that you aren’t tired of reading all about my DIY Drop Ceiling Tiles with Black Dog Salvage Furniture Paint that I’ve been working on for months…. But guess what– this is the 3rd and last pattern. At least, it is the last TIN ceiling tile that I’m planning to show you. I think 3 tin ceilings is enough, don’t you?!
I’ve learned a lot after painting 3 different ceiling tile patterns three different ways. So if you have any questions, I would love to help you out! Just put your question in the comment section below. I would also love to know– which of the 3 is your favorite?!

Not Sure How to Find a Nice Drop Ceiling Idea?
Guests come and in a short time 3 different guests have had the same comment– but each of them chose a different ceiling about which to say it– they have all said–
“Is that ceiling original? It is gorgeous!”
And I’m so happy to smile and say no, I painted it! It has shown me that I made some good choices– thanks to the help of Black Dog Salvage Furniture Paint* and American Tin Ceilings.
*Black Dog Salvage Furniture Paint sponsored the paint for these ceilings. ***Be sure to use code B420 to get 20% off of your order! [Also, American Tin Ceilings provided a discount for their tiles.]
To truly understand what it means to finally have these ceilings finished, I have to take you all the way back to the Day we bought the house.
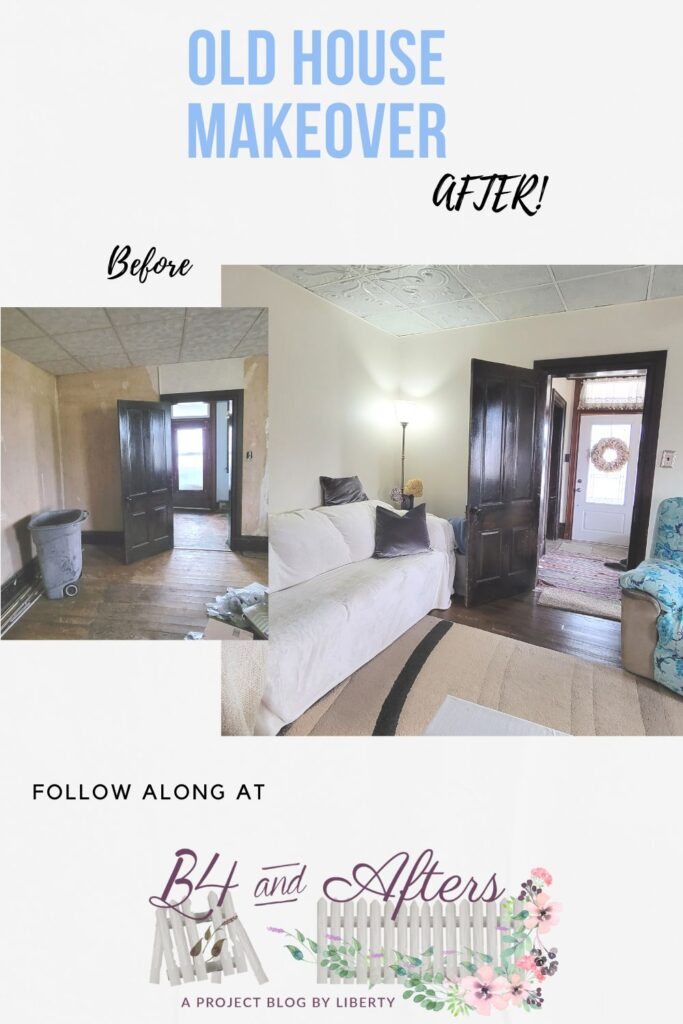
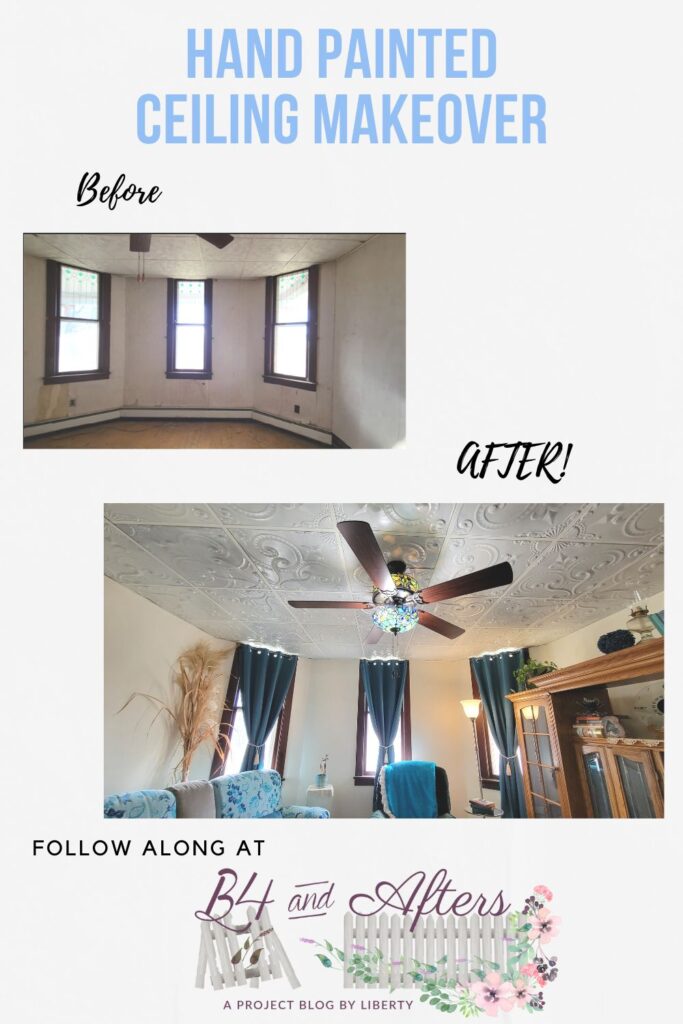
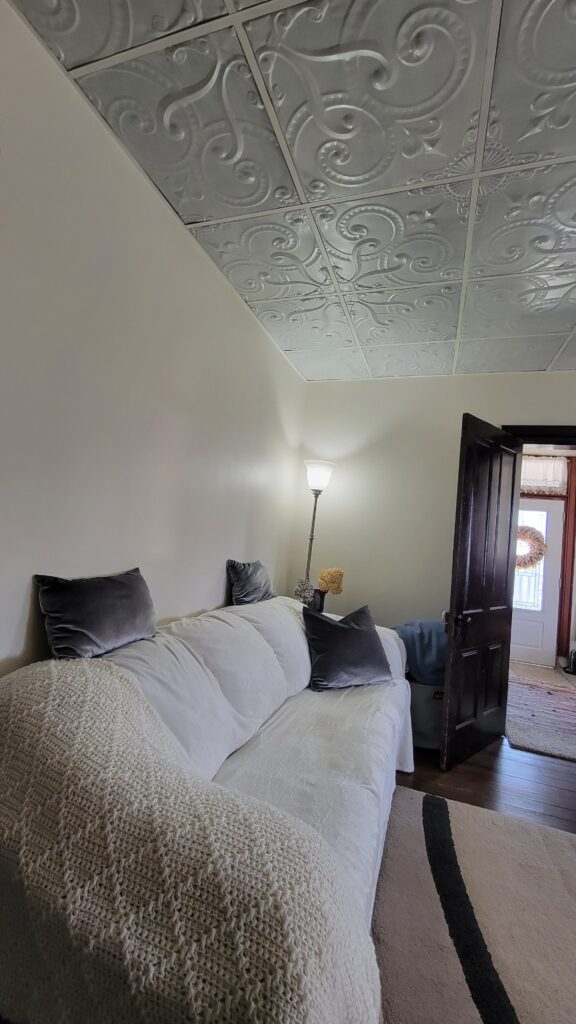
Ceiling, Before
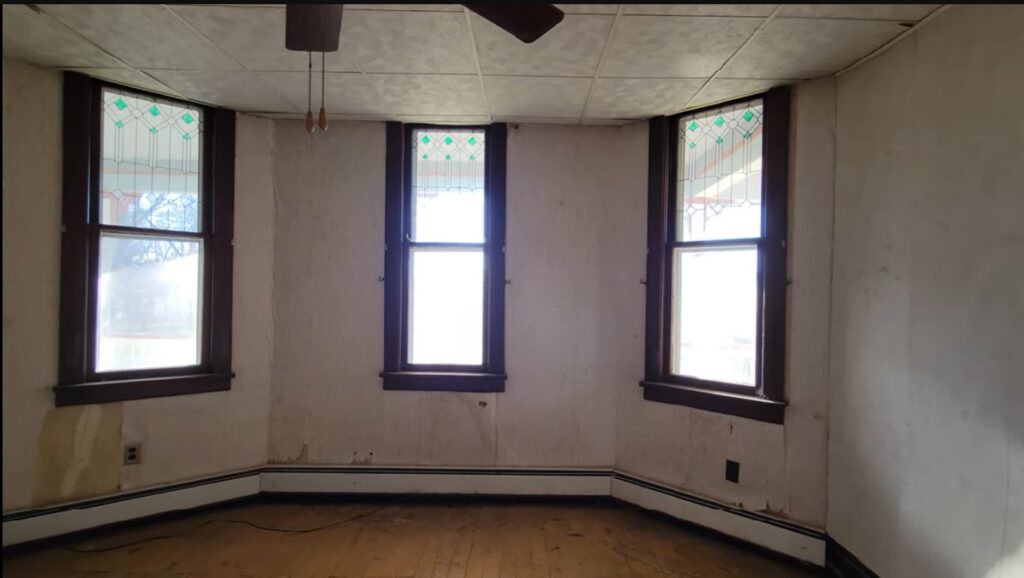
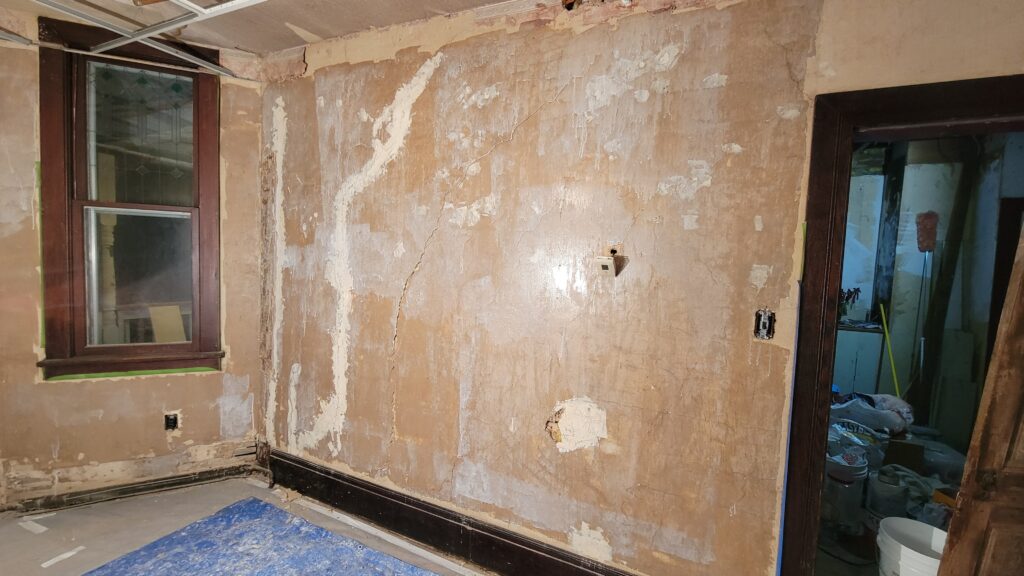
In the video I took that day, we didn’t know that there were huge cracks behind the paneling that was on the wall. The paneling practically fell of the wall as soon as we touched it, and the wallpaper behind that came off almost just as easily.
This photo shows the glue that the plasterer used before he replastered the living room.
So while this isn’t a post about the whole room (the flooring, etc., will wait for another day), you can appreciate where we started!
Of course this project took several months, but in the video I give you a complete picture of how to paint the tiles with Black Dog Salvage Furniture Paint from start to finish. Things take several months around here because I just can’t work on one thing at a time– something is always being started, in process, or finishing up! Delays like supplies and illnesses slow me down. Or realizing I missed something and having to go back and touch it up….
This was my 3rd tin ceiling to paint, using the same paint from Black Dog Salvage. Each ceiling was a different pattern, and I used a different painting technic on each. So if you are considering painting your own tin ceiling tiles, I would recommend reviewing each technic to help you decide how you want to paint yours– which could be a different way altogether from mine!
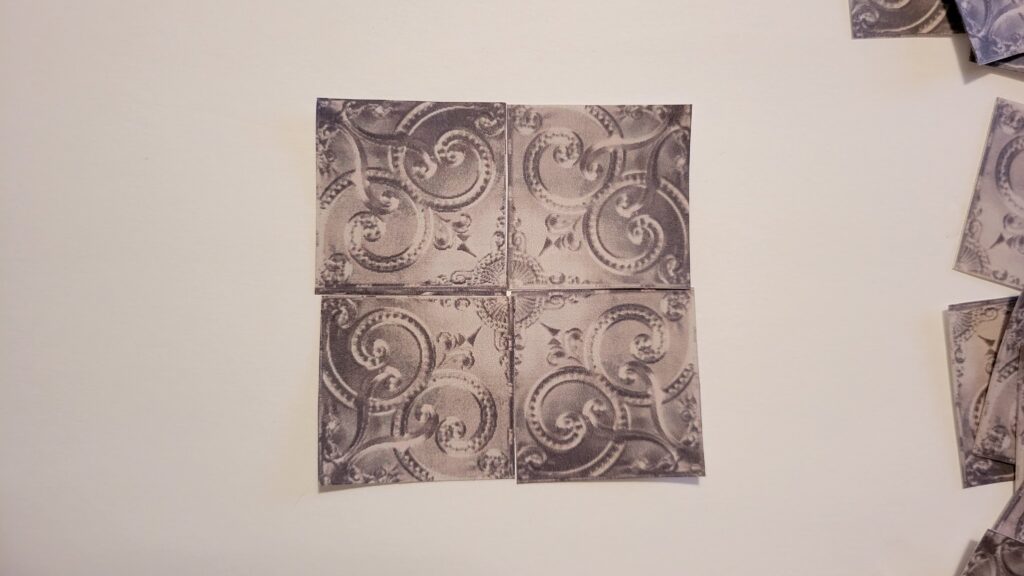
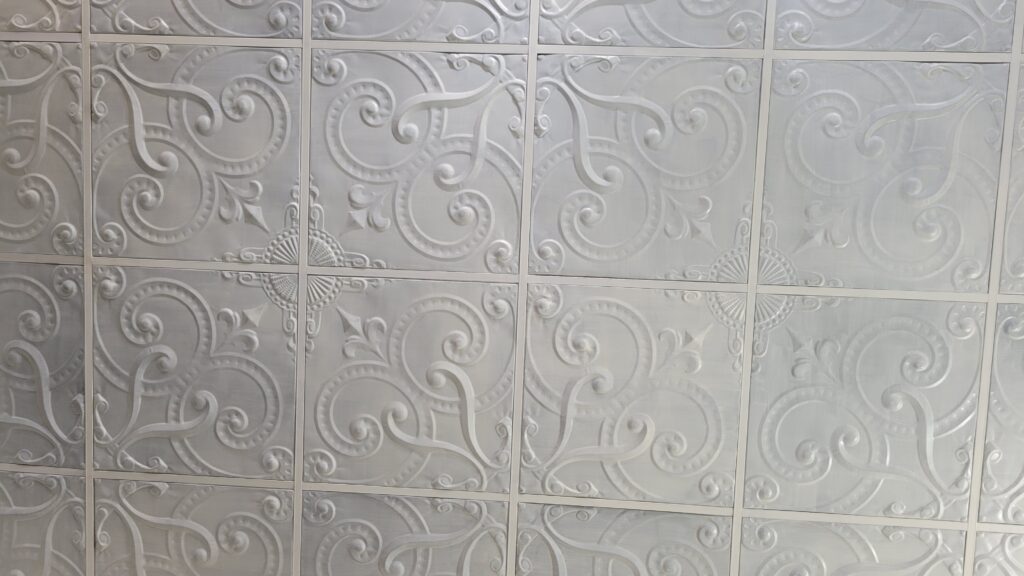
American Tin Ceilings has a helpful visualizer tool. However, it doesn’t know that this particular pattern (#33, embossed fleur de lys) needs to be turned so that the four corners make a fan pattern as shown below.
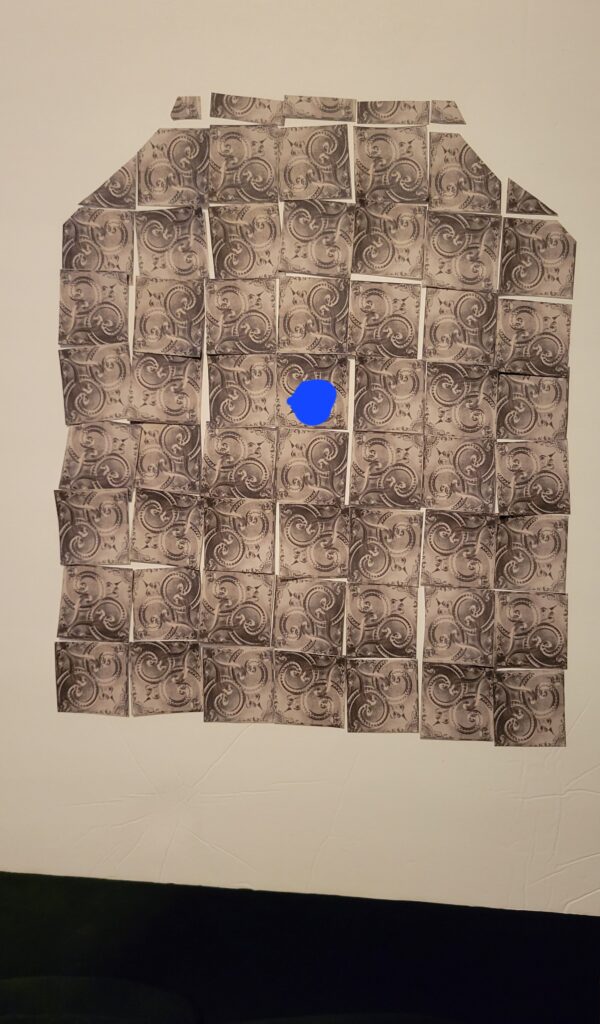
Since I needed to trim some of my panels, I made a graph so I would know which side to trim. Thankfully, I didn’t make any mistakes! That was good because I did not have a single extra panel!!
Cost of Unfinished Vs. Finished
By the way, if you are curious as to how much 2 x 2 tin tiles cost– my unfinished ones are $8 apiece. If you want to purchase them already finished, they can cost anywhere from $15 to $55 apiece, depending on which style and finish you choose!!
So finishing them yourself is much more cost efficient, if you have the time and ability. They do need to be clear coated/ sealed on the back as well. If you don’t finish both sides, it is very likely that they will begin to rust. Do not take any chances with this!
Keep in mind that even if you do not finish your own tiles, you will still need to cut and install them (or hire someone else to do it).
I placed these unfinished ones up to start following my graph before I cut the ones on the other side of the room. Then I took them back down to paint them.
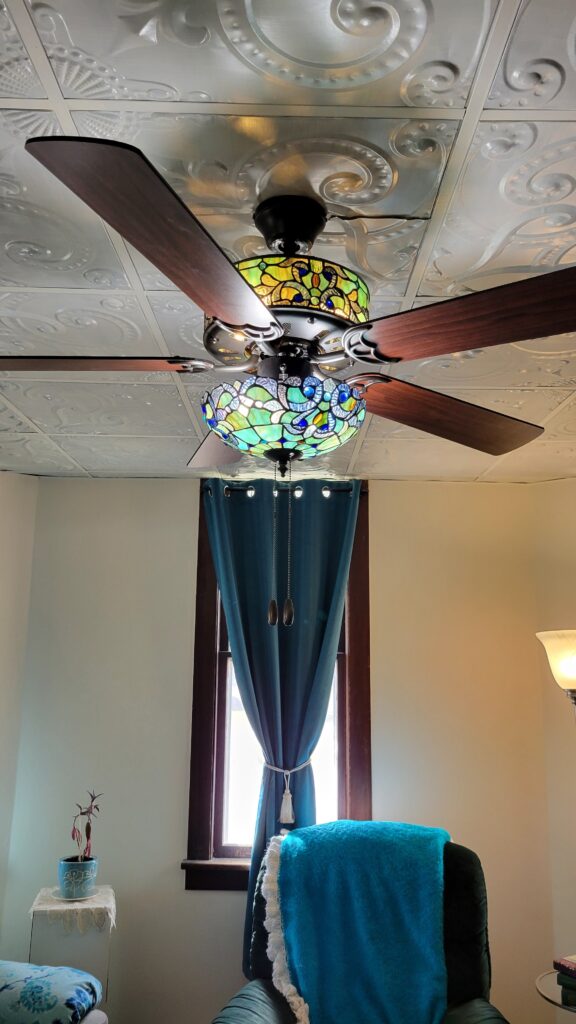
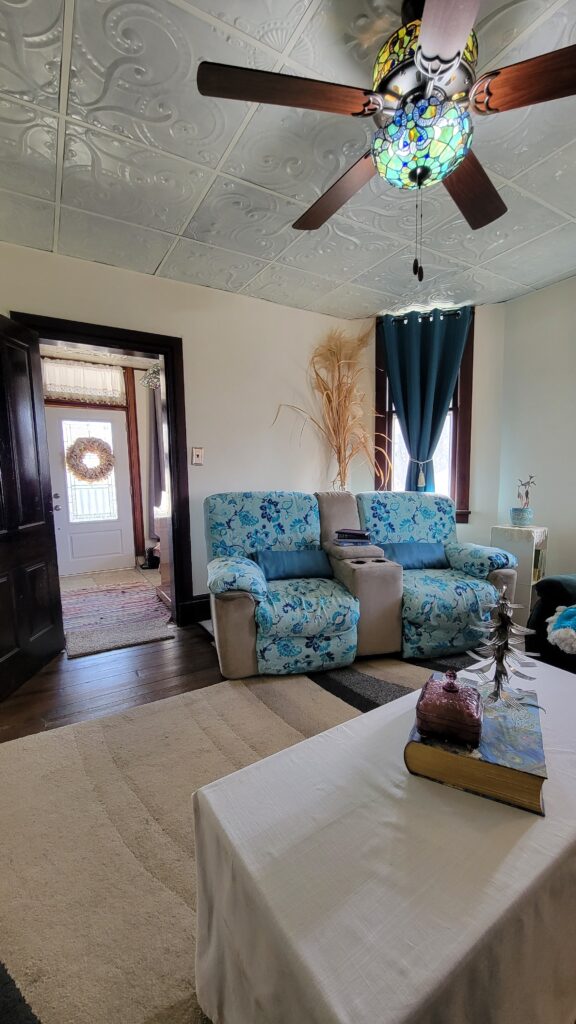
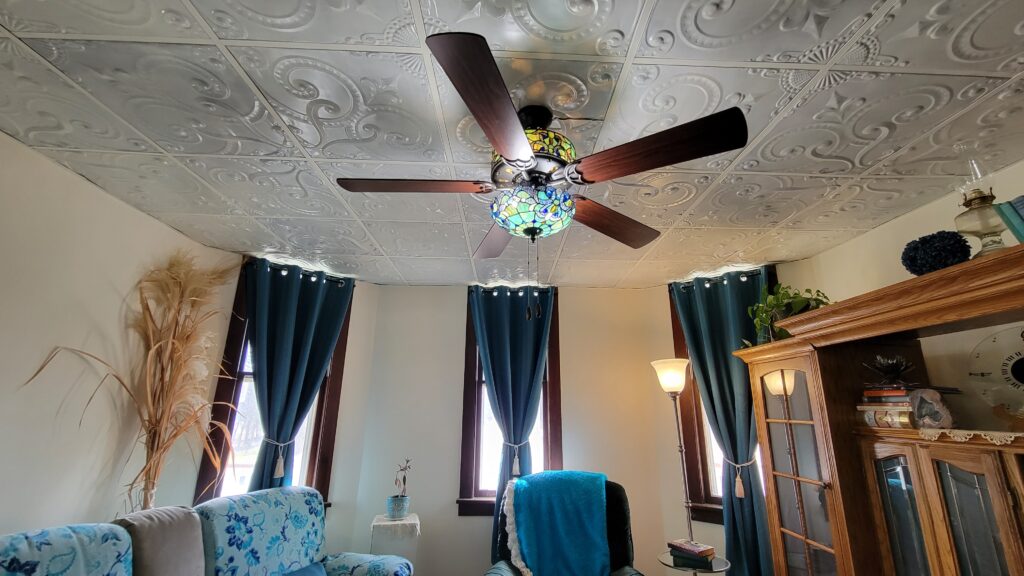
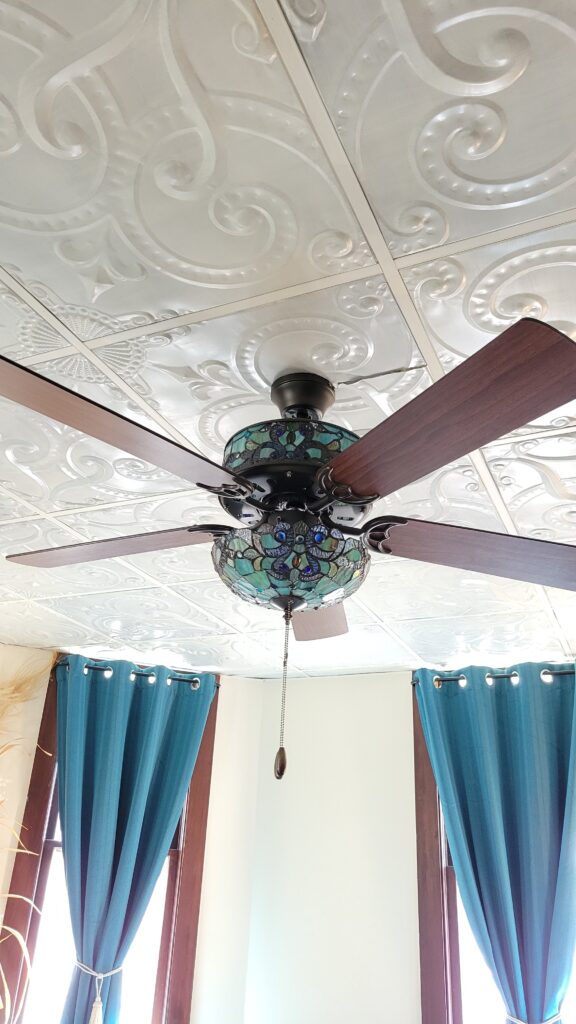
I am not a fan of ceiling fans. Ha ha!
Especially ugly ones.
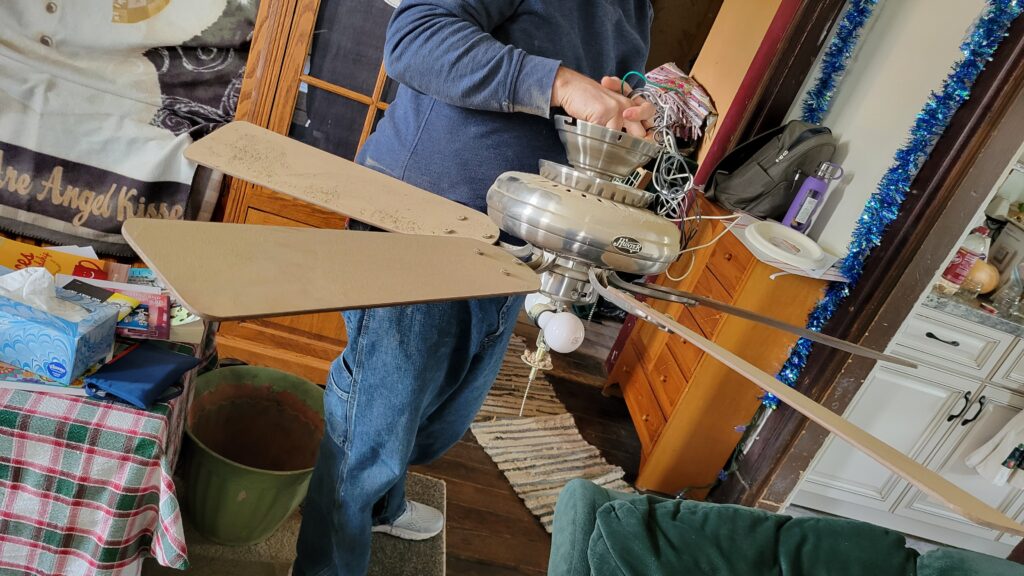
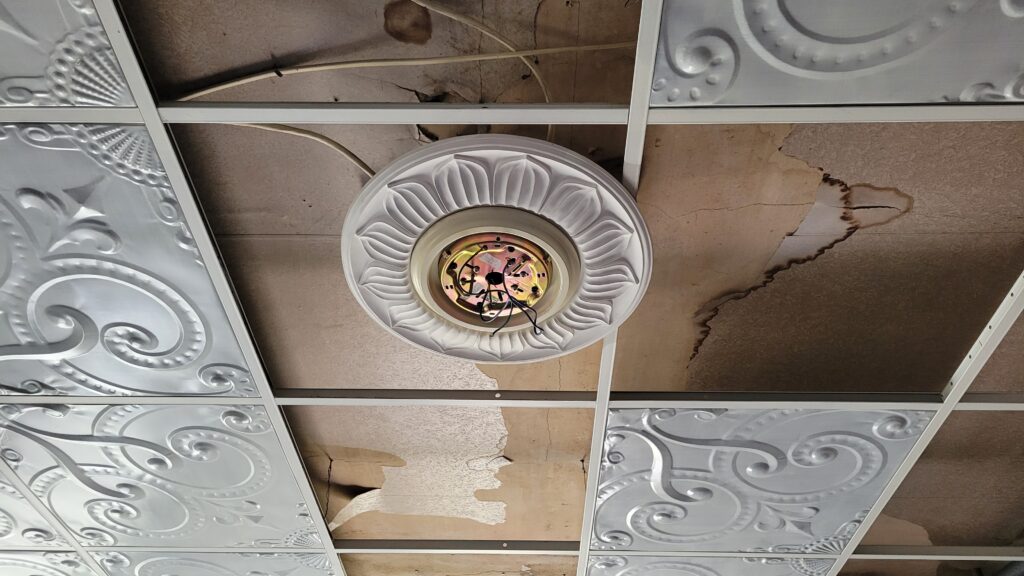
Since we don’t have AC, a ceiling fan is an absolutle necessity. So I found the prettiest one I could.

You may notice that the top part looks more yellow that the bottom part, and that is because we used the bulbs it came with. But they weren’t very bright, so I found some brighter/ cooler ones. Well, those that are installed in the top part aren’t the easiest to get to, so I think I will wait til they burn out to replace them.
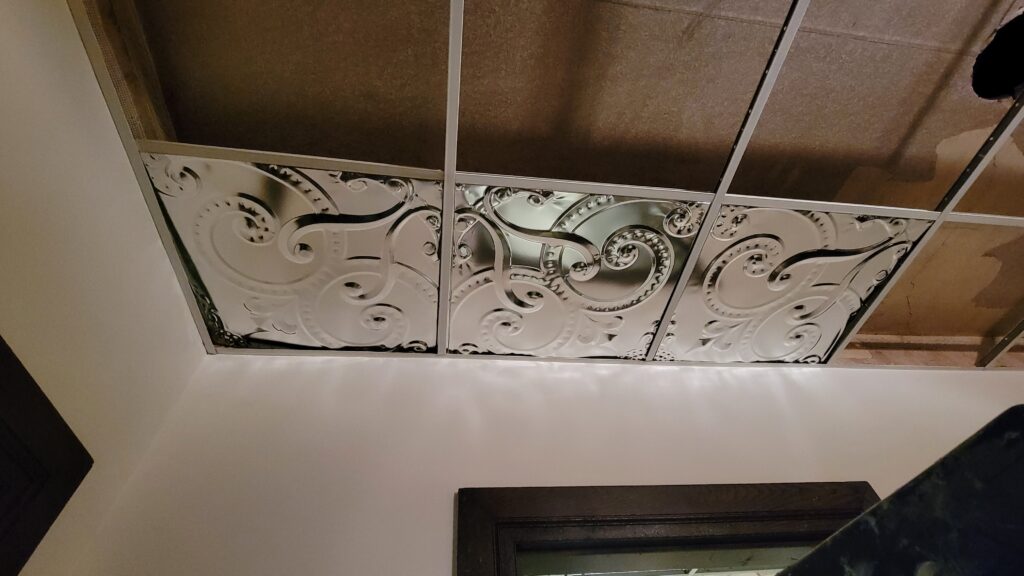
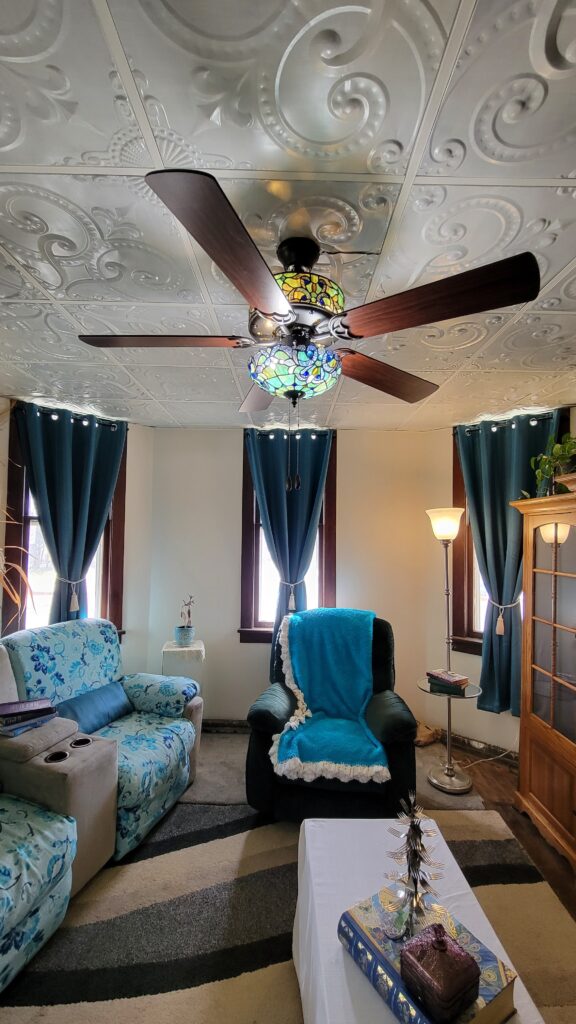
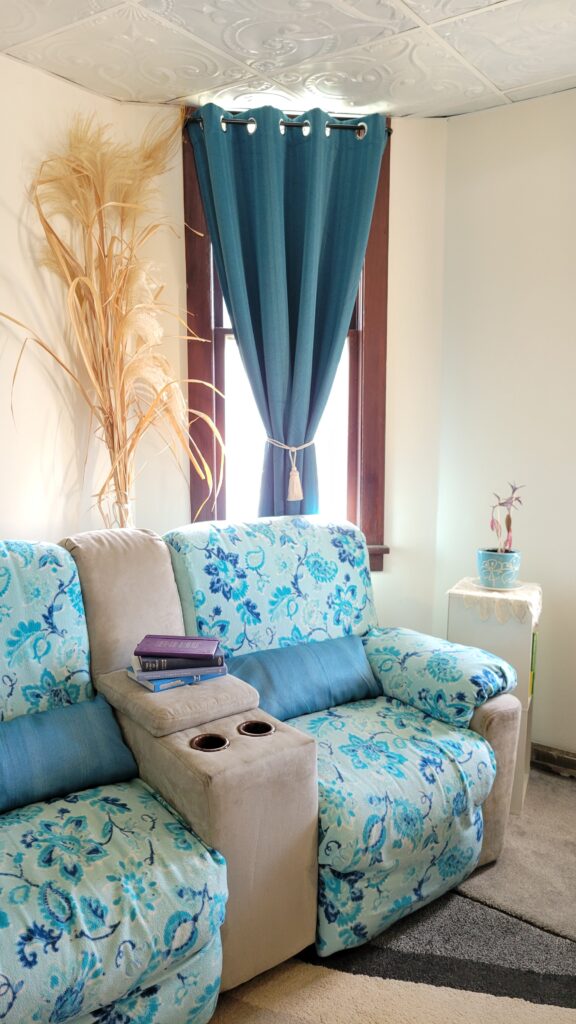
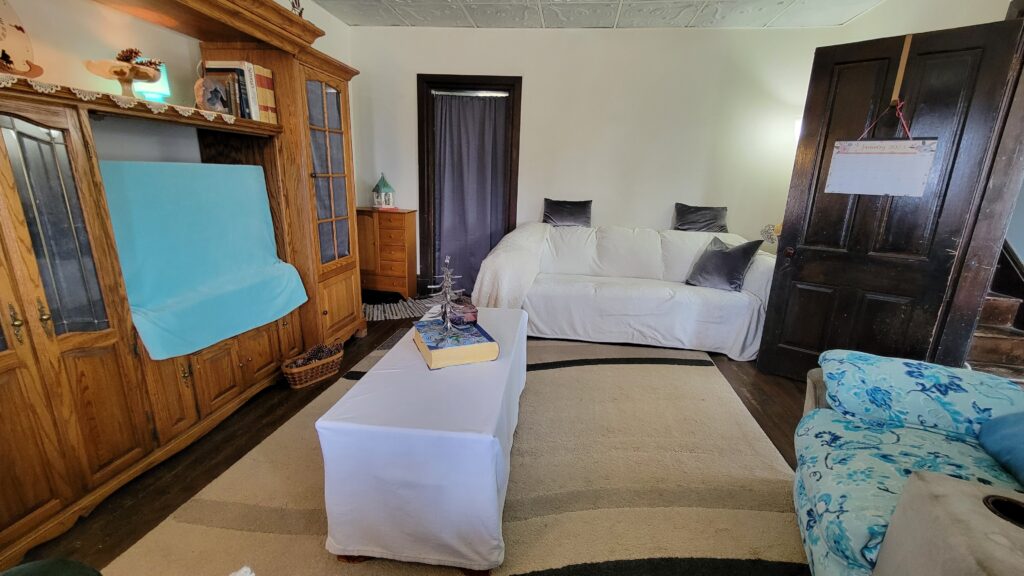
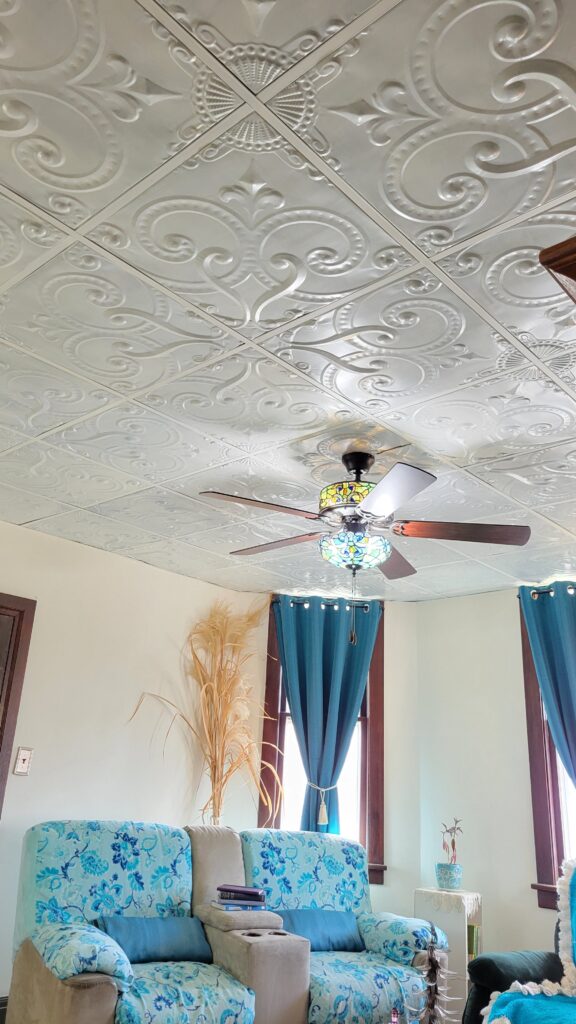
Ok, are you ready to see this gorgeous ceiling?!
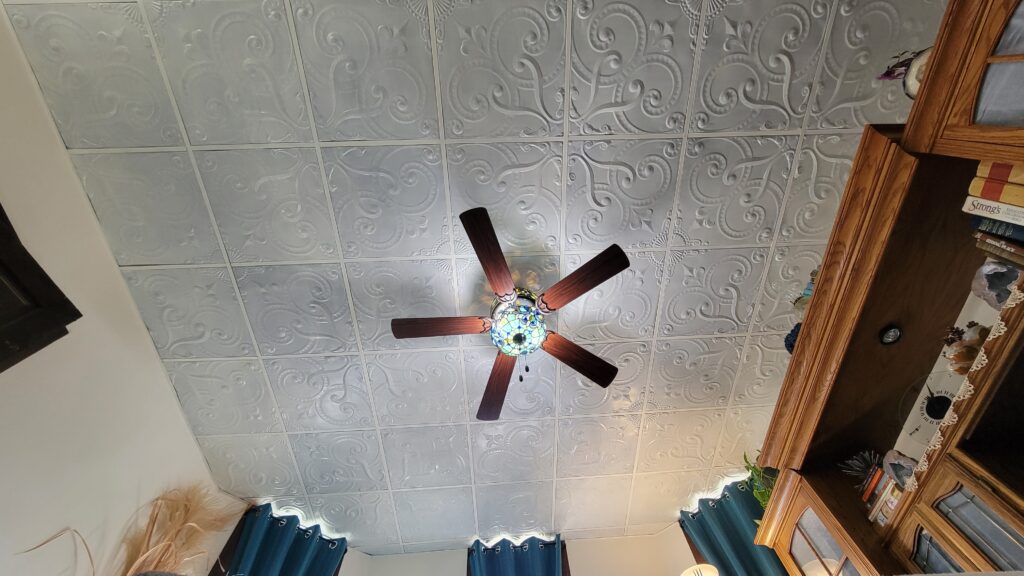
Isn’t it pretty? We got so used to seeing the ugliness that was up there, we feel like we are in a palace now.
What’s funny, is that even though this is the last tin ceiling to get finished, it was actually the first one that I wanted to do. I had chosen this pattern, thinking it would look nice. But then we decided to do 3 ceilings, in 3 different patterns– and this room got put last on the list!
I’m really so happy with how all three ceilings turned out. I could not have done it without the help of the people and the paint at Black Dog Salvage Furniture Paint. ***Be sure to use code B420 to get 20% off of your order if you decide to try it!
The Painting Process of using Black Dog Salvage Furniture Paint
Speaking of paint– I guess you might like to know more about my process?! Ok, be sure to watch the video for more details, and here are the steps:
- Clear coat the backs with an oil based polyeurathane sealer, or one for floors.
- Use a Freeform paintbrush (It kept my wrists from getting sore and had just the right amount of “bend” in the bristles) to paint on your color.
- I mixed my own color using White, and a drop of yellow Baby I’m Amaized and a drop of Dog Bone khaki.
- I added a bit of water to thin out the paint– by dipping my paint brush in distilled water as needed.
- I did the first layer with brush strokes going in one direction.
- After it dried, I painted the 2nd layer in the opposite, perpendicular direction. In the photo below, you can see the difference between one coat on the bottom, and two coats.
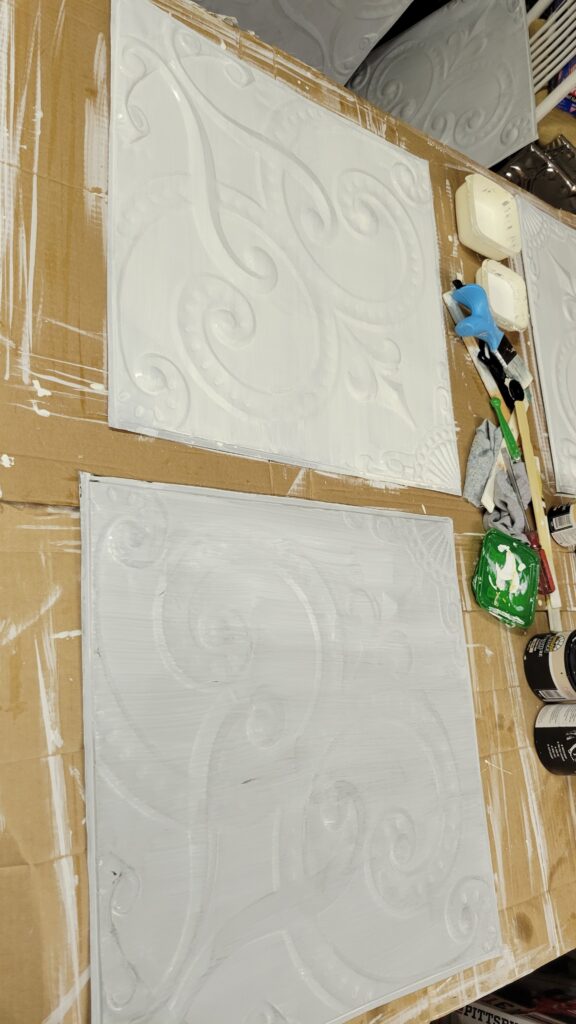
- 7. This method gave me a lovely linen, grasscloth look. I loved it! Can you see what I mean?!

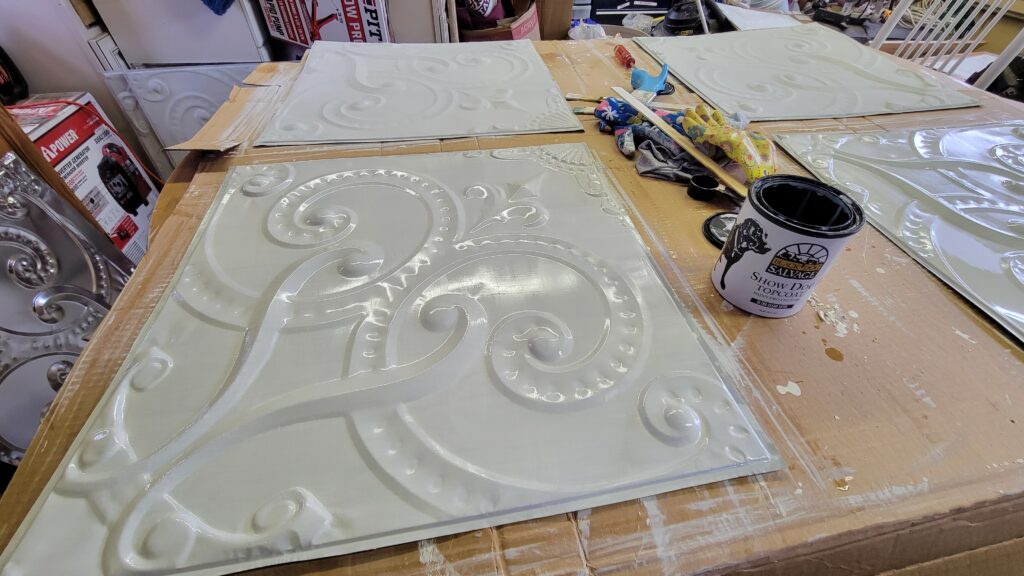
- 8. Lastly, paint 2 coats of a clear coat on to seal the paint. The benefits of this is that a. you can fix mistakes before you seal it. and b. you can get a specific sheen. I really, really, really love the satin matte finish of the Show Dog topcoat from Black Dog Salvage Furniture Paint. It is the perfect combination of soft, silky, not too glossy, not flat. What you see below is before it dried.
So there it is– 8 simple steps to the ceiling of your dreams! (Try not to think about the fact that that means 5 coats (including the backs) on each tile– times however many tiles you have. I had about 56.)
I did have some spotting on my panels and I wondered if it was the paint. (I had also skipped cleaning them…. You really are supposed to clean them in case there is residual manufacturing oil or dirt. But they looked clean enough to me.) Then I realized that our gargage electric kerosene heater had run out of kerosene once, and had been turned on. It had sputtered and smoked, and I realized it had probably spit out tiny oil spots on my panels. UGH. It was stressful having unfinished tiles out! I finished them as fast as I possibly could.
So just be aware that if you have something happen it might not be your paint. It could be something else. (In my next paint project I’ll talk about brushes…– yes, of course I’m already in the middle of the next project!)
Ok, back to the tour around my now-lovely living room. Do you like how I combined two entertainment centers into one?!
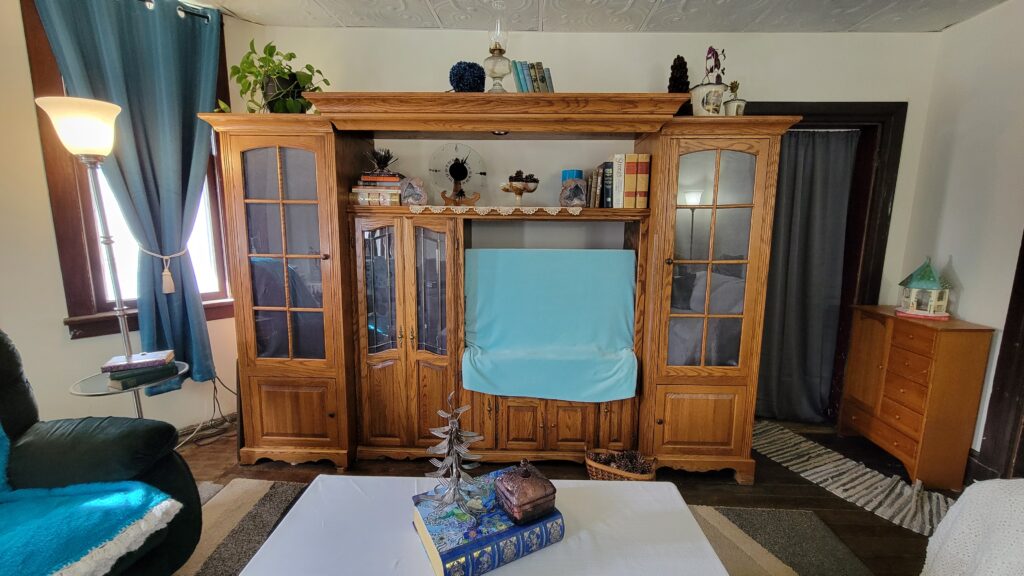
Do you recognize the larger, outer one? It used to be around my fridge.
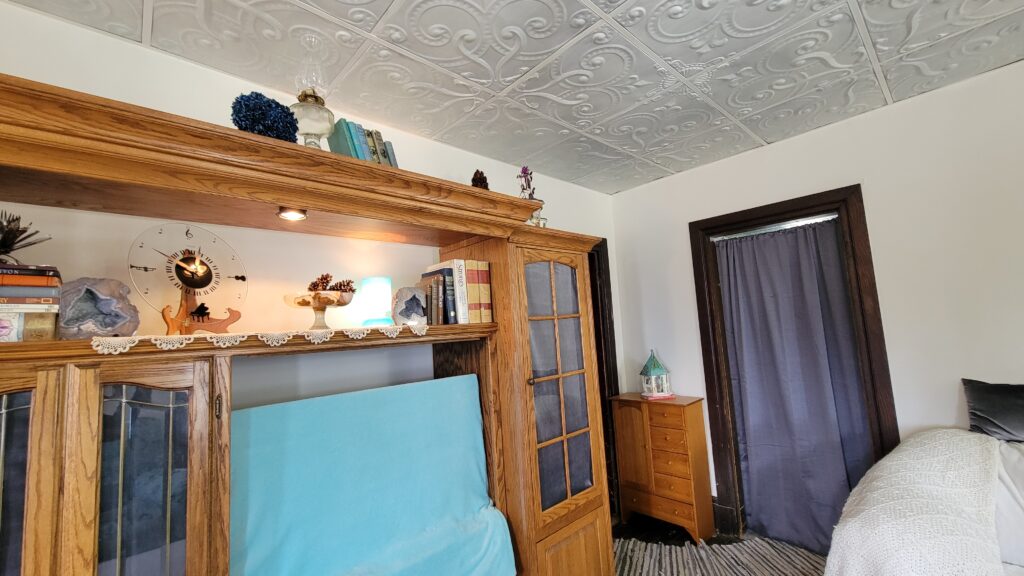
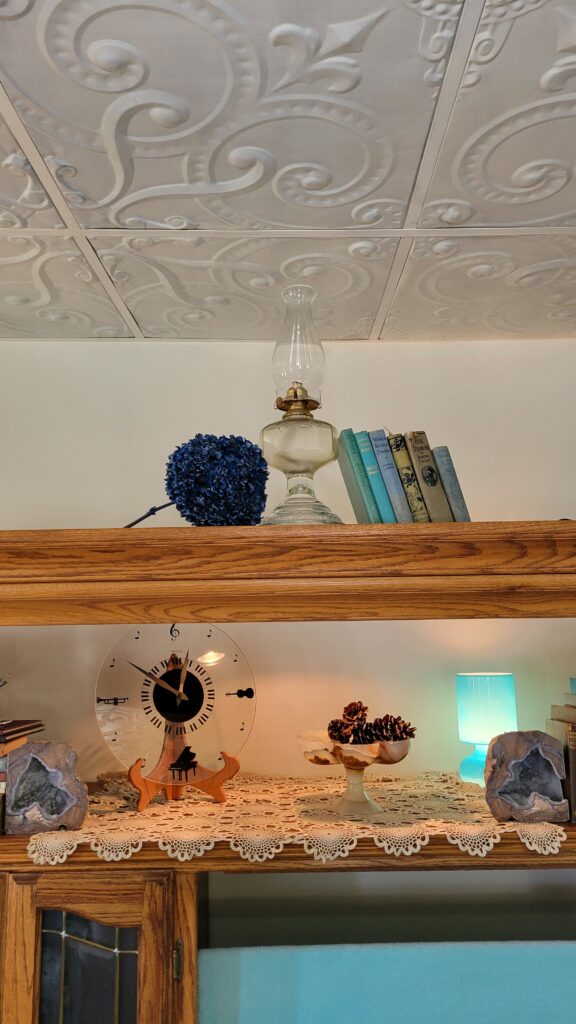
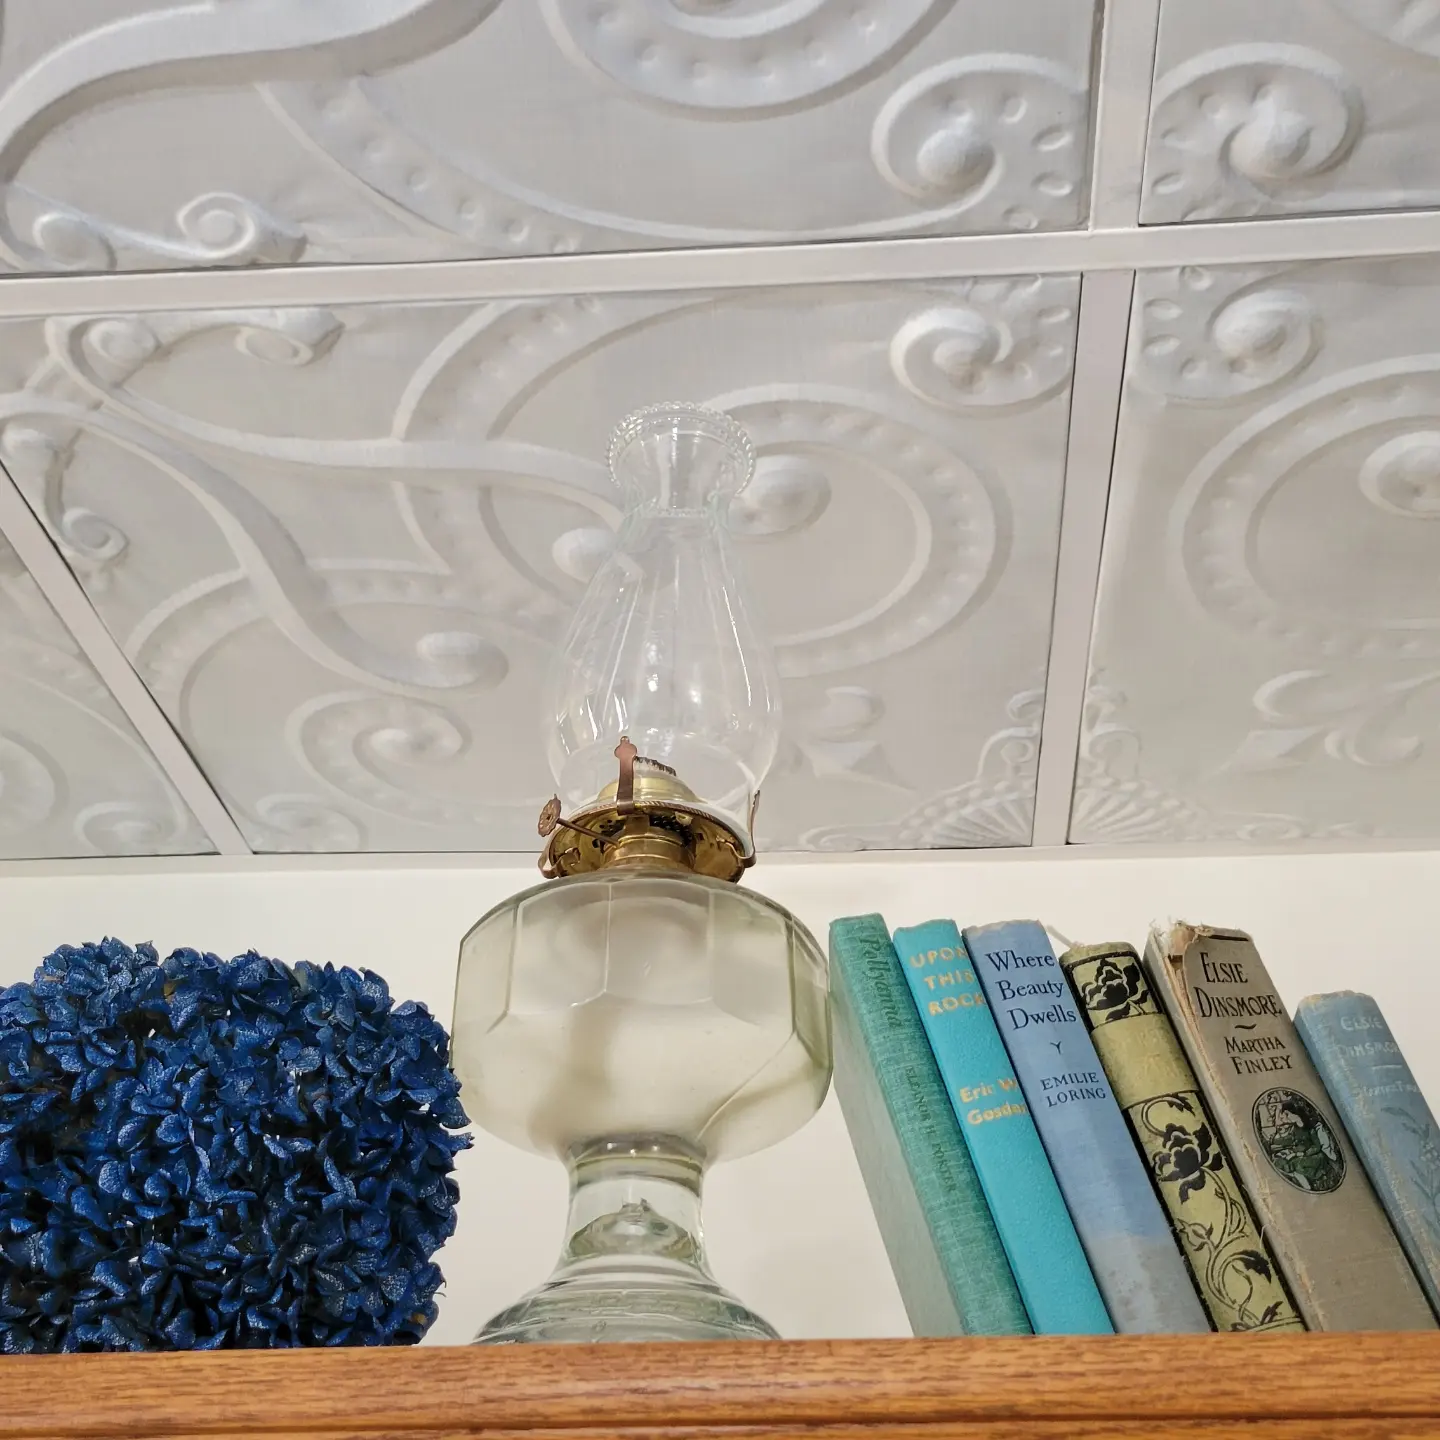
Here are some closeups.
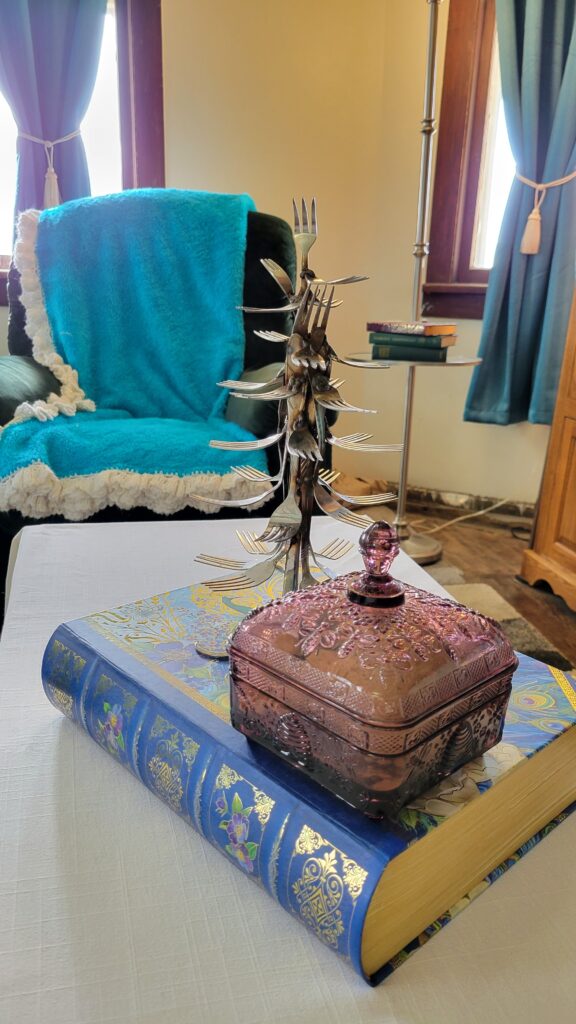
I love my fork tree! Have you ever seen such a thing?!
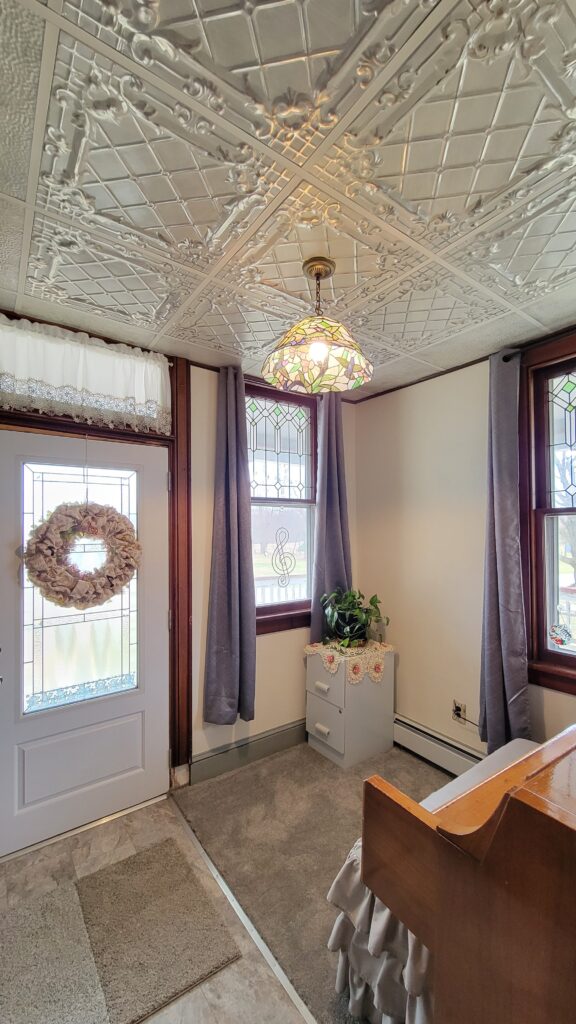
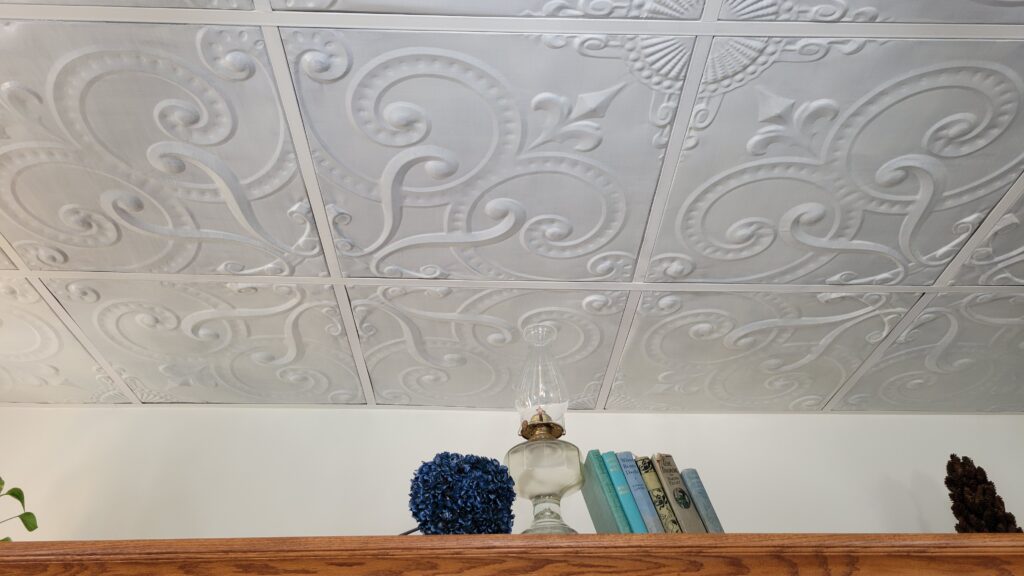
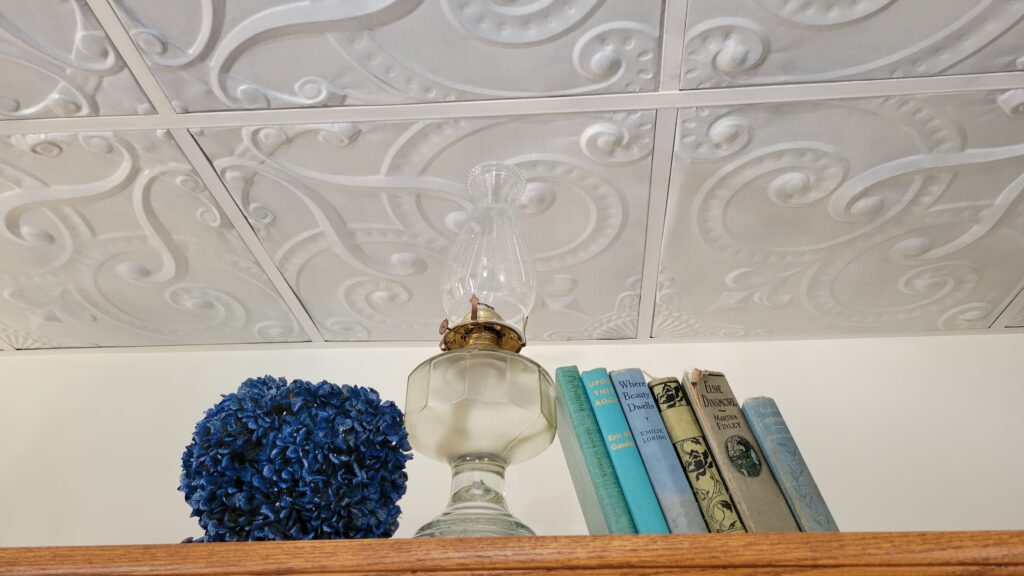
I think the stained glass look goes well with the swirly pattern of the ceiling.
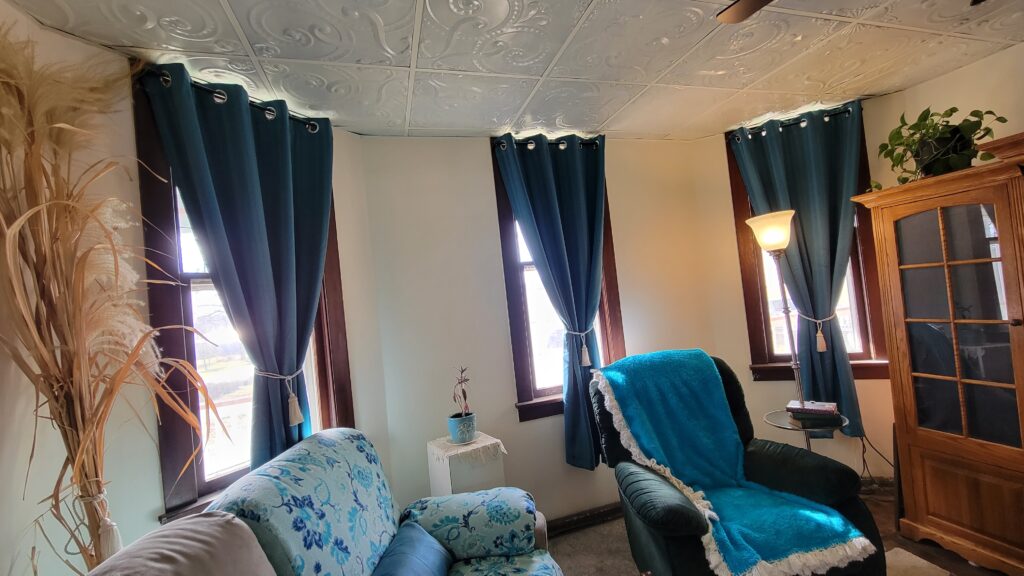
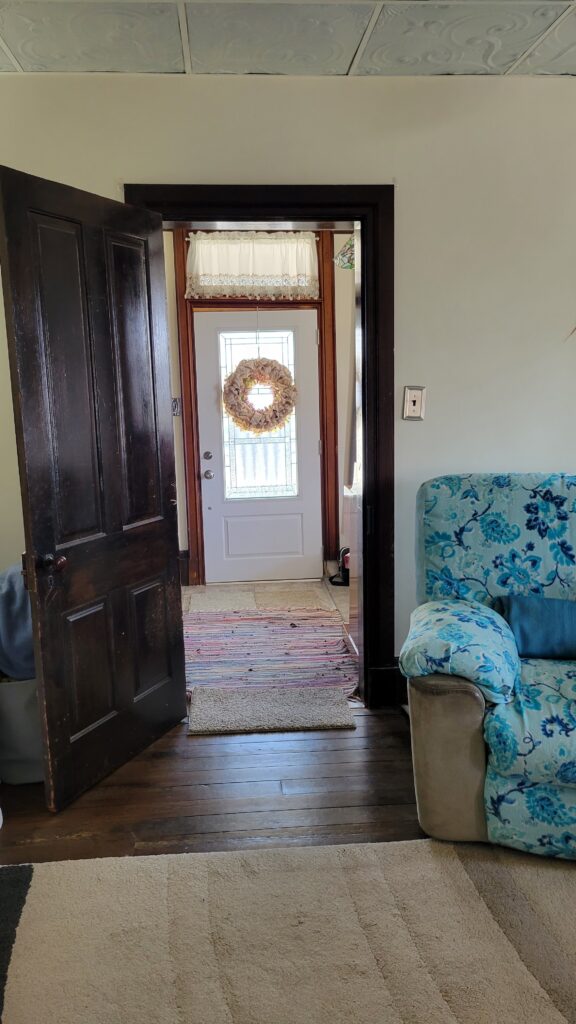
I had to take a lot of pictures while it was all cleaned up! It doesn’t stay like this for long. I love this view into my piano room/ front door.
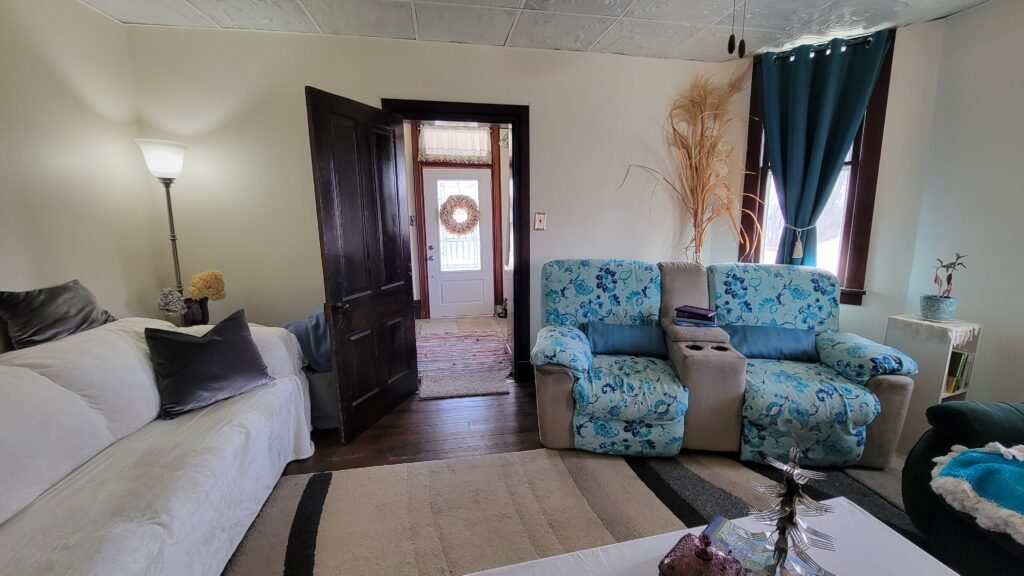
We didn’t have room at our previous house for a coffee table in the living room. Now I do– except it’s a cedar chest.
I’m so glad that now we can have company over and not feel crowded. It used to be that we hoped the weather would be nice if we invited more than 3 people over at a time. Now the weather can do whatever, and we have room!
Big Question: Do you think I accomplished my goal of How to make my drop ceiling look better?!


Before we closed on the house, I bought all of these heavy duty curtains for the entire house. I bought them in two colors: gray and turquoise. I’m so glad I did! I’ve learned that it’s good to have some similar elements, so that everything will look better coordinated.
And for the ceilings, while I used 3 different patterns and 3 different painting styles, I did use just one color– my ivory that I mixed to match my ivory walls. I painted the grids to match.
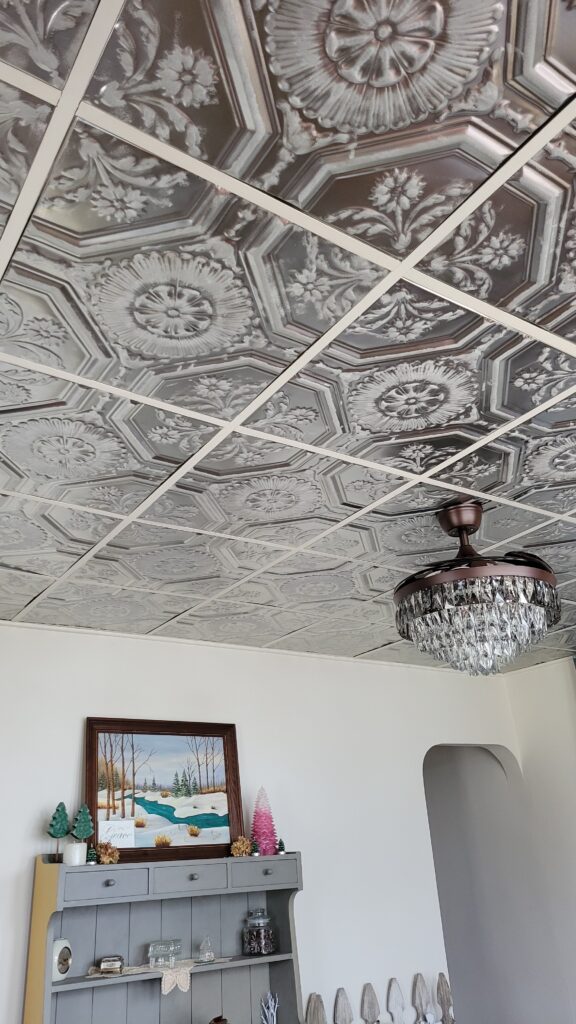
Speaking of painting grids– I shared my dining room ceiling in a group online, and so many people there wanted me to paint those grids silvery gray, to blend in. What do you think? I want to know. I’m plenty happy with how my dining room ceiling looks, but maybe one day down the road I will decide to paint the grid gray.
There’s something else I would like to know… Which of my 3 ceilings is your favorite?
I hope you enjoy the video!


I give you a lot of credit, Liberty, for taking on such an enormous project of painting all of those ceiling tiles! I know I wouldn’t have had the patience, but it’s great that you are so pleased with the outcome. I imagine you will take pleasure in those ceilings for years to come!