
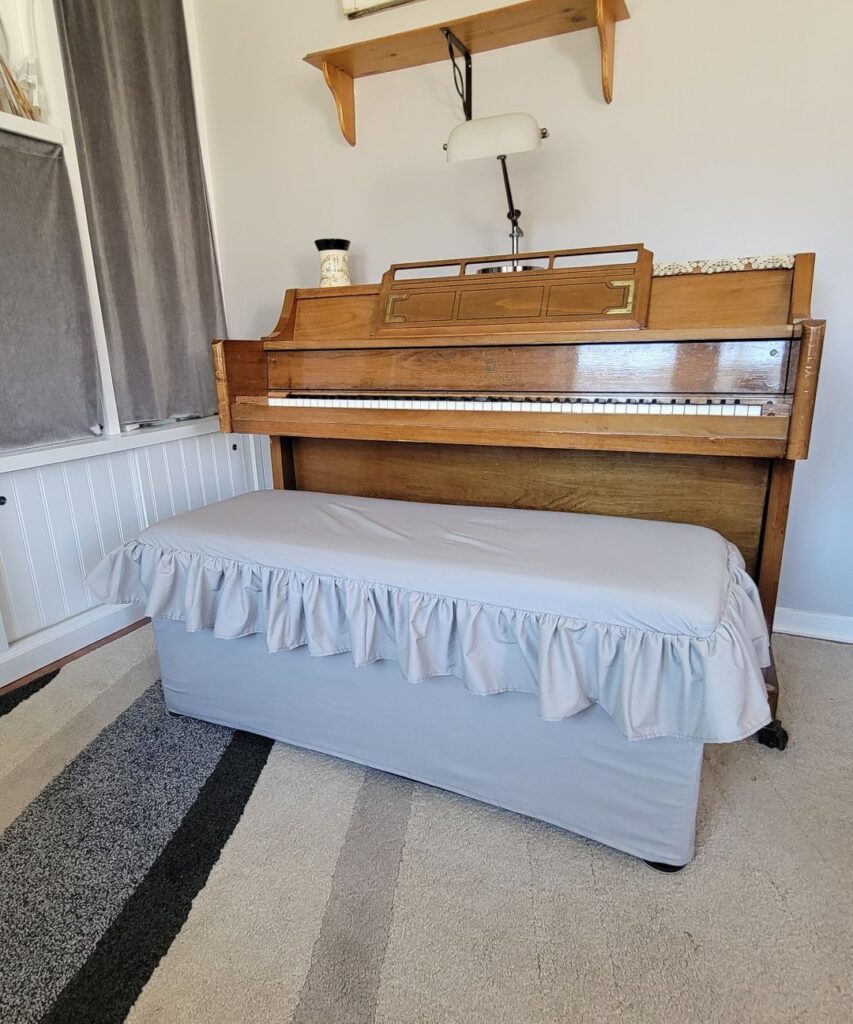
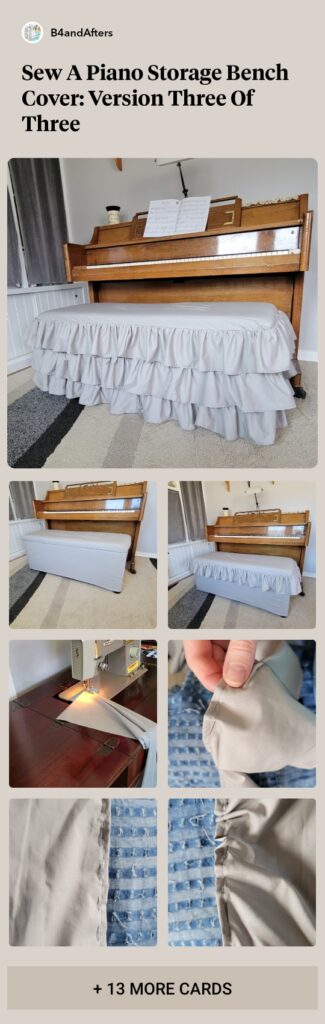
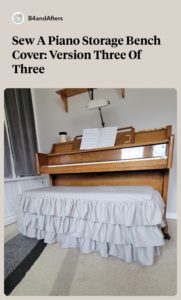
How to Make a Ruffled Slipcover for a Bench
Have you ever wanted to make a three-tiered ruffled slipcover for a bench that looks high end? I have just the tutorial for you today! And at the end I have a fabulous suggestion for a great shortcut to making all these ruffles!
Feel free to rest your scrolling muscles and watch the video instead!
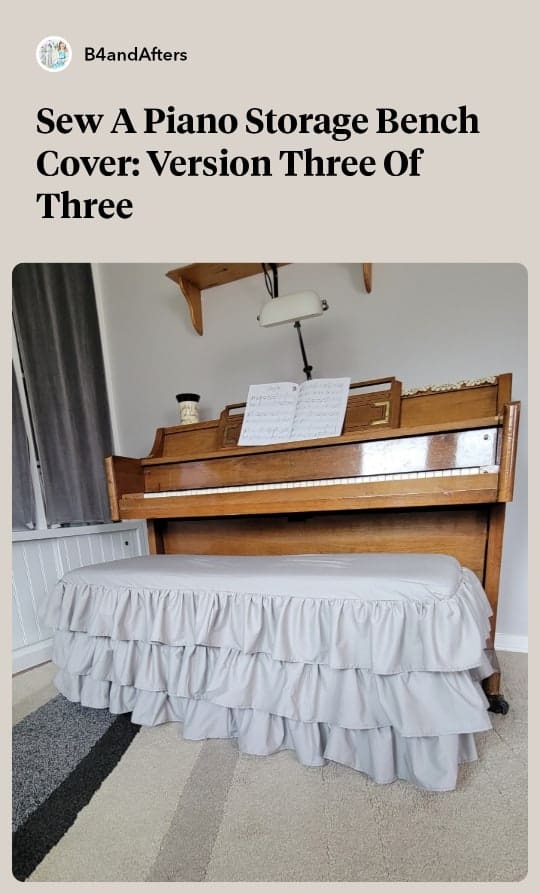
You may remember that I shared two other versions of this slipcover for a storage bench. Either version would work, depending on the look you are going for. Of course, I prefer this third and final version!
Our DIY Challenge this month was to make a DIY knockoff version of a High End home decor item. I really enjoyed doing this last year when I altered this chandelier.
Can you believe that there is a ruffled slipcover for sale for….. $1,000??!! If for some reason you would rather buy that one, than make your own, well, here it is! (and no, sadly, it is Not an affiliate link.) The good news is that— it includes the bench itself!
Another 3 tier slipcover option for you, if you love the look, is this one for a dining chair. It does not include the chair itself, and is much more economical. (and again, no, this is Not an affiliate link.)
Here are a few other options:

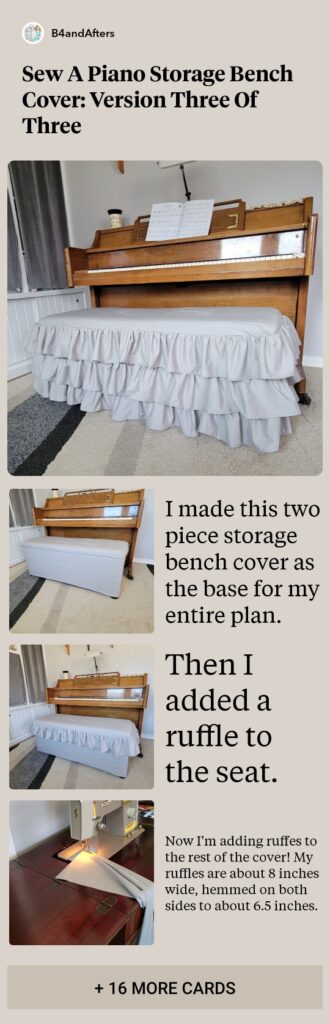
How to Make a Ruffled Slipcover for a Bench
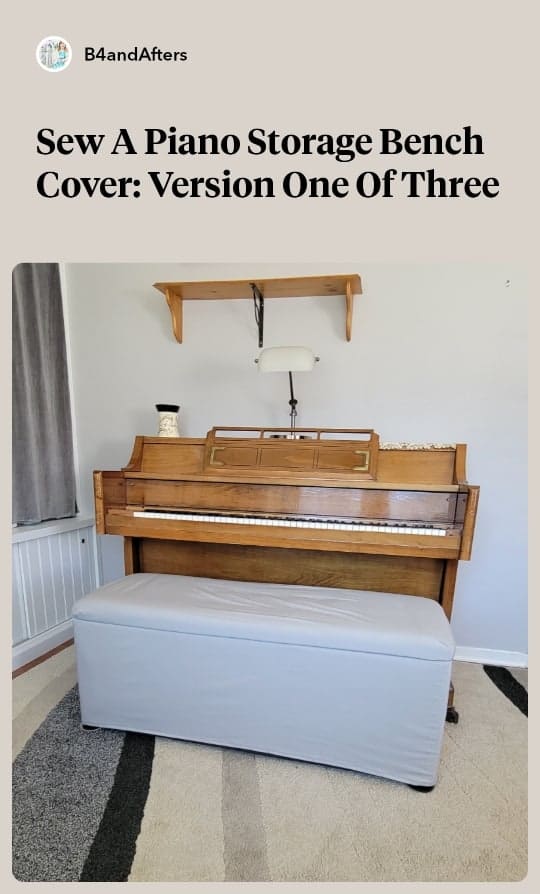
I made this two piece storage bench cover as the base for my entire plan.
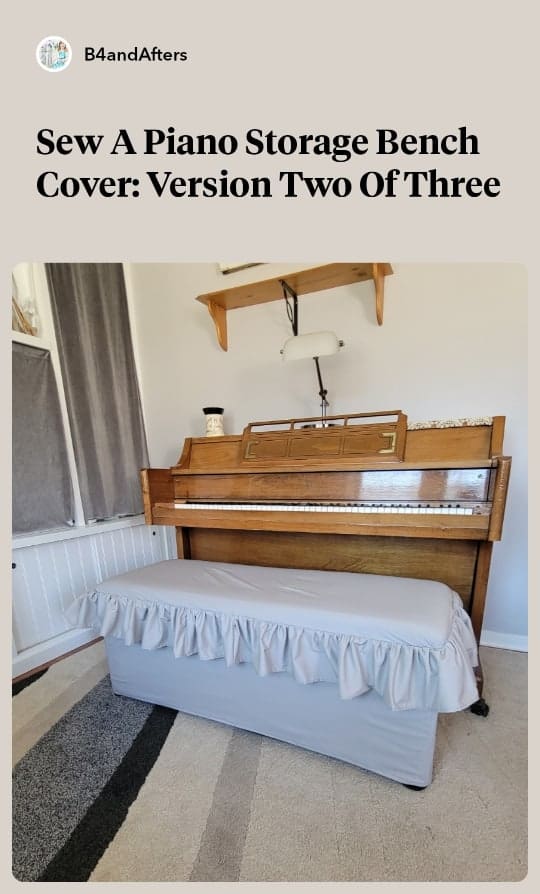
Then I added a ruffle to the seat for Version 2.
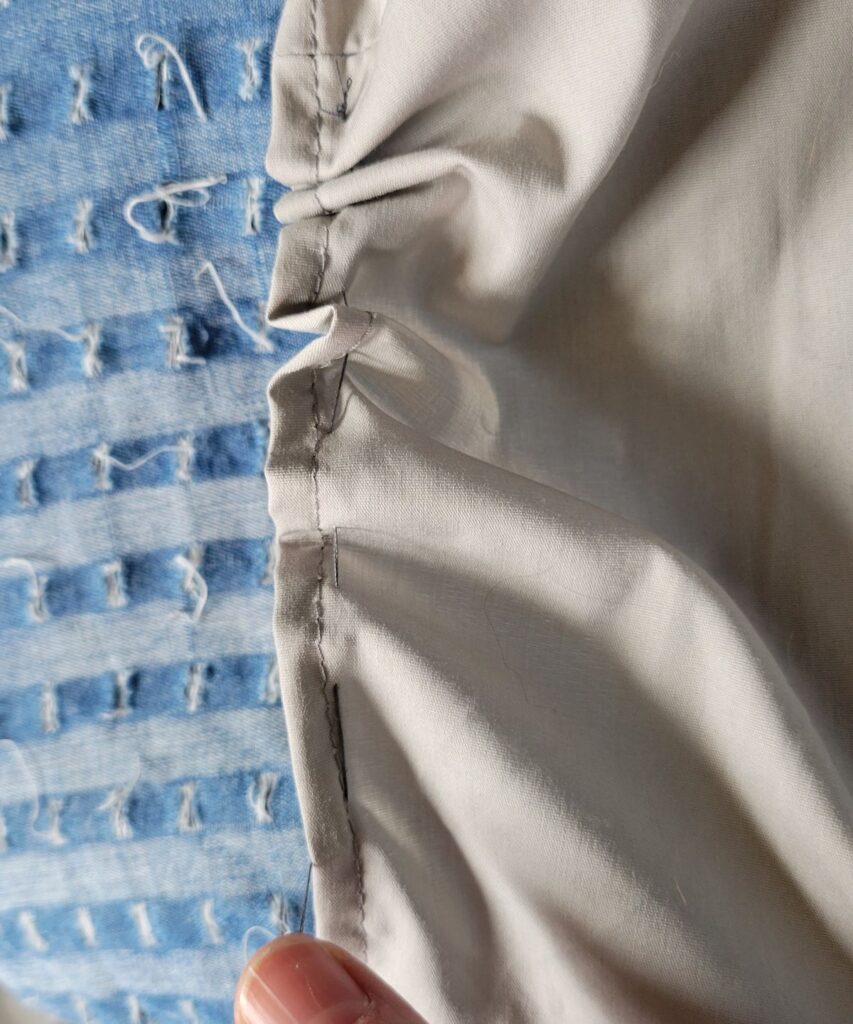
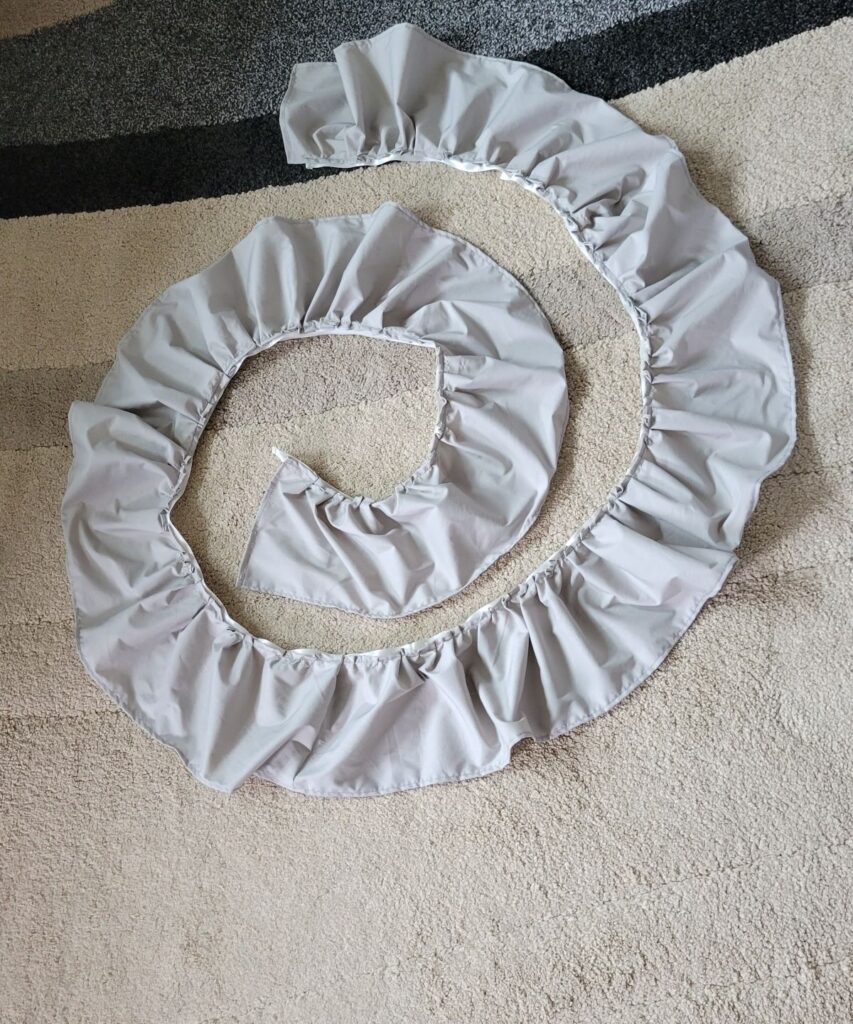
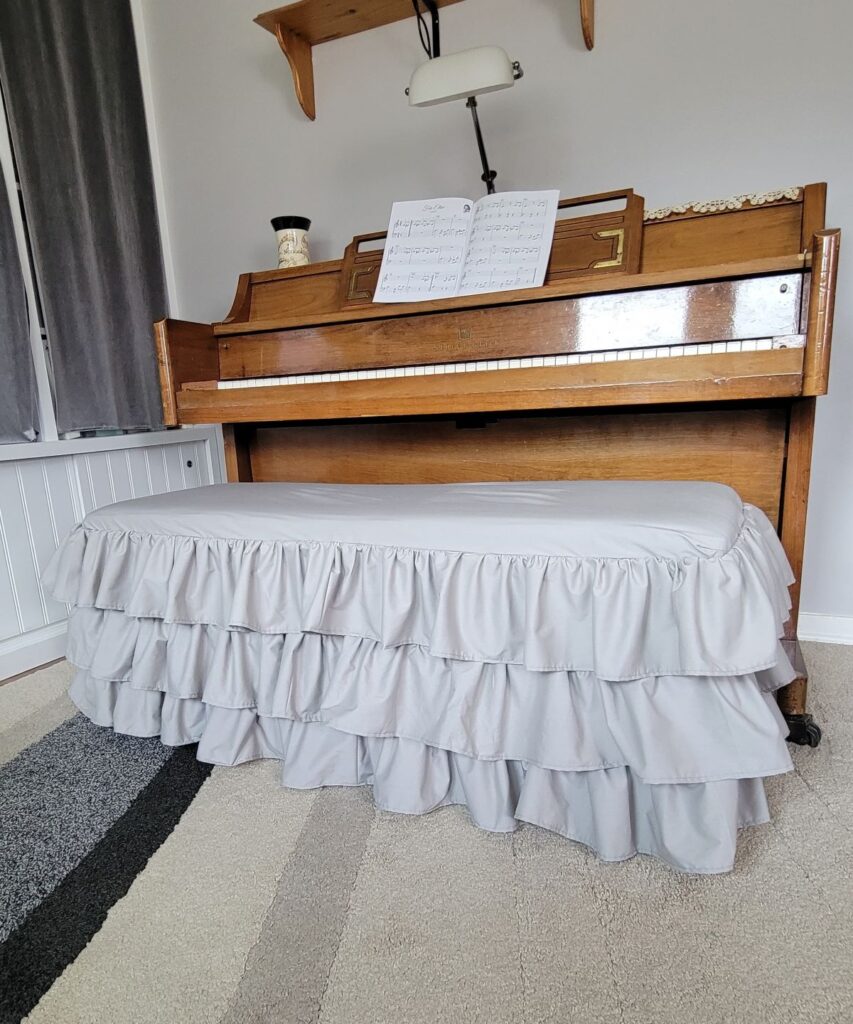
Now I’m adding TWO MORE ruffles to the rest of the cover! My ruffles are about 8 inches wide, hemmed on both sides to about 6.5 inches. They are 192 inches long, to cover a length of 96 inches. So you need about twice the length to gather for ruffles. If your machine will not sew a long stitch like mine wouldn’t, then hand baste where you want to gather it.
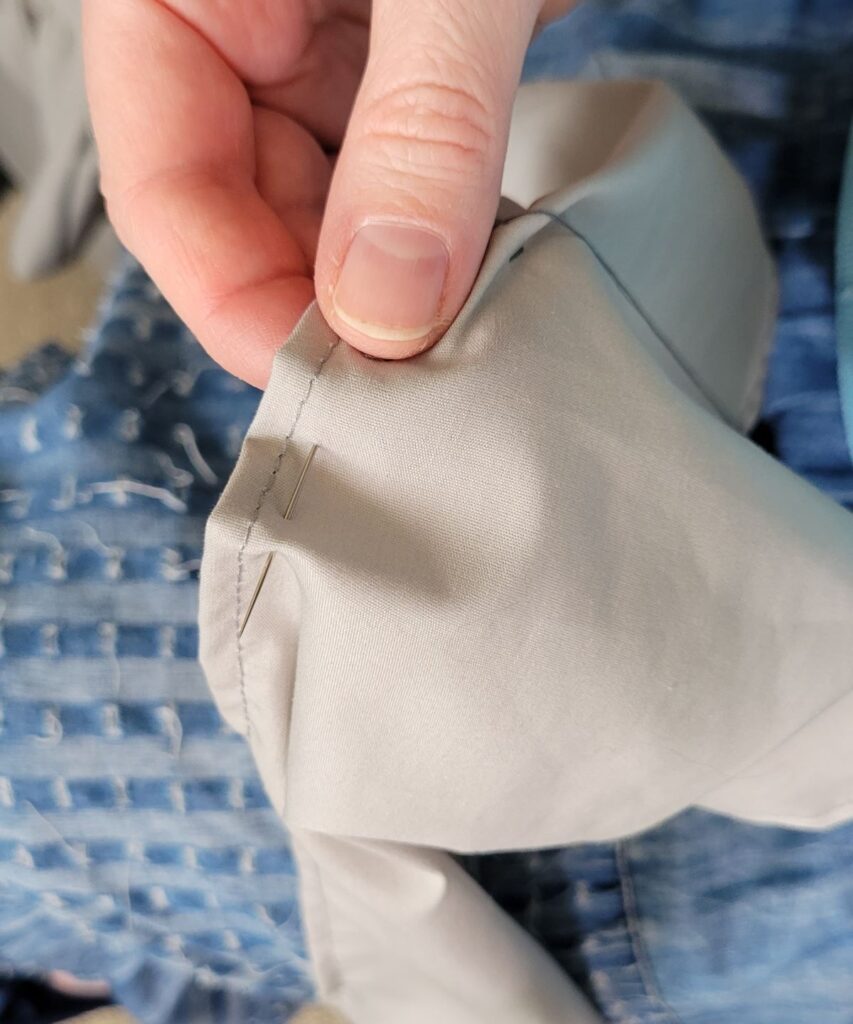
Then you can pull the fabric along the thread like a curtain. Sew long stitches. I really recommend that you check out my video to see how I did this if you have any questions!
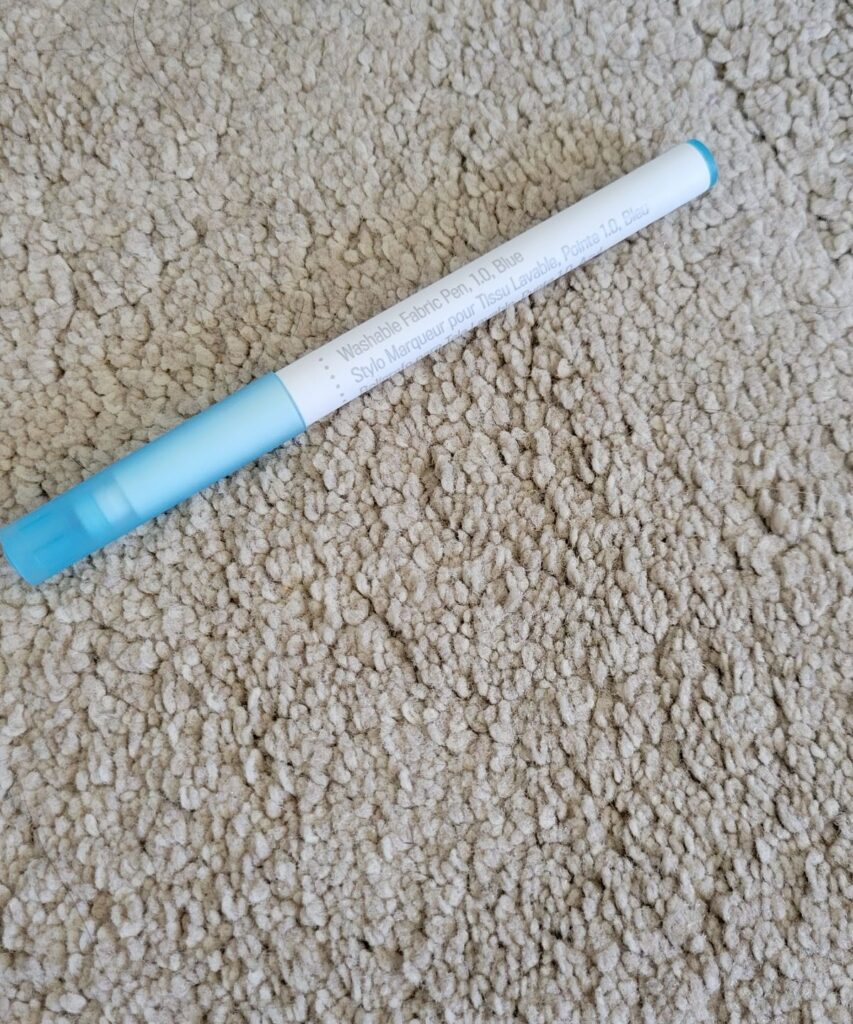
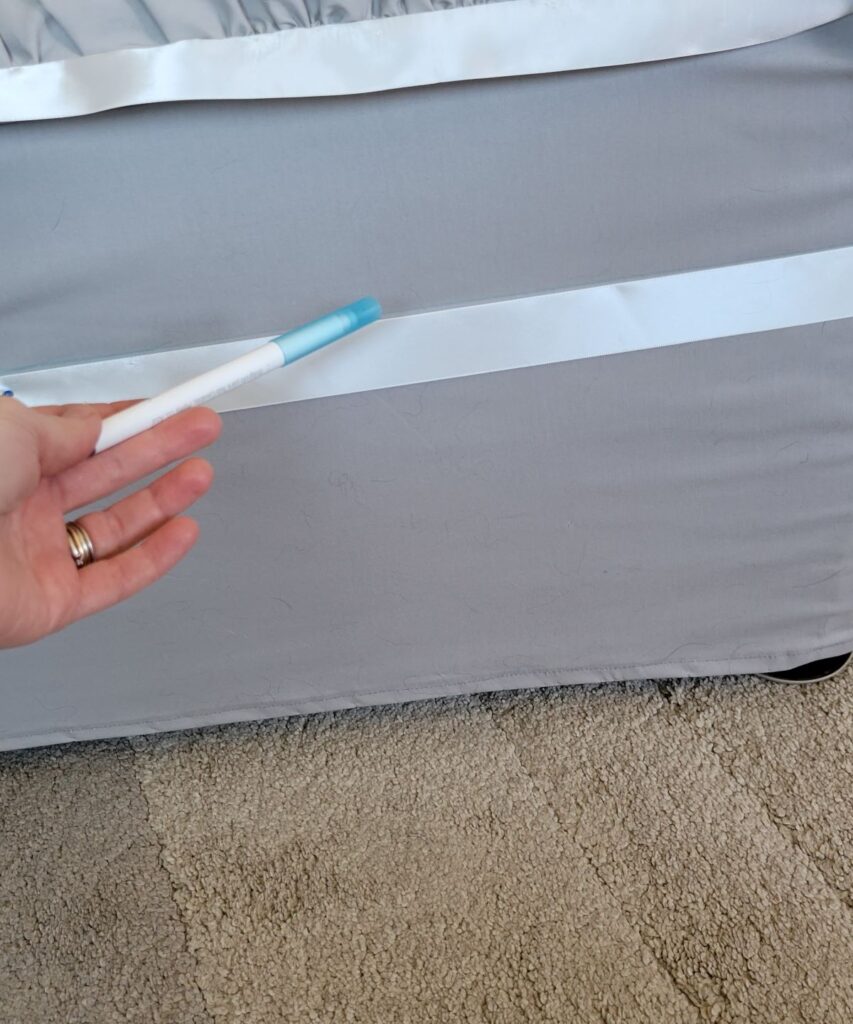
I used a washable fabric marker to mark along the fabric where I wanted to place the ruffle, using a yard stick to help make it straight.
I realized I could sew the ruffle to a ribbon, and then sew the ribbon to the bench. Here I’m marking another washable marker line.
These ruffles took sooo much longer than I anticipated! I used the ribbon to help guide where to draw the line for the next ruffle.
Then I could do the gathering separately instead of while I was trying to attach it to the bench. That idea worked but it involved the extra step
of sewing the ruffle to the ribbon.
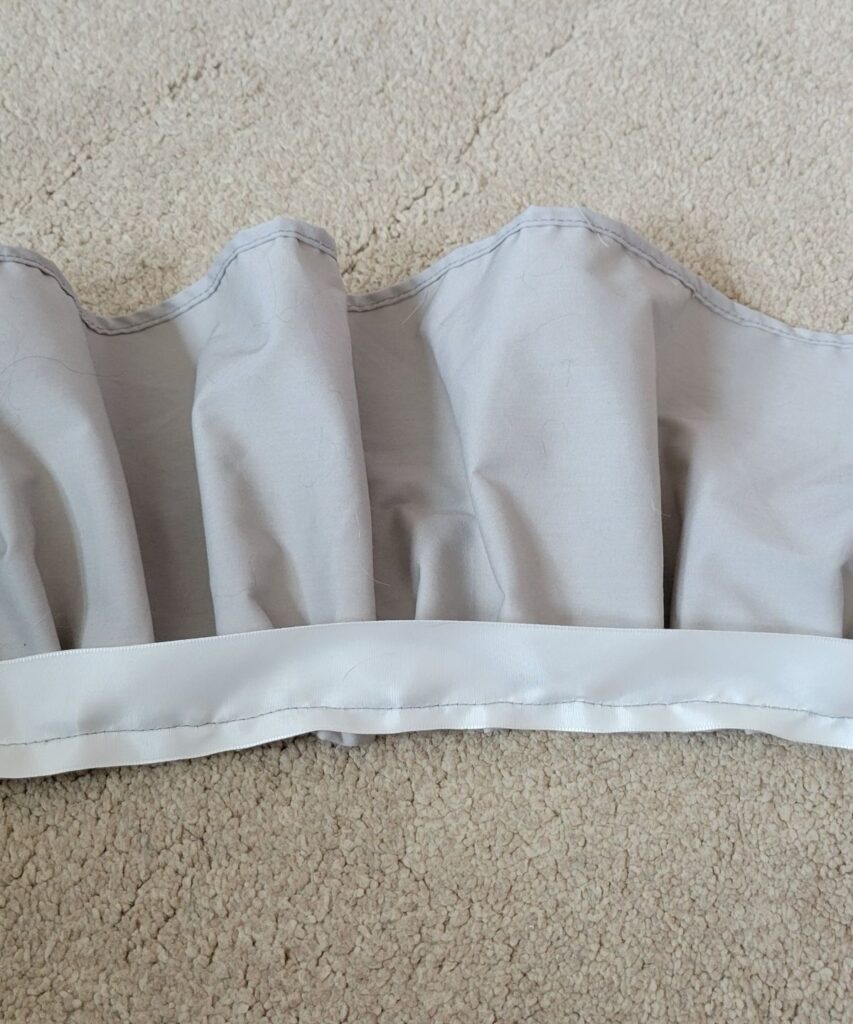
This did make it a lot easier to work with when it was time to attach the ruffle to the bench.
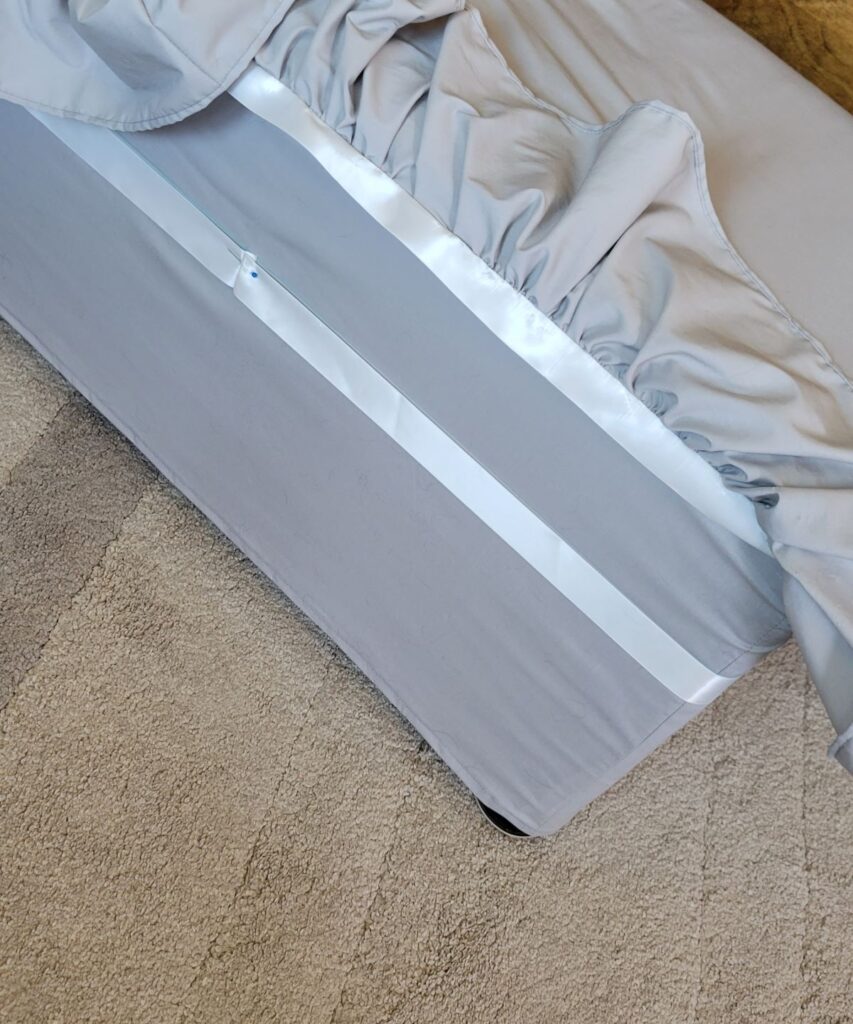
It took me several days to complete, and I even forgot what my plan was, and ended up pinning this ruffle directly to the cover at my marker line!
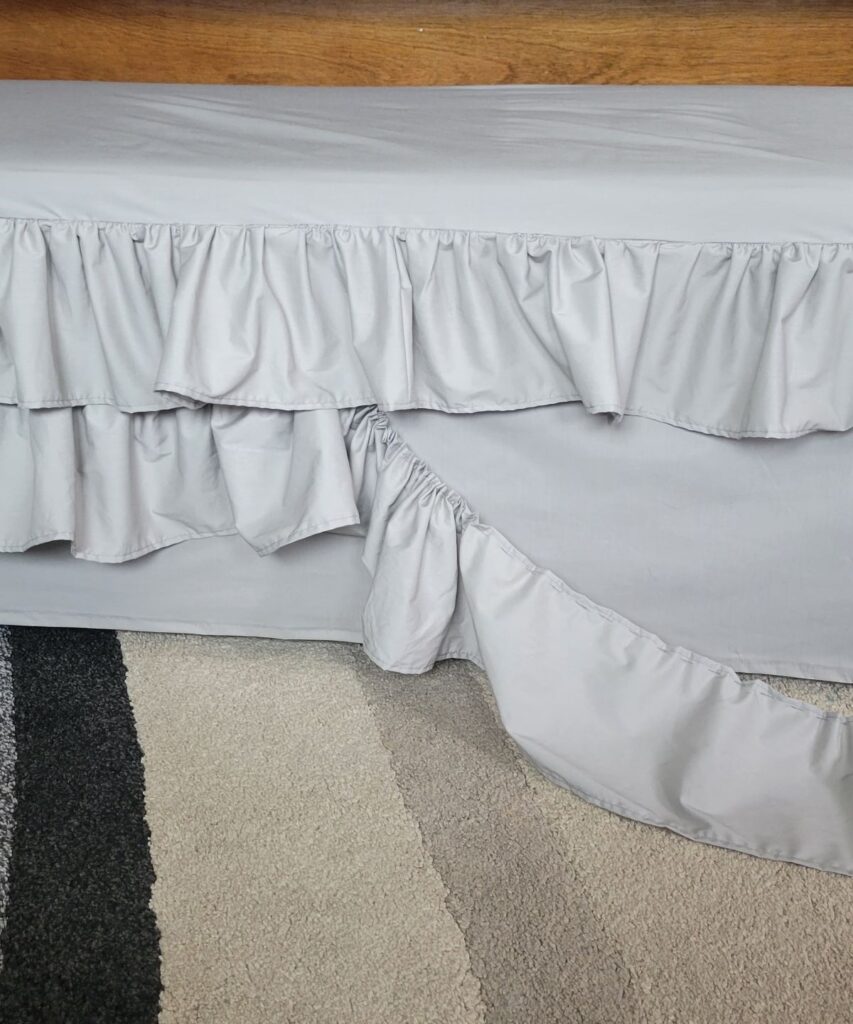
The bottom 2 ruffles are pinned!

Of course, I then took off the bottom part with the 2 pinned ruffles to sew them on with my sewing machine.
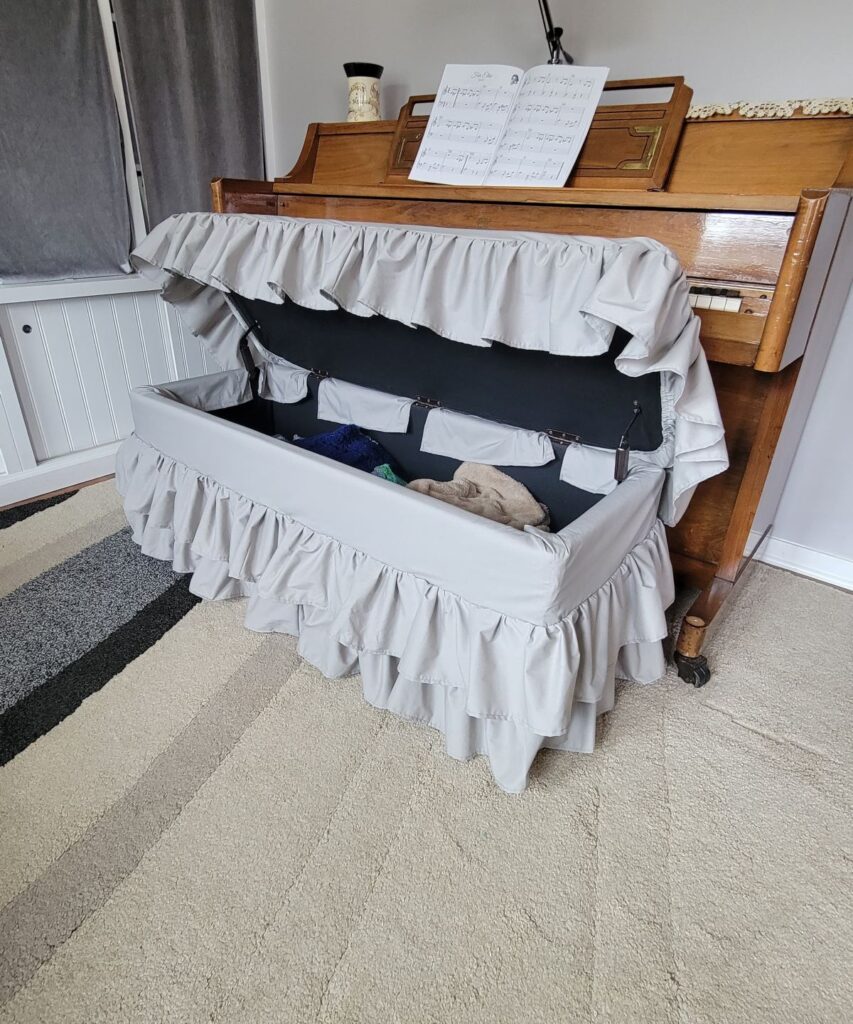
Here it is with the lid open. Even though this took longer than I anticipated, I am so happy for the end result! It makes it so much easier to access our blankets now!
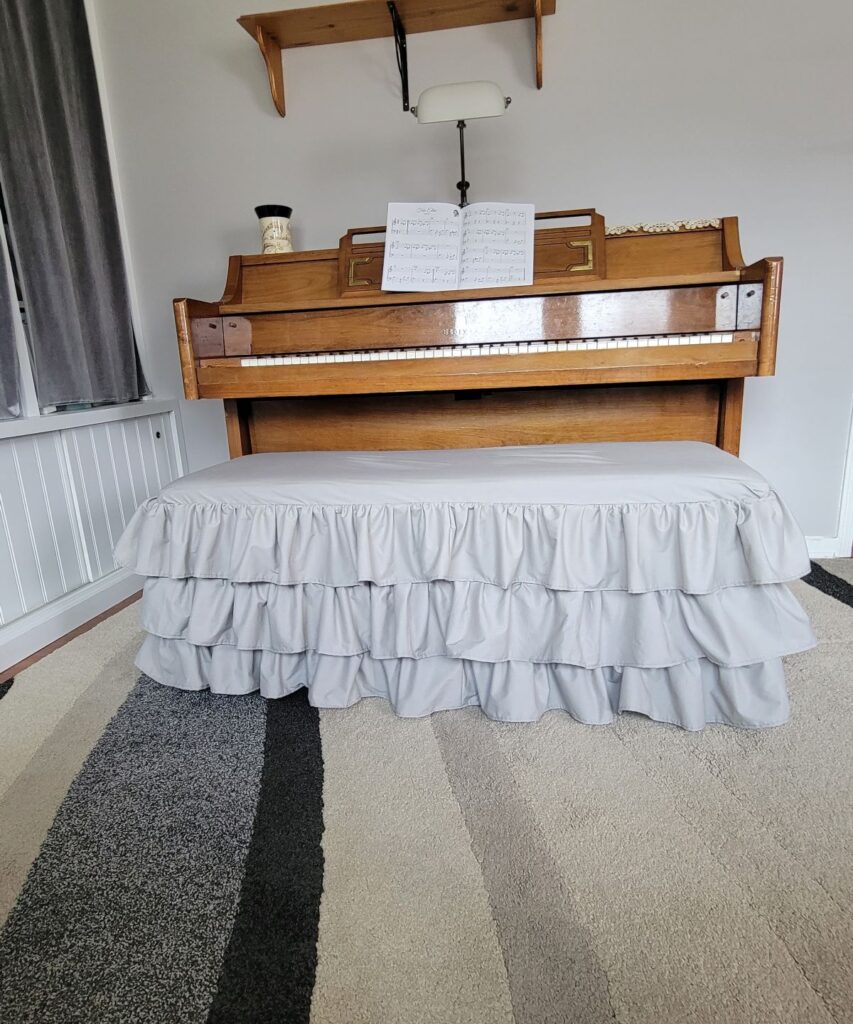
And now they are sewn! I am so glad that it turned out like the picture I had in my head!
More Details about Sewing a Ruffled Slipcover for a Bench
One of my goals when I made this ruffled slipcover, was to imitate the blankets that I lay over the bench to discourage my cat from clawing on it. That does seem to have been successful, as she has not been scratching on it.
Fabric Wholesale Direct sponsored the fabric for this project. Because of the stretch in the material, it is perfect!
While it was a lot of work, it was worth it in my opinion. My cover looks so nice!
I decided not to take the ruffles all the way around the bench. You could do that if you wanted to, of course. But I thought perhaps the ruffles would get in the pianist’s way while he/she was using the damper pedal. So it made it easier for me not to sew the ruffle all the way around. I will guess that you didn’t even realize that fact until I told you just now!
I absolutely love slipcovers because of several reasons. 1. They are washable. 2. They are optional. 3. They allow for variety– you can change to a different color or style anytime you want to. 4. They protect the furniture.
I would love to show you the slipcovers I made for my Double Recliners! And I made some lovely floral slipcovers for my kitchen chairs, too.
Ruffled Shower Curtain idea
I just found this ruffled shower curtain. If you wanted a shortcut to making a ruffled bench cover– I would get that curtain and use it to make your cover!!
And… if you liked this idea, please hover over the image below to save it to Pinterest for later!
This DIY Challenge is hosted by Terrie from Decorate and More with Tip. Didn’t Gail have an amazing knock-off idea?!
Now it is time to show you everyone else’s Knock Off Projects! I hope you enjoy them all.
Decorate and More with Tip | Sweet Southern Grace
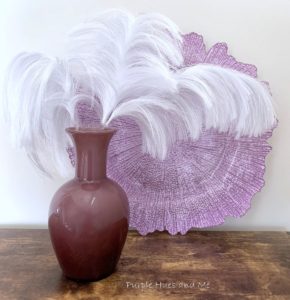
Cloches and Lavender | Purple Hues and Me
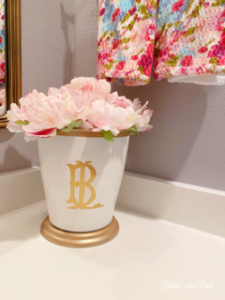
B4 and Afters | Patina and Paint


I love how it turned out! There have been so many times I have wanted to make ruffles for something. Great tutorial!
Your ruffled slipcover turned out so pretty. I love the different options you’ve shared.
Liberty, you are a great seamstress and this bench project shows it. I can’t believe the inspiration was $1000! It was definitely worth it to make your own.
Wow! That looks great. I know how labor intensive sewing ruffles can be. Awesome job!
Wow, you are so creative, Liberty! I think I like the third style bench best! I love ruffles! And I also love how you used mini-videos to show us a few of your instruction steps! What a neat idea I’d like to learn, too!
You made it look so easy. Thanks for the tutorial on how to make a ruffle, I always struggle on those.
I love your slipcover!!!! Super budget friendly and very good instructions!