
One Dollar Pine Cone Wreath
Easy and frugal wreath ideas are my favorite. Read on to see how you can create your very own (and very frugal!) Pine Cone Wreath!
This summer we went camping at Stone Mountain, Georgia. While walking through the campground and hiking, we kept seeing pine cones. When I picked one up, it poked me! These pine cones were extremely spikey! I believe they are from Ponderosa Pine Trees. Ponderosa Pines have gorgeous tree bark….
Anyway, not only were the pine cones spikey, they were beautiful! Just the right shape, in my opinion. So I began collecting them. My kids helped. It was a lot of fun. Maybe I will start collecting pine cones everywhere I go! One of the wonderful things about camping in a travel trailer is that there is a lot of space to stash things like pine cones to bring home– (as long as the things are not very heavy….).
So that is how I came to own a big bag of gorgeous Ponderosa pine cones– just enough to make this wreath!
Pine Cone Wreath Supplies

If you don’t have any pine cones where you live, and are not able to hike to any nearby places, then ask around. Some friends are likely to know where there are some pine cones lying around just waiting for someone to make them into a wreath! If your pine cones are a different shape than mine, that’s okay! Your wreath will be unique and beautiful.
While I have decorated my cone shaped miniature pine cone tree many times, I’ve never created a pine cone wreath before now. I’m sure there are various ways to make one. I’m not an expert— this is just an account of how I made this one.
I started with a wreath frame from the Dollar Tree. Yes, that is where I spent my One Dollar!! The rest of this wreath did not cost me a thing! I tied a piece of brown yarn to it.
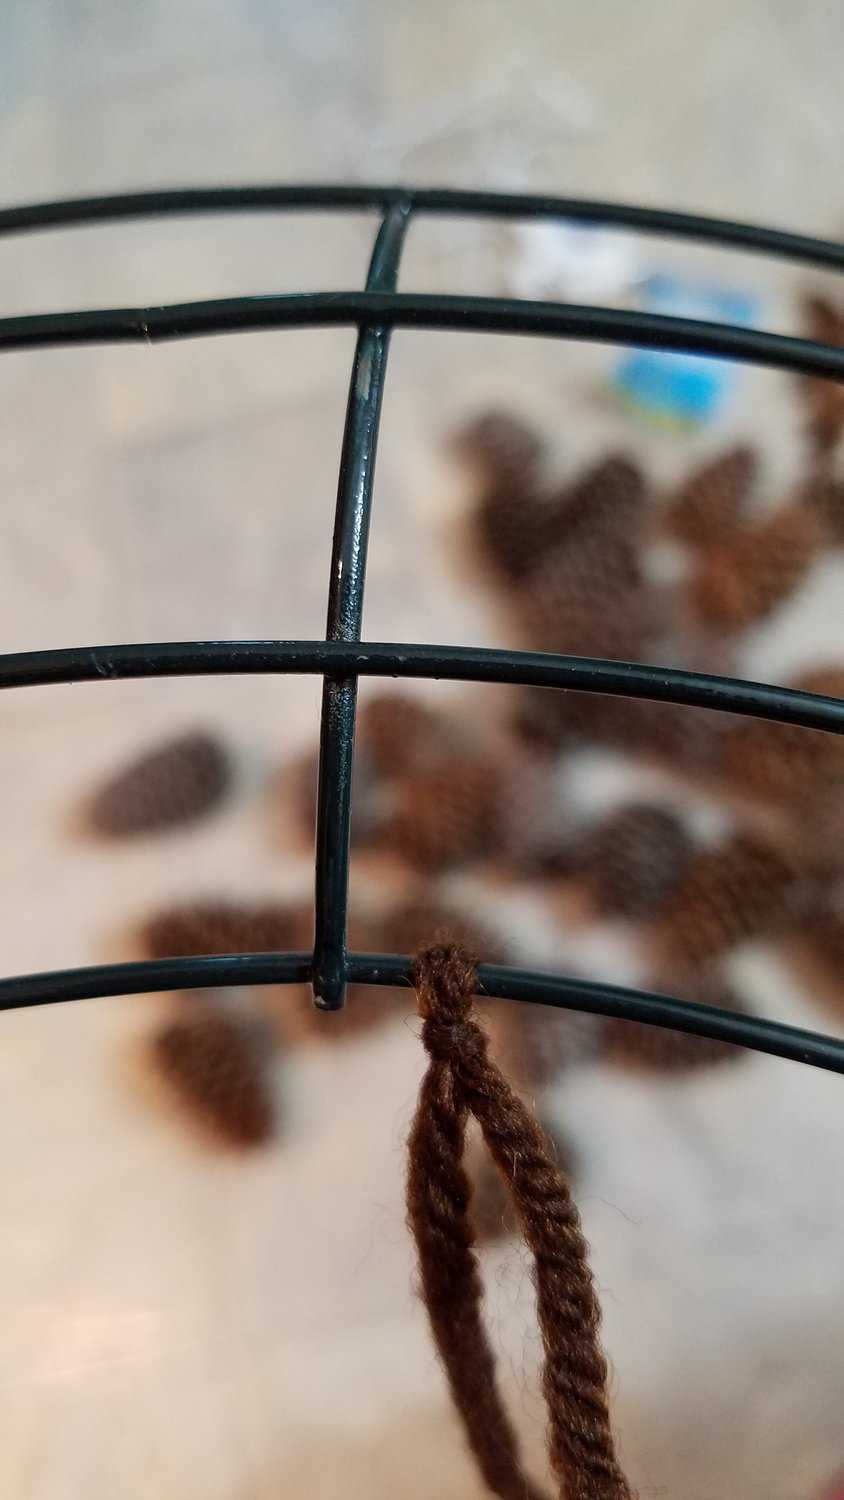
Then I began wrapping the wreath frame with the yarn– winding it around and around the frame.
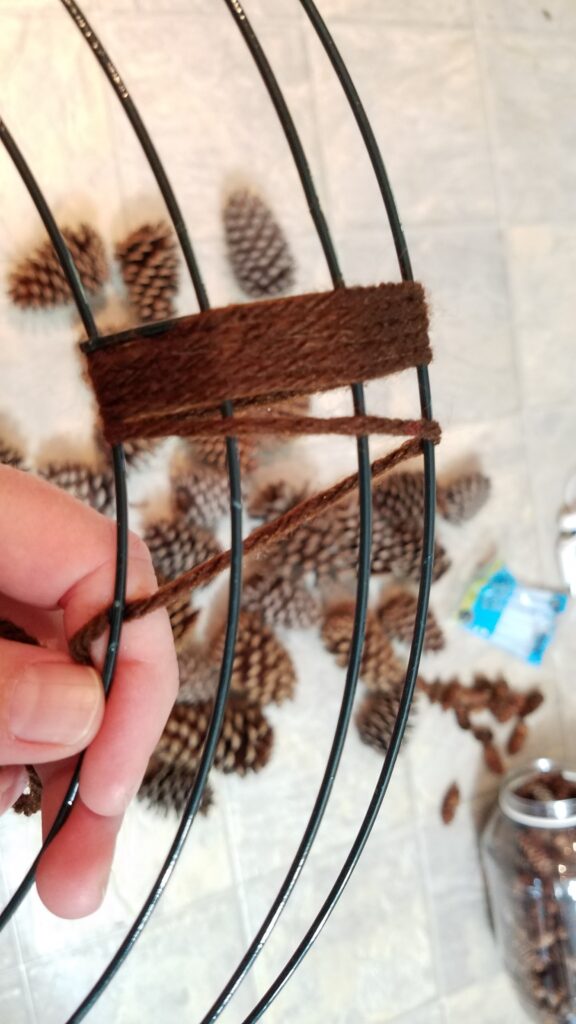
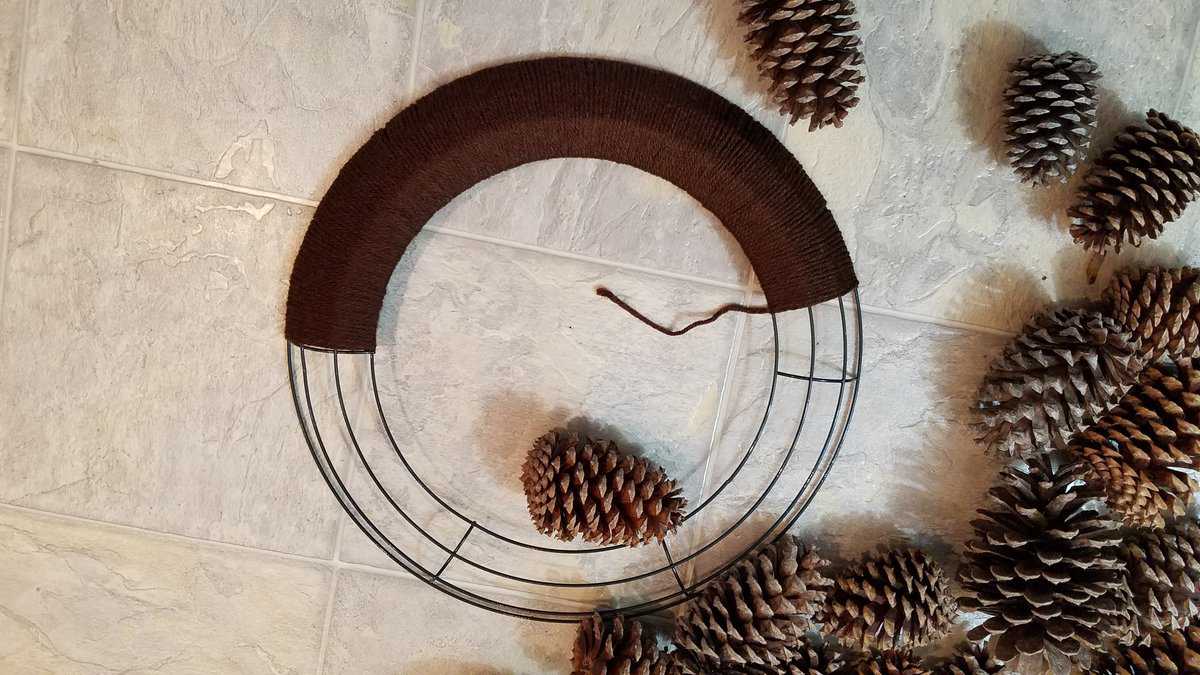
I used up my small ball of brown yarn and had only wrapped half of the wire frame. If I had had enough yarn I would have wrapped the entire wreath frame with it.
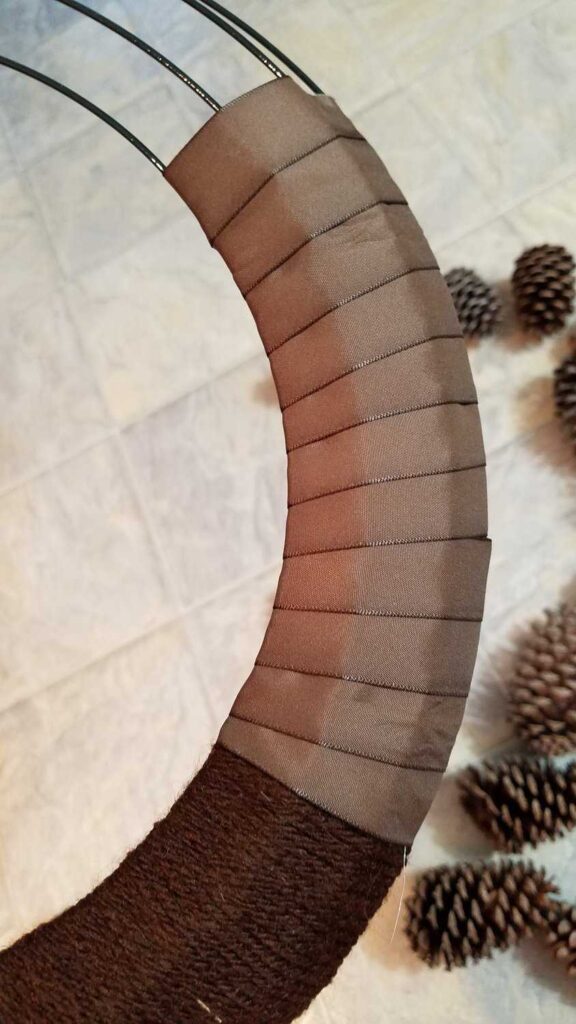
So I looked for something else to wrap around my wreath frame, and found some brown ribbon I had saved from some Godiva Chocolate. I hot glued it to the frame, wrapped it around, and then hot glued the other end to make it stay.
Since I did not want to spend any more money to buy more brown yarn, I decided to just use black yarn instead. I figured it wouldn’t show very well through the pine cones and that no one would ever know (except you, of course!) Using black yarn to finish worked just fine. I could have used black yarn instead of the brown ribbon, but I wanted to test out the ribbon to see if it would work. It did work just fine. Really, I could have used strips of fabric instead of ribbon.
Things you can use to wrap a wreath frame
If you need something to wrap around your wire frame, now you know that yarn, ribbon, or fabric will work just fine. In fact, one of the ways to find cheap fabric is to use discarded bed sheets (or ones passed on to you from someone else). I hate to see anything thrown away that can be used or upcycled. So cutting sheets into fabric to wrap around this wire wreath would work great!
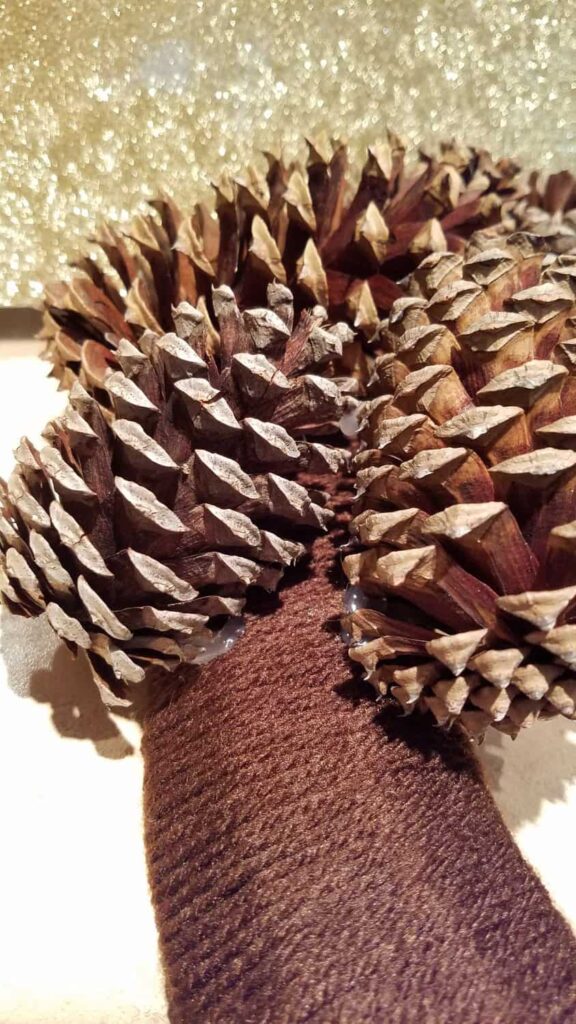
Why am I wrapping the wire wreath frame? Well, I figured it would be easier to glue the pine cones to it that way. As a bonus, the yarn also keeps the wire frame from scratching my door.
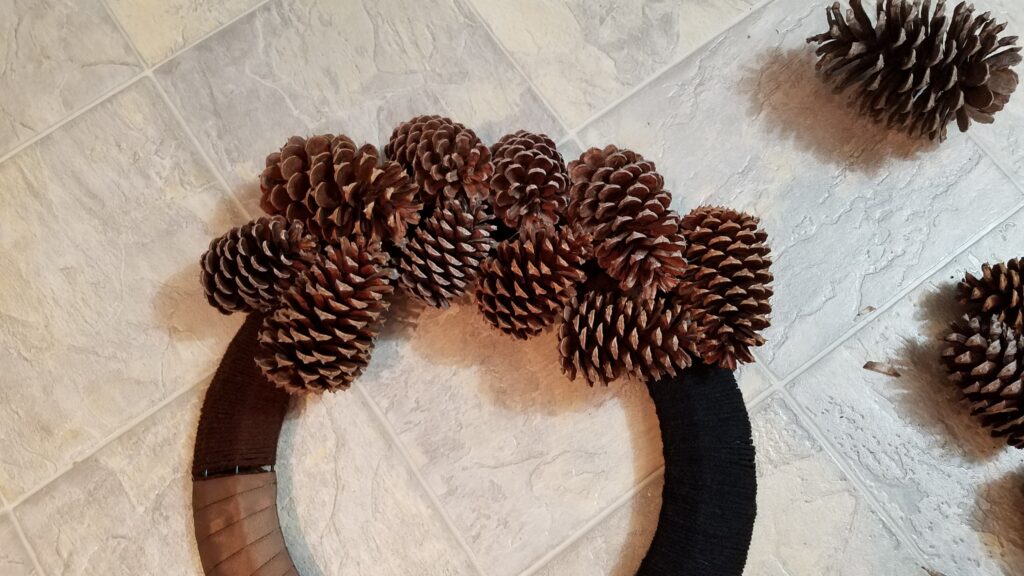
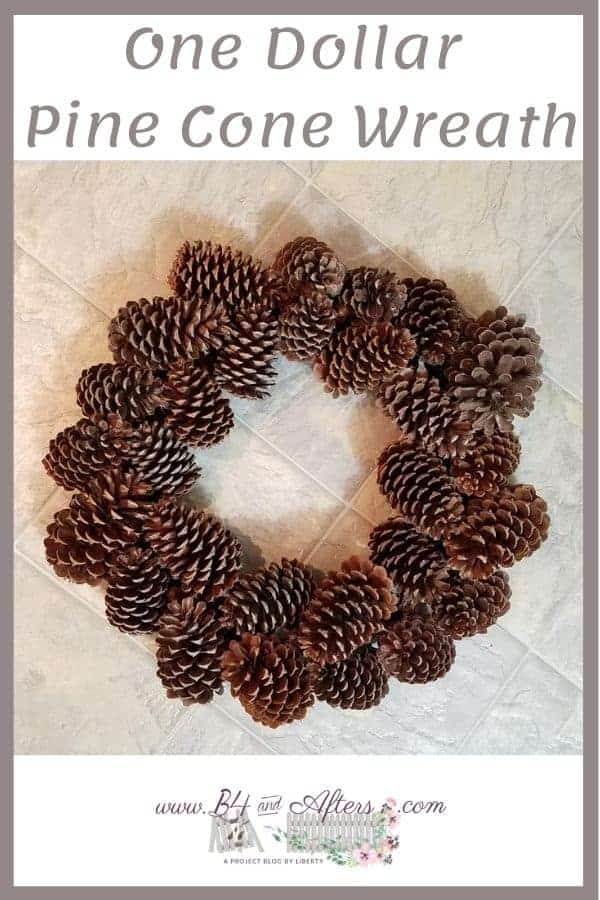
A lot of pine cone wreaths that I’ve seen have 3 rows of pine cones. I decided to arrange my pine cones into just two rows. I angled my pine cones in a V shape as I glued them down. First, I put a little glue on the pine cone to glue it to the yarn or ribbon, and then I glued the pine cones to each other in about two other places for each cone, letting the glue dry all at once.
Here is the Pine Cone Wreath partially finished.
And this is the back, in case you wanted to see how it looks.
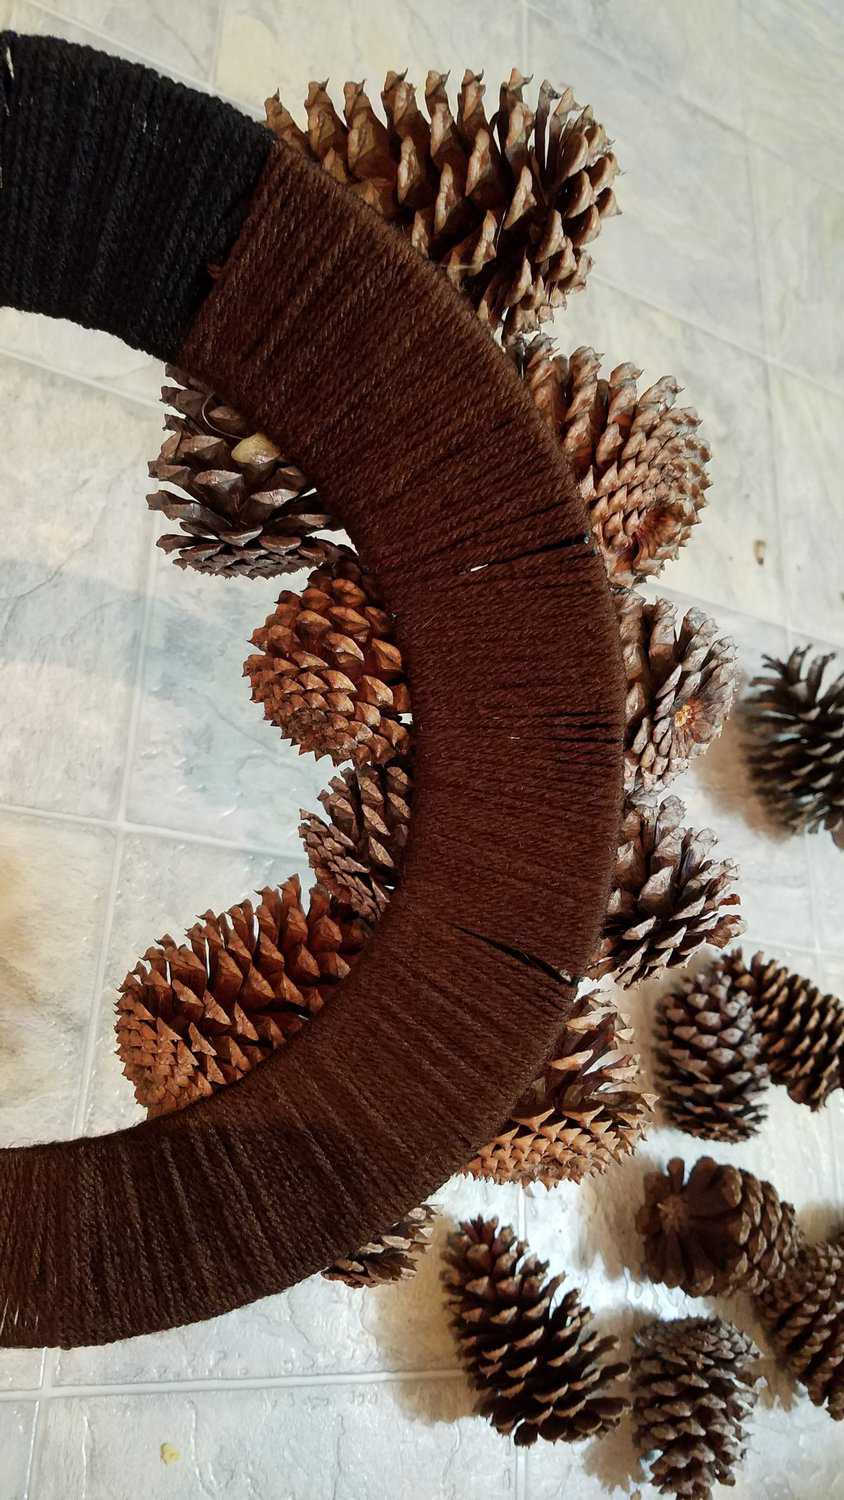
My pine cones did vary a little in size, so I tried to balance out my wreath by not putting all of the small ones on the same side and spreading them out. You can see that I have one large pine cone…. I decided to use it anyway.
Also, I used about 5 or 6 of my miniature pine cones (In the first picture, above), to fill in a couple of gaps between the rest of the pine cones in my wreath. They are poked down underneath and between the other pinecones, so that there aren’t any large spots of yarn or ribbon showing through.
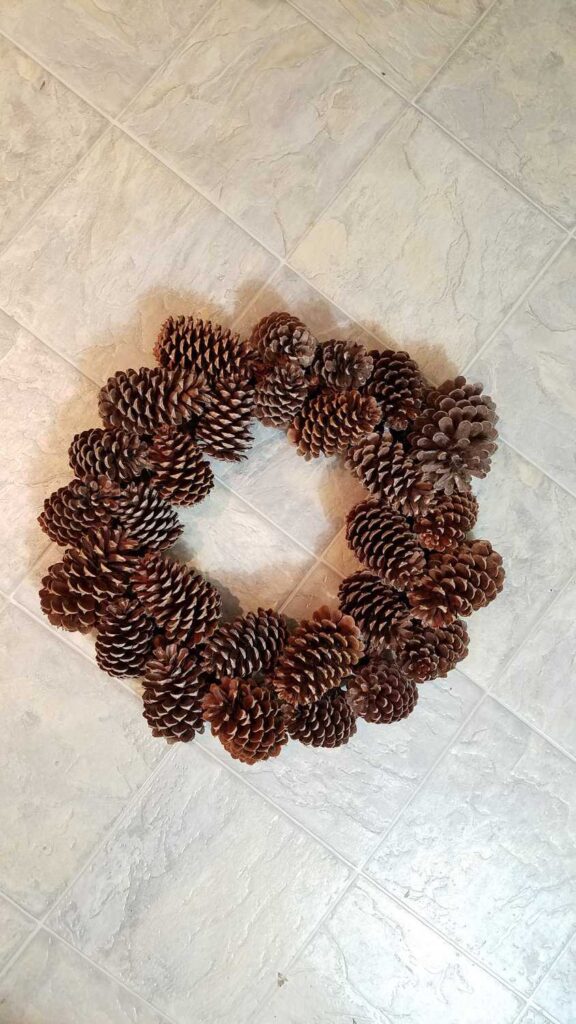
And there it is! My Pine Cone Wreath is all finished. If you know me, you know that I will not leave it plain.
**A word of caution– if you use hot glue to secure the pine cones– don’t hang this wreath in a place where the sun will melt the hot glue. Hang it in a shady place. If you want to hang your wreath in a sunny place, then I recommend that you use brown yarn or string to tie the pine cones directly to the metal wreath frame.
Easy Pine Cone Wreath
Whether you are wanting a Fall Pine Cone Wreath, or a Christmas Pine Cone Wreath, this simple wreath base will work. Simply decorate the wreath how you like.


Love it! I baked my pine cones and then white washed some. With 2 parts white pant to 1 part water. Looks like bleached cones but without the use of smelly bleach. Also added a few dipped panted cones that we’re antique green, blue and red. Just not flashy. I was sooo anxious but your step by step guide was the fix I needed.
I’d love to see a picture! You could email me one at [email protected].
Love it Liberty, I love using natural elements for seasonal decorations especially in fall and winter.
I just losted an acorn wreath a few days ago.
Great tutorial too!
Cindy
I will check yours out! Thanks for stopping by, Cindy!