
Painting a Runner on the Basement Stairs
*This post was featured at An Artful Mom’s Thursday Favorite Things and at Wall to Wall Wednesday.
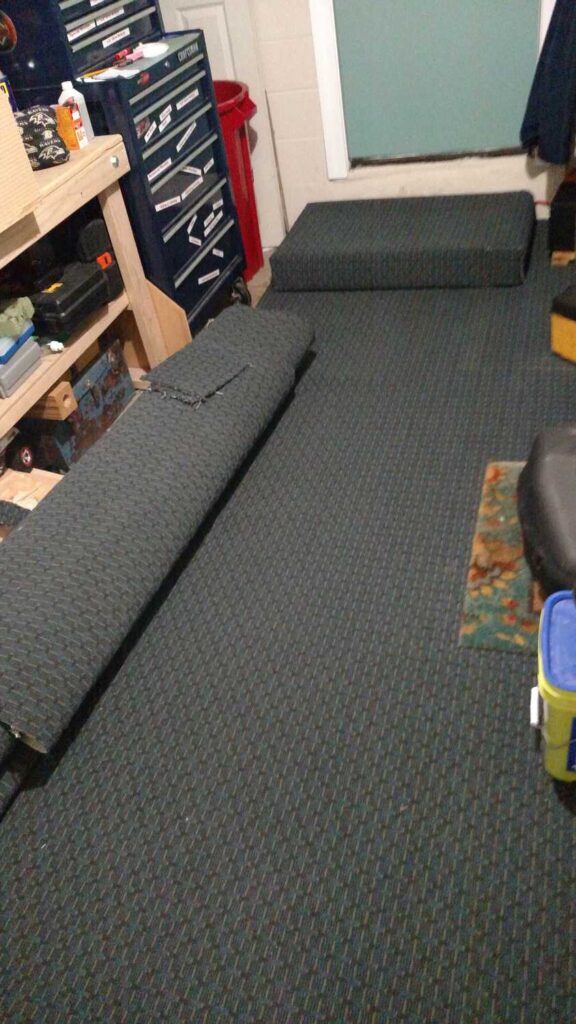
Today I am excited to tell you all about how I painted a runner on my basement stairs. You can see in this Before picture, how there used to be carpet pads going down the middle of the stairway. When we bought the house, I took out those pads because they were full of dog hair. Yuck! I lived with these awful stairs for a couple of years. Other projects needed finished first, such as painting the stairwell a light blue. Finally, the day came!
Before

(*This post may contain affiliate links. By purchasing anything from these links, I may receive a small commission at no cost to you. More information is available on my Disclosure page.)
Here is another before picture, from the bottom looking up the stairs.

I had a picture of how I wanted my stairs to turn out. I had found it from this Pinterest pin. There is a tutorial there, as well.
After cleaning the stairs (Yes, they were clean in the above pictures!), I painted two coats of primer.

They are looking much better already!

Here is the first coat of primer.

I used a lego to space how far away the stripe/painter’s tape should be from the side.

Then I put yellow Frog Tape on each side of the blue tape. The blue tape was actually just a marker for the stripe that would be painted between the two rows of yellow tape.

Then I pulled off the blue tape– and the primer came up, too. I guess you’re not supposed to tape primer? I hoped that the yellow tape, which is for delicate surfaces, would not pull up the primer, also!

I spent a ton of time taping the stairs!

Before painting my runner, I sealed the edges of the tape with more primer paint– the same color that was under the yellow tape. I had read that this would keep my darker accent color from bleeding through– giving me clean, straight edges.

Then, I used Driftwood Gray General Finishes milk paint leftover from painting my kitchen cabinets, for my runner color. In order for it to look like a runner, there is also a stripe on each side. That is why there was sooo much taping!

Here are the stairs from the top.

Then came the most exciting part– taking off the yellow tape! I started at the bottom. I was concerned whether my primer would come up with the yellow tape. I was also eager to see whether painting over the yellow tape had sealed the edges to make that crisp, clear line, with no bleeding of the gray.

So far, so good! And YES! I was thrilled with how crips and clean my lines were. I was so thankful to have read that tip just in time.

But alas! Other parts of the stripe peeled off, and it was Really bad near the top of the stairs! Here they are looking down…

To fix the peeling paint, I just free handed the lighter color over again with a foam craft brush. It is a lot easier to “stay in the lines” that way. I wasn’t going to risk tape pulling up the dark gray, to paint the lighter stripe!
To seal the primer, and the gray, I used a flat/matte clear made-for-floors polyurethane. I think it required three coats! Yes, it did yellow a little along the edges and corners where there was more of it, but you don’t notice it unless your face is close enough to be cleaning the stairs…
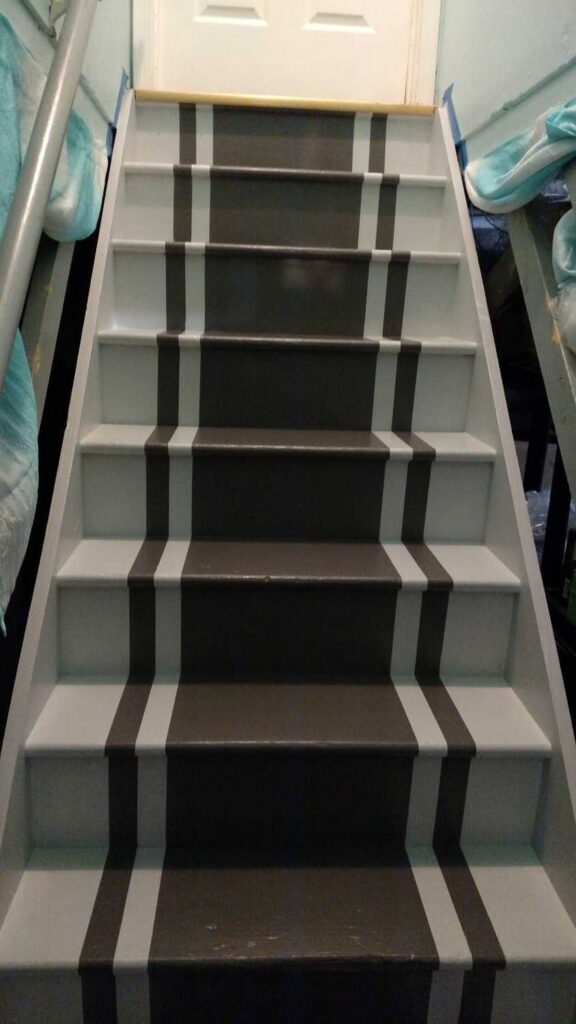
After!!

I put picture ledges from Ikea along the side to hold some pictures and things. The hand rail would eventually come down when we put a bathroom wall there where the curtain is. (There are plans to put a nicer railing on the opposite side.)

Here’s the Before picture once more:
And After, again! Doesn’t it look so much better?! Once again, it was another project completed all by myself. : )

I was not finished with my plan for the stairs, though. To see what more I did, click here!


This makeover looks amazing! Thanks for sharing at To Grandma’s House We Go DIY, Crafts, Recipes and More Wednesday Link Party. I pinned this! Hope to have you join again next week!
Wow, this is an amazing transformation! I love how they turned out! I’ve featured this post today at Thursday Favorite Things. Thanks for sharing!
Thank you, Pam! I saw it on TFT before I saw your message here : ). Thank you so much for featuring my stairs!
Wow…Love your basement stairs now! Thanks so much for the idea! I love the colors you chose as well. Saw your post at the beautifully made link party!
Thank you, Kathleen!
Hi Liberty,
I first clicked on your post (from Dwellings) because I posted about my stairs this week too and thought I’d see what you did to yours. But WOW! You’ve really outdone me; your painted runner is beautiful and I really admire you for hanging in and finishing it with all the hassles you had (paint pulling off) along the way. You really did a remarkable job and I can’t wait to see what you’ve got up your sleeve to do with them next!
Cheryl
Why thank you, Cheryl! I hope you’ll say double Wow when you see Part Two : ).
What an improvement! Your steps look great!
Thank you, Paula!